
Administration is where you decide who can do what, and where. NEQTO.ai separates the data side of the platform (devices, dashboards, alerts) from the people side, and the people side has three moving parts: Accounts (your organization), Applications (workspaces inside that organization), and Users who are granted Roles at one or both of those levels. Get these right and everyone sees exactly the screens and actions they should, and nothing they should not.

The Account Model
Everything you own lives under one Account (your organization). Applications are workspaces inside it, and each carries its own membership and its own permission set.
Accounts and sub-accounts
An Account is the top of the tree. The platform also has a sub-account concept (a child organization linked to a parent, shown under “Account Management”), with its own users and devices. Sub-accounts have a full permission set (view, create, edit, delete) and the plan you are on caps how many you may create.
Applications
An Application is a scoped workspace. Endpoints, devices, dashboards, alerts, and members all belong to an application. A user added to an application gets a per-application role that decides what they can do in that workspace only, independent of any account-wide role.
- Default application: one application in the account is flagged as the default. Screens that are not opened from inside a specific application (for example Alert History) fall back to scoping their data to this default application.
-
The master override: a user who holds the account permission
account:manage:applicationsis treated as having full access to every application, short-circuiting all per-application checks. Grant it carefully.
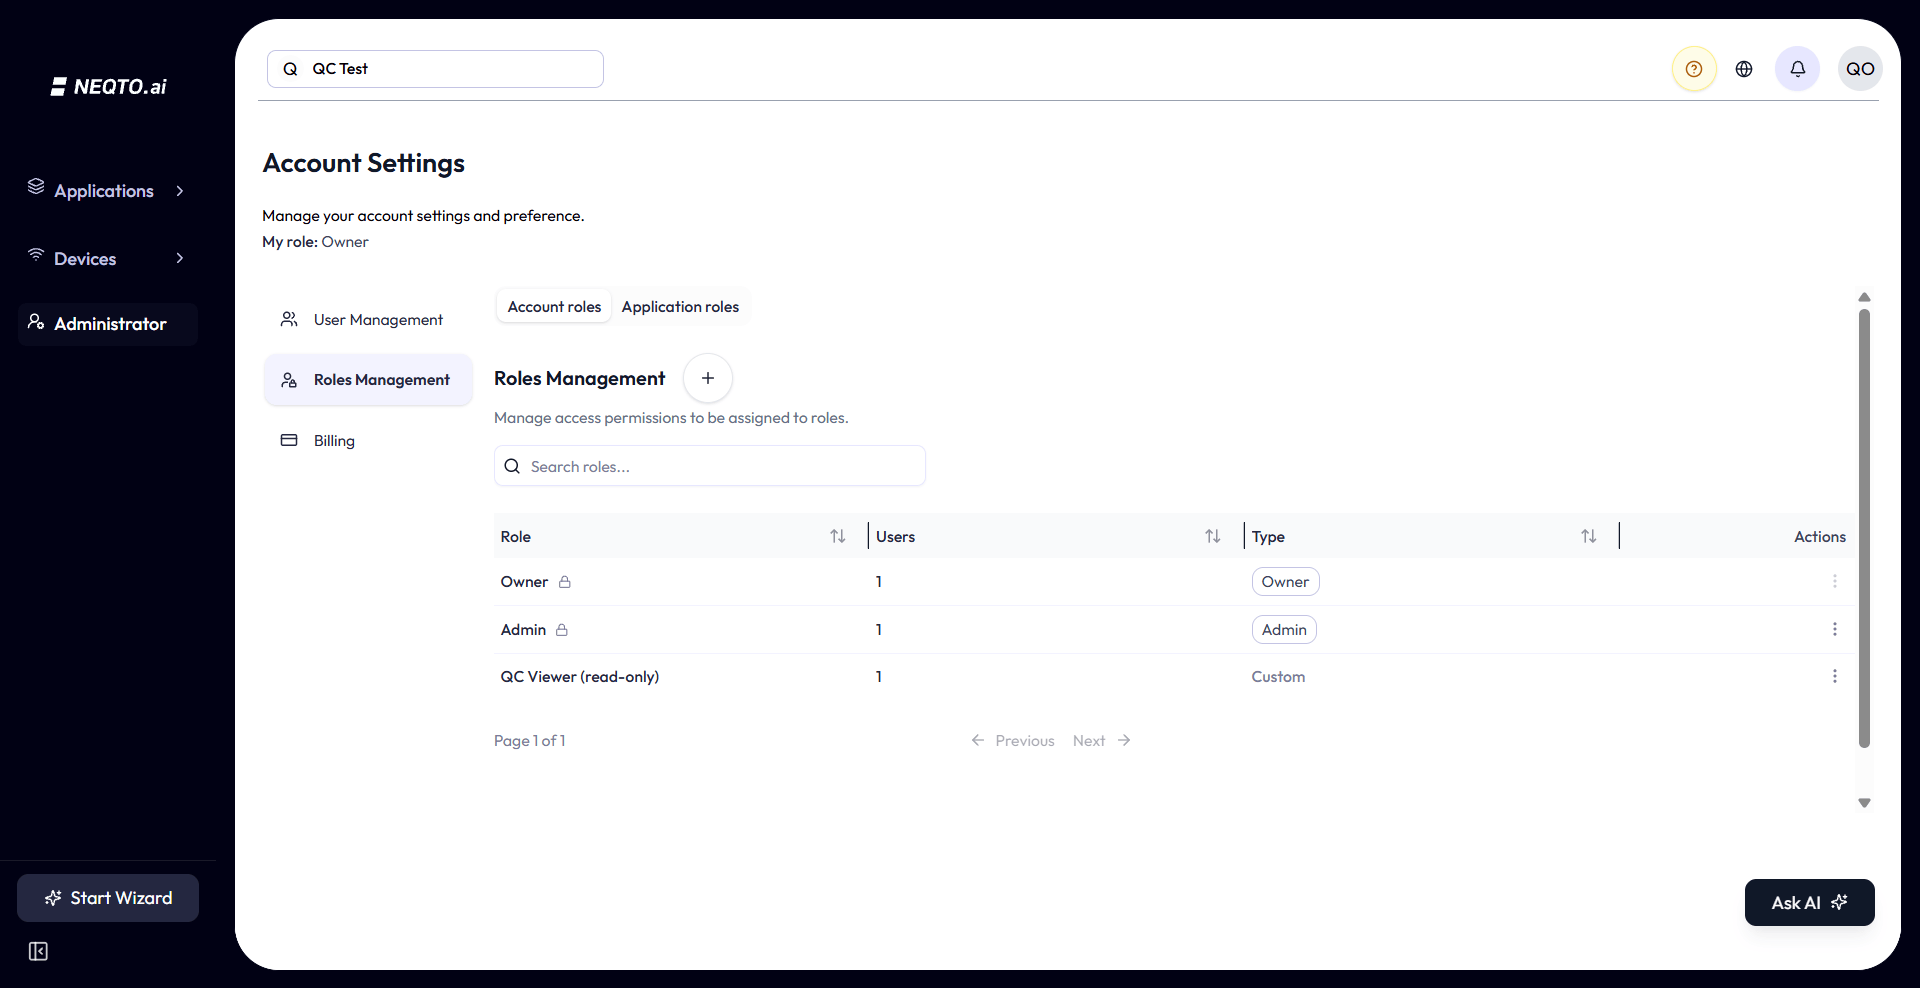
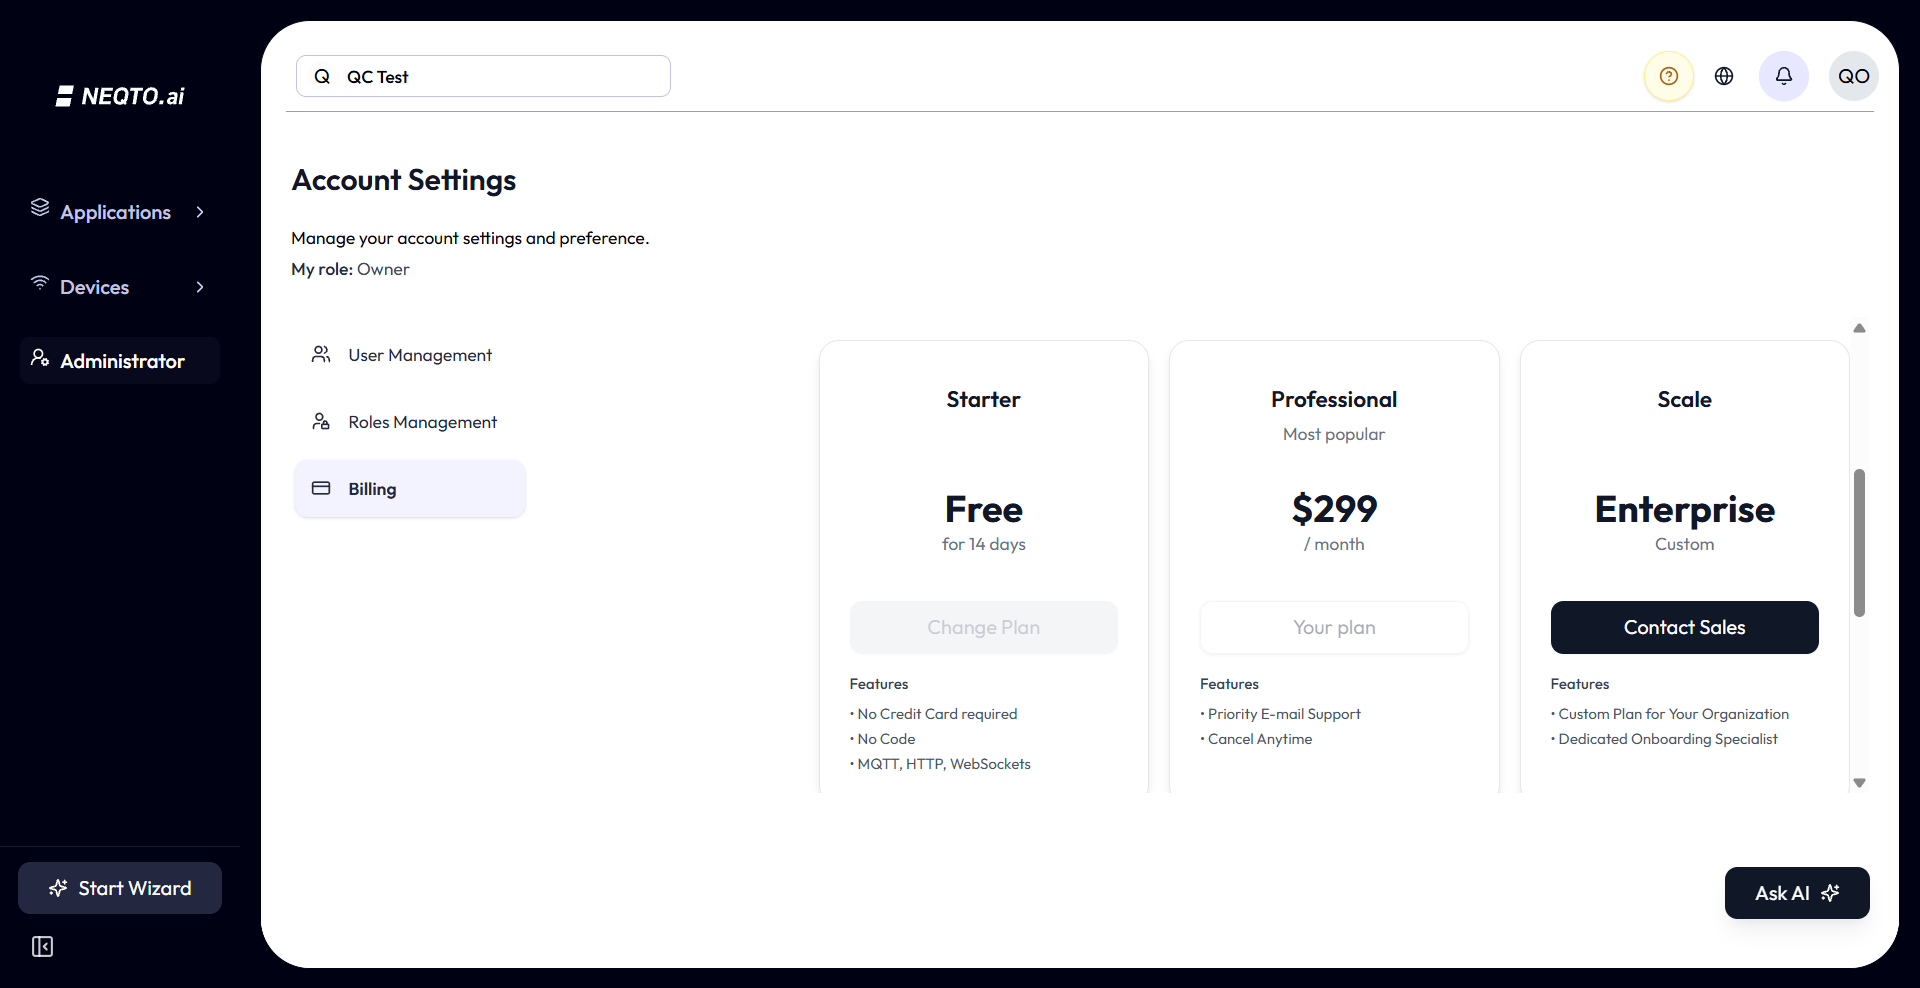
Account Settings
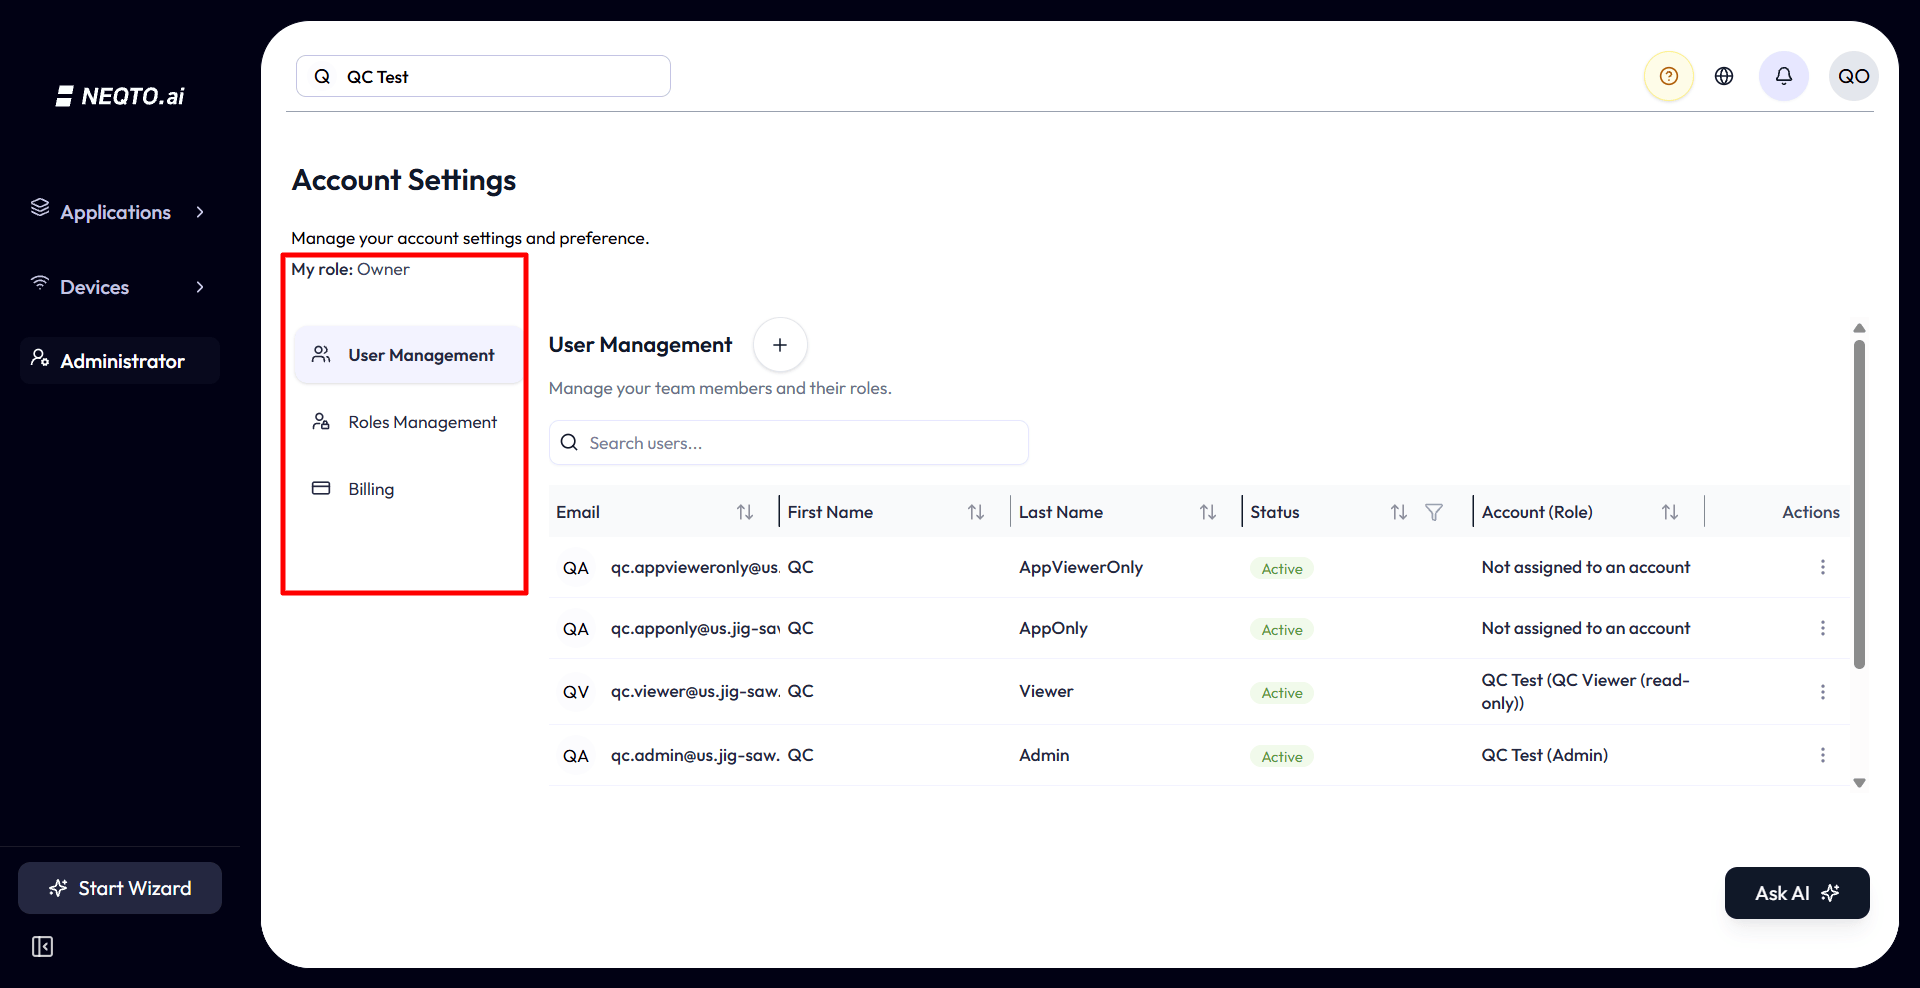
Open Administrator from the main sidebar to reach Account Settings. The page shows your own role at the top (“My role”), then up to four tabs. You only see a tab if your role grants the matching view permission.
| Tab | What it does | Permission to see it |
|---|---|---|
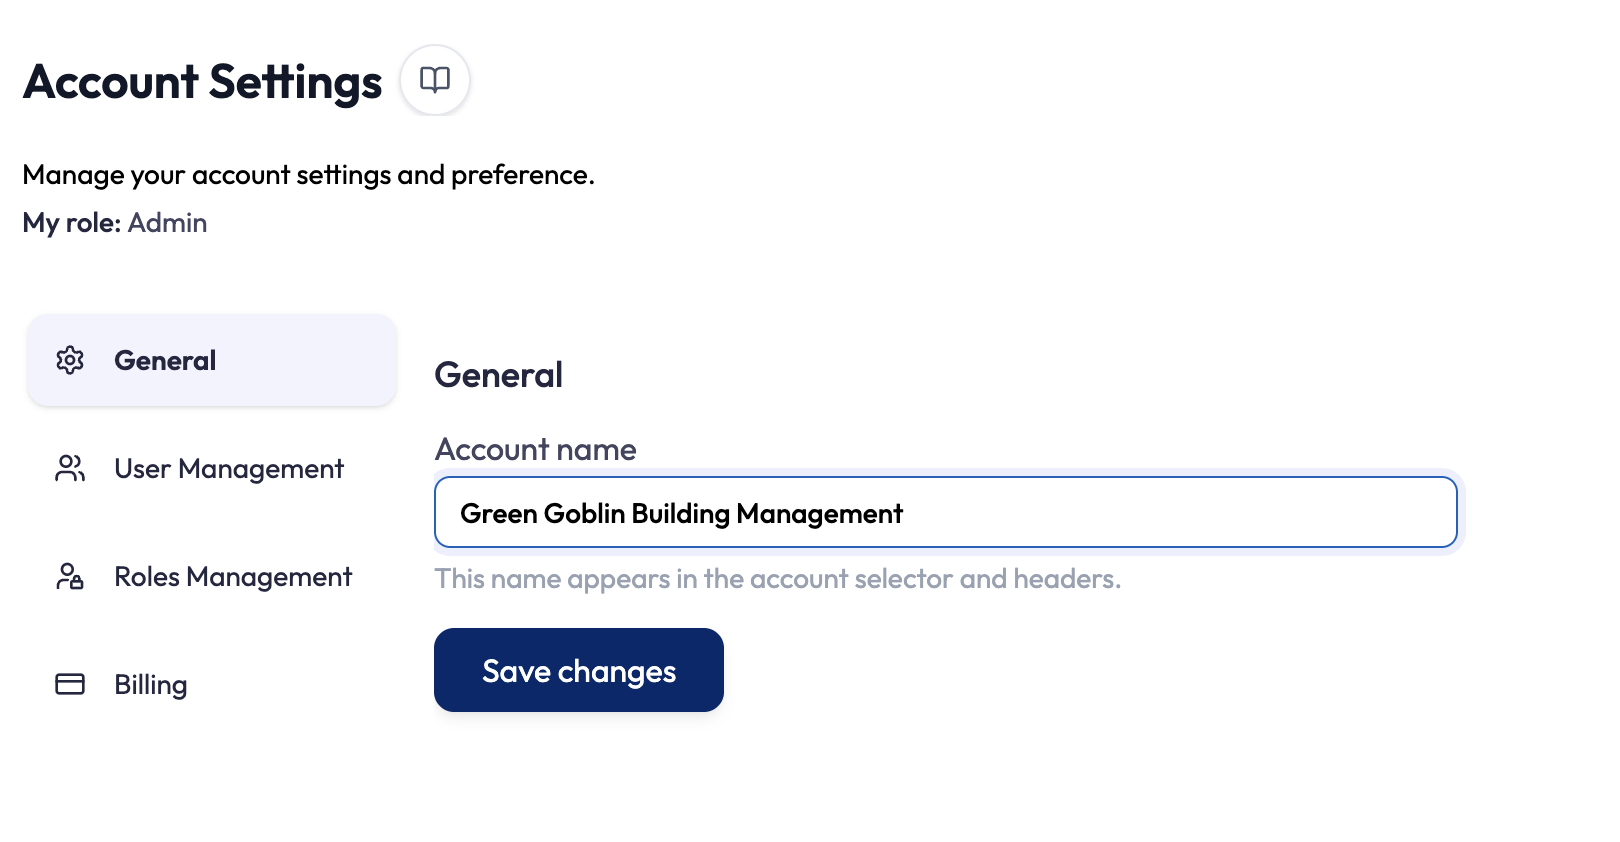
| General | View and edit the account’s name. | account:read:settings or account:update:settings |
| User Management | Invite, edit, and delete users in the organization. | account:read:users |
| Roles Management | View roles; create, edit, duplicate, or delete custom roles. | account:read:roles or account:update:roles |
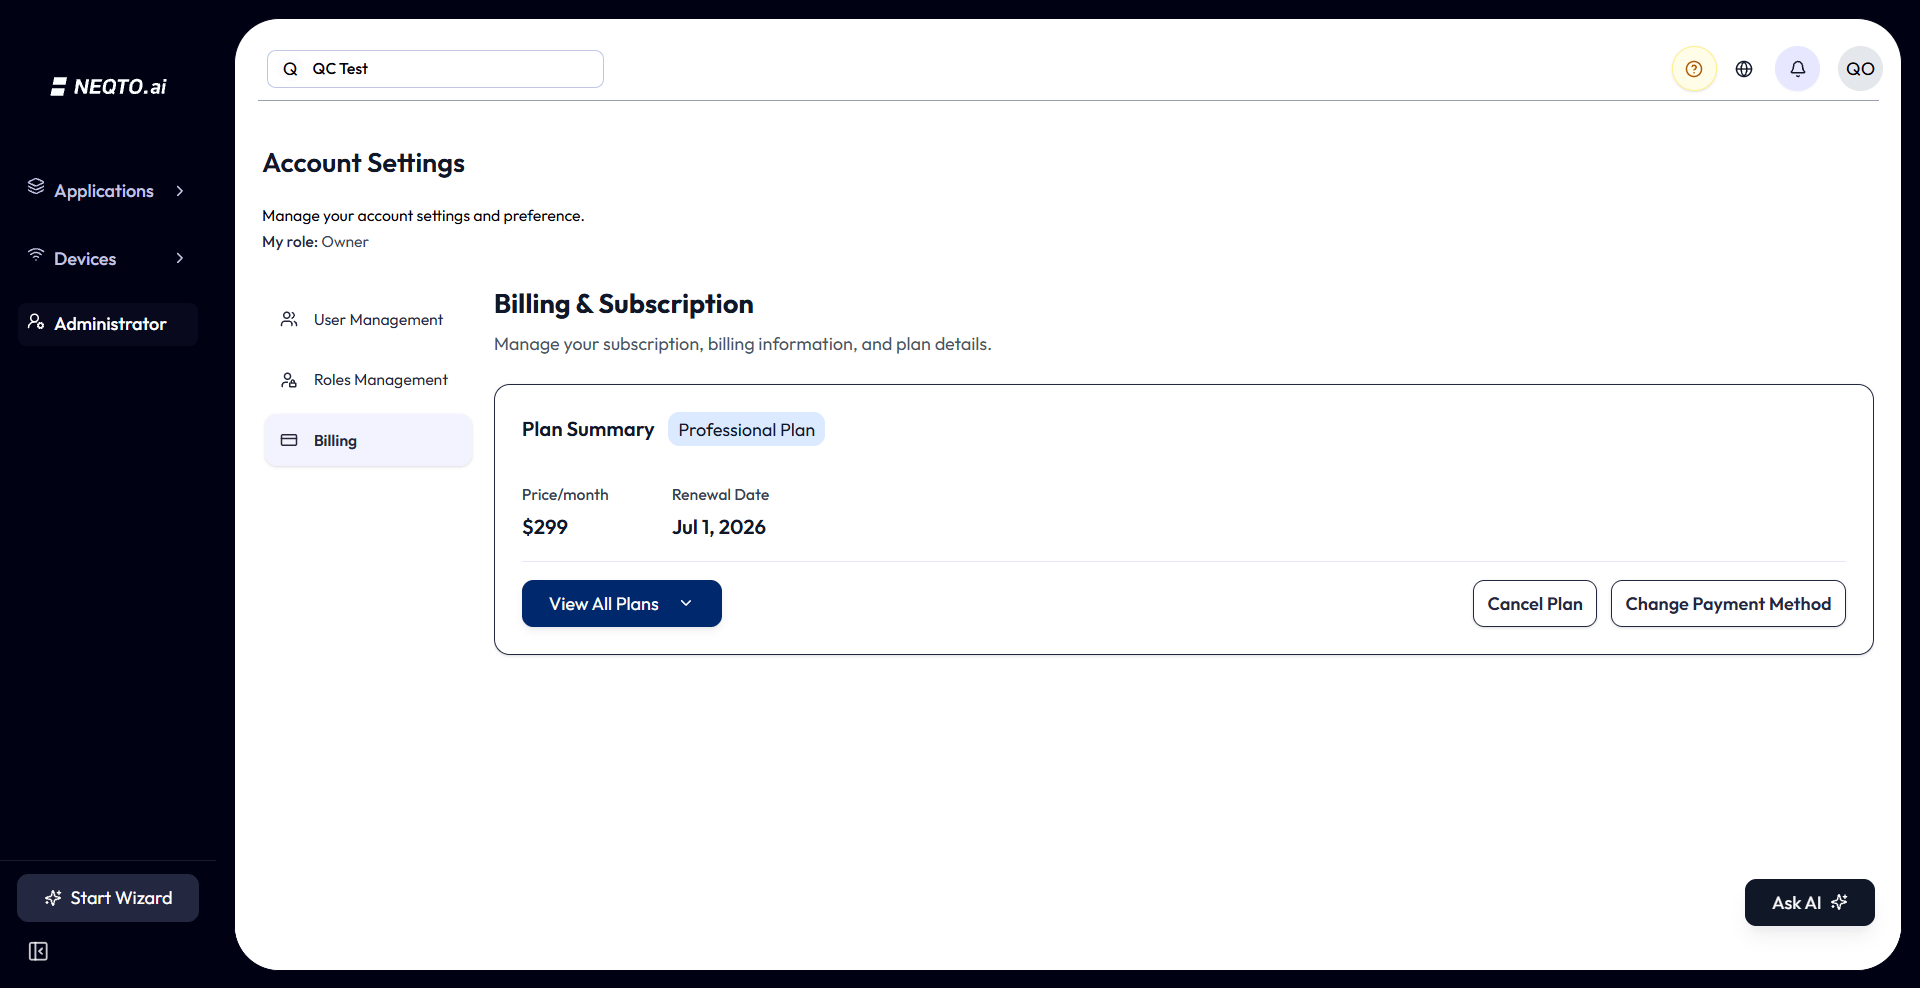
| Billing | View the current plan, switch plans, and manage payment. | account:read:billing |
If your role grants none of these, the page shows an Access Denied message instead of the tabs.
General: the account name
The General tab holds account-wide settings. Today it has one: the
Account name. Edit the field and click Save changes. Its
helper text notes the name “appears in the account selector and headers”, so renaming the
account updates it everywhere it is shown. The field is read-only unless your role grants
account:update:settings.
Users
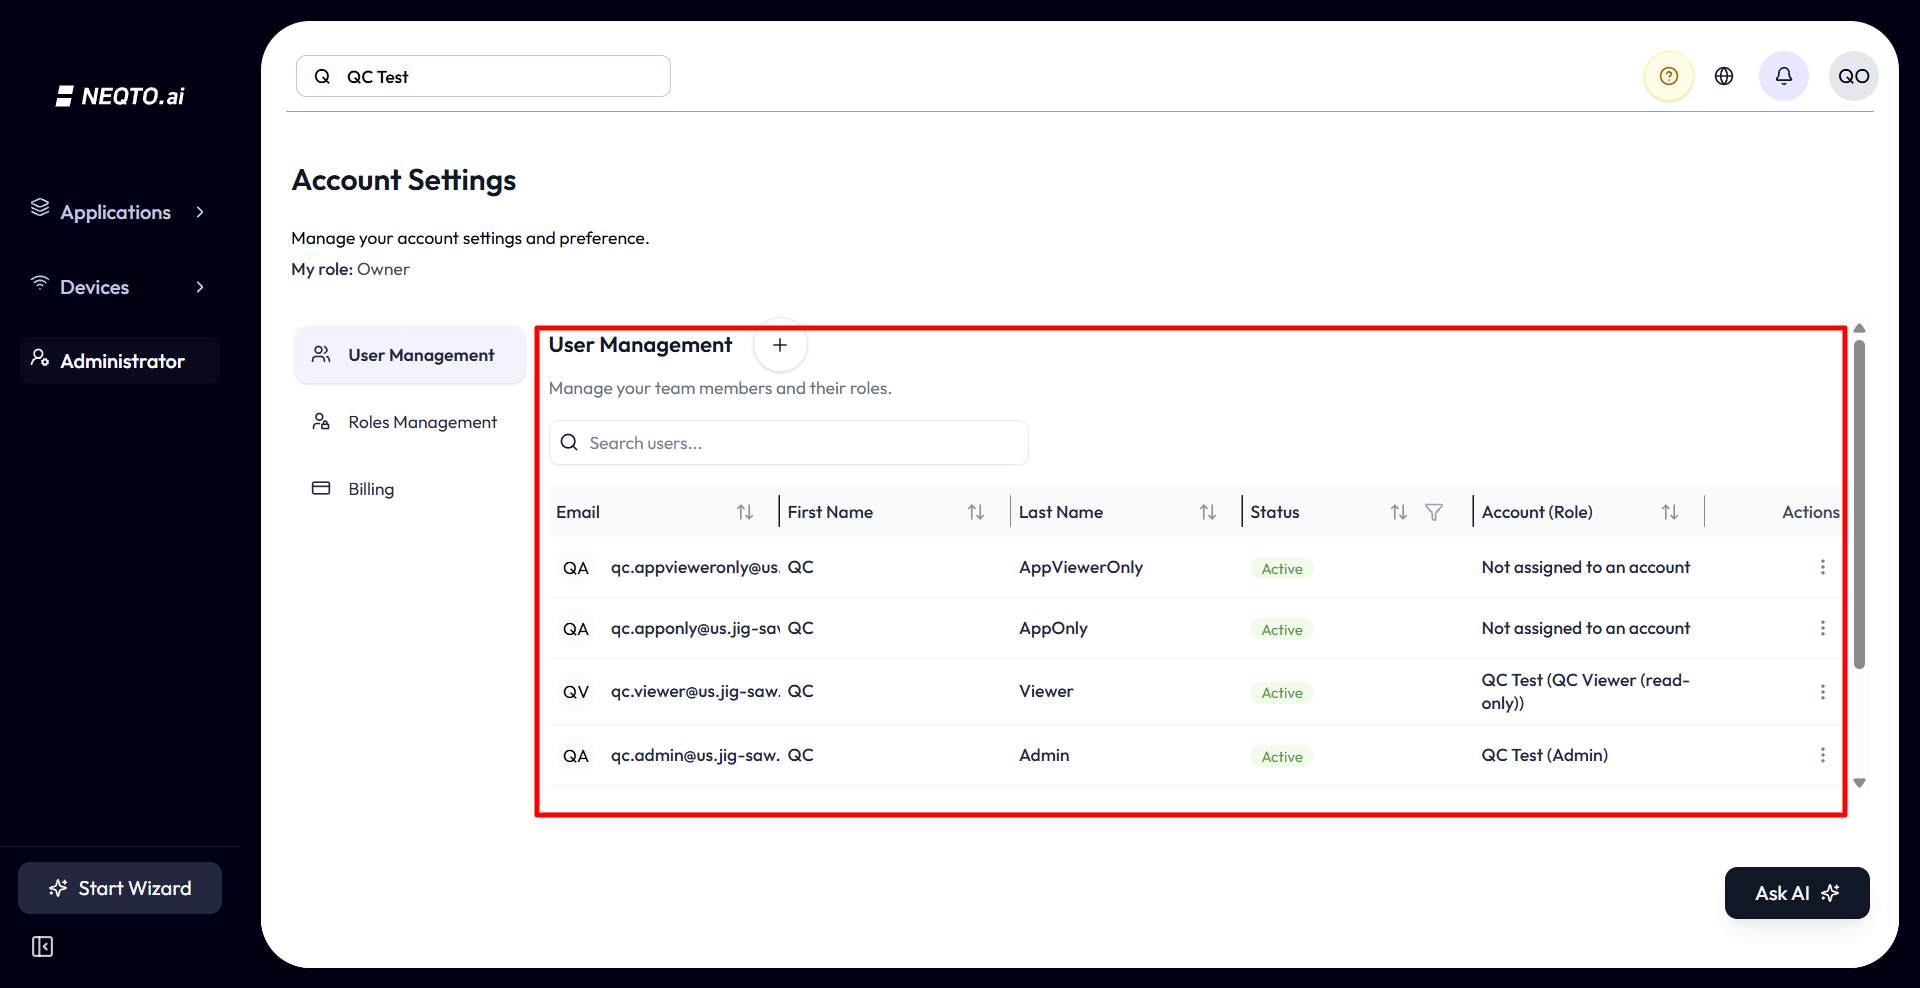
User Management lists everyone in your organization. You invite by email, assign organizations and roles, and from then on manage details from the table. The columns are Email, First Name, Last Name, Status, and a combined Account (Role) column that lists each organization the user belongs to and the role they hold there (or “Not assigned to an account” when they have none).
How sign-in works
Inviting a user
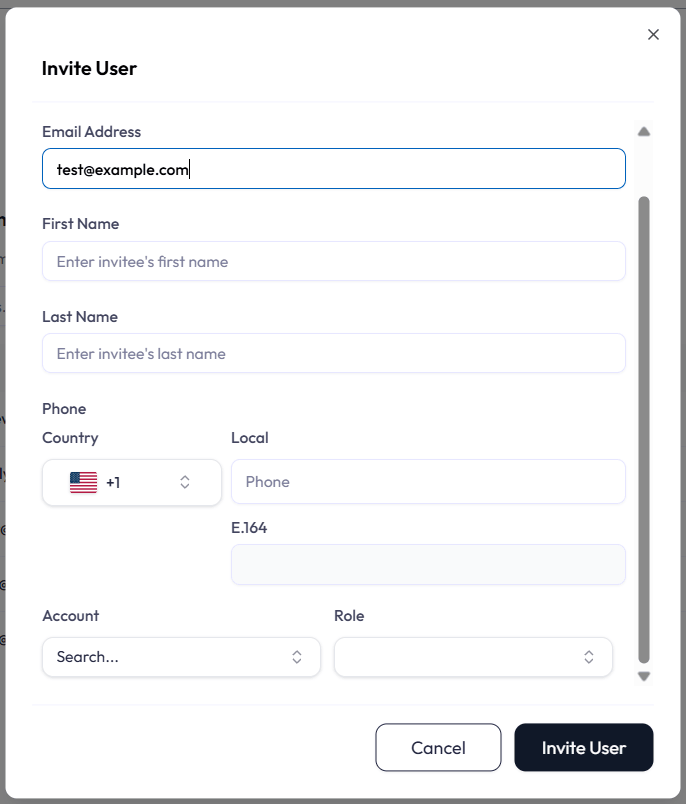
Click Invite User. The form is email-first: type the email and NEQTO.ai checks whether that person already exists on the platform.
-
1Enter the email. If the address already belongs to a platform user, you only assign organizations and roles. If it is new, you also fill in First Name, Last Name, and an optional Phone (E.164 format, for example
+1234567890). -
2Pick an organization (account). The Role next to it is optional. Leaving it blank invites the person as a member of the account with no account-wide role, which is the right choice when they should only get access through a specific application.
-
3Send the invite. The user receives an email and, once verified, can sign in. App-scoped roles can be added later from the Edit User page or from an application’s own user screen.
Row actions, status, and delete
Each non-Owner row has an actions menu (the Owner’s own row shows no menu). The menu offers two items:
-
Edit (needs
account:update:users) opens the Edit User page, where you change the person’s details and their per-organization roles. -
Delete (needs
account:delete:users, and is hidden on your own row) removes the user after a confirmation that warns it cannot be undone and that the user will lose access to the system.
The Status column shows each user as Active or Suspended and can be filtered. A built-in Enable User / Disable User toggle (with its own confirmation dialog) exists in the code but is currently commented out, so there is no enable/disable action in the row menu in this build.
Roles and Permissions (RBAC)
Access is granted through roles, and every role is a bundle of permission slugs. Permissions come in two scopes that never mix: account-scope (the whole organization) and application-scope (one workspace).
Account roles and Application roles
Roles Management splits its list into two sub-tabs: Account roles (the
account: scope) and Application roles (the
app: scope). The two system roles always live under Account roles. The application
roles (Admin, Operator, Viewer) you assign to per-app members are custom app:-scope
roles that live under the Application roles tab and are shared across the account.
System roles vs custom roles
Each account ships with two locked system roles, plus any number of Custom roles you build. The Roles Management table tags each role’s Type as Owner, Admin, or Custom, and shows a lock icon on the system ones.
| Role | What it is | Editable? |
|---|---|---|
| Owner | Full permissions. Exactly one per account. A short-circuit in the permission engine returns true for every check, so the Owner can do anything regardless of slugs. | No. Cannot be edited, duplicated, deleted, or reassigned through the UI. |
| Admin | Granted the full permission catalog at account creation. | Editable only by the Owner. Cannot be deleted. |
| Custom | Any role you create, with exactly the permissions you toggle on. | Yes (with the right roles permission). Create, edit, duplicate, delete. |
The two permission scopes
Permission slugs are formatted scope:action:resource, for example
account:create:users or app:read:devices. The scope prefix decides
which slug set is checked: account-scope slugs come from your account-level role,
application-scope slugs come from your role in the application you are currently viewing.
| Scope | Covers these resources | Example actions |
|---|---|---|
Account (account:) |
Users, Roles, Billing, Settings, Applications, plus account-side Devices, Tags, Device Endpoints, and Attributes. (Account Settings slugs now power the General tab’s account-name editing. Sub-account slugs also exist in the catalog, though the sub-account management screen is not yet a navigable route.) | read, create, update, delete (Billing is read/update only; Attributes are read/update only) |
Application (app:) |
Dashboards, Widgets, Alerts, Chatbot, the Simulator, plus app-side Users, Devices, Tags, Device Endpoints, and Attributes. | read, create, update, delete (Chatbot is a single “manage” grant; Simulator is read/execute; Attributes are read/update only) |
account:read:devices and app:read:devices. Holding one does
not grant the other. The main sidebar’s Devices link checks the account slug, while an
application’s Devices link checks the app slug, even though both say “Devices”. This is the
single most common source of “why can they see it here but not there” confusion.
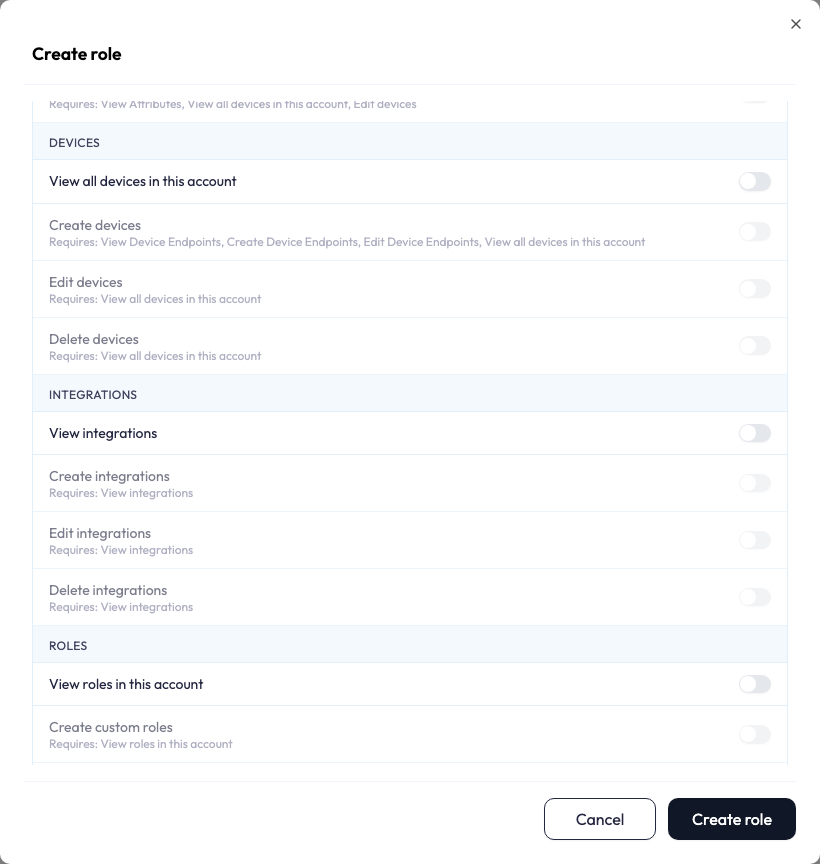
Editing a role’s permissions
Open a Custom role (or Admin, if you are the Owner) to get the permission editor. Each permission is a plain-language toggle — for example Invite users to this account or View devices in this application — rather than a raw slug, and the toggles are grouped by the feature they apply to (Users, Roles, Devices, Dashboards, Alerts, Billing, Simulator, and so on). A Select all switch at the top grants everything at once.
Who can manage roles
- Create / duplicate a role needs
account:create:roles. -
Edit a custom role needs
account:update:roles. The Admin role can only be edited by the Owner; the Owner role cannot be edited at all. -
Delete a custom role needs
account:delete:roles. System roles (Owner, Admin) can never be deleted.
Application Roles and Members
Inside an application, the Administrator area has its own user screen. This controls who belongs to that one workspace and what they can do there, separately from their account-wide role.
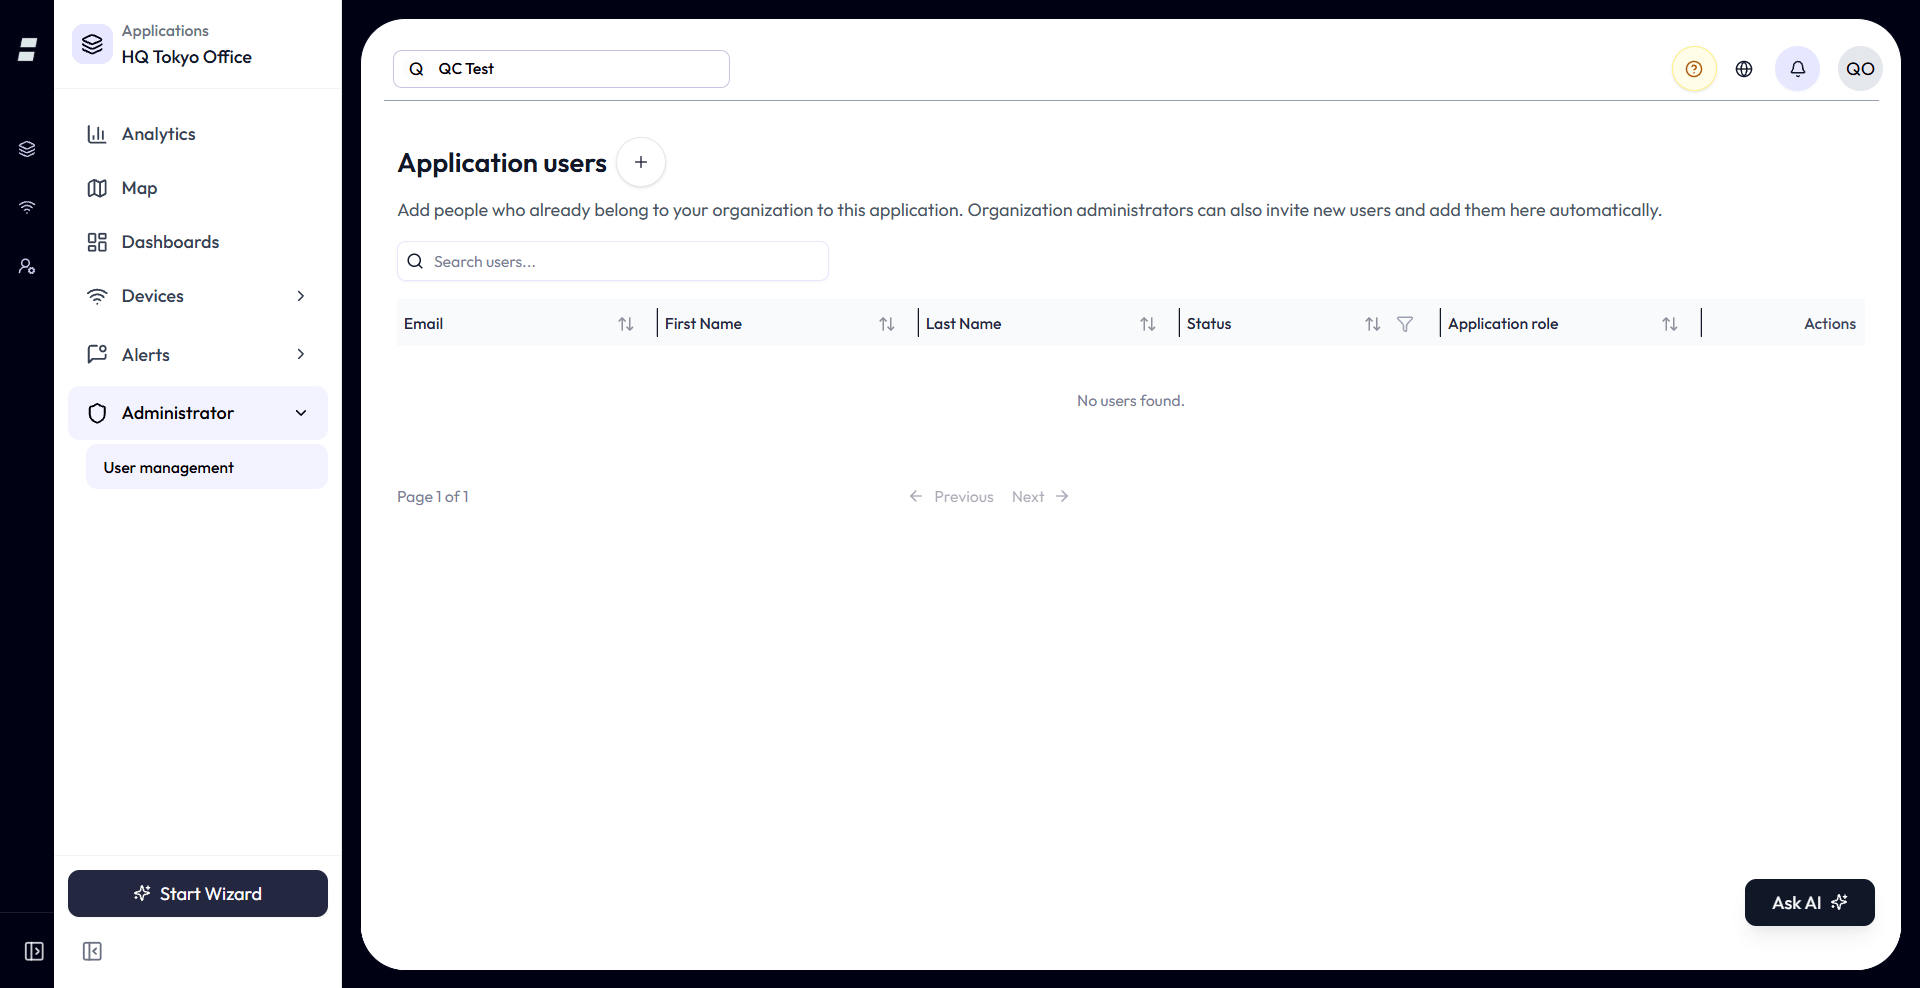
Application roles
Applications use their own roles, seeded from templates. The three member roles you will see are Admin (the application manager: add/remove members and change application roles, plus full feature access), Operator (full access except member and role management), and Viewer (read-only). The add-member dialog defaults the Application role select to Operator.
The dialog is email-first. Type the email and the dialog resolves whether the person already
exists on the platform: an existing user is added straight to the application, while a brand-new
email shows name and phone fields. The “add new user” path only appears if you can invite new
organization users (Owner, account:create:users, or the per-app
app:create:users); otherwise you may only add people who are already registered.

Who can manage application members
Access to the application user screen is granted by any one of: the per-application slug (app:read:users
and the matching create/update/delete), the account-level user slugs
(account:read:users, account:update:users), or the Owner /
account:manage:applications override.
account:update:users) gets a focused
dialog that only changes a member’s role within that application. They never see the
account-role dropdown and cannot promote anyone to an account-level role. This closes a
privilege-escalation gap (NEQTOAI_TECH_AI_ML-581). Removing a member from an application removes
their access to that workspace only; they stay in the organization.
Billing and Plan Limits
The Billing tab shows your current plan, its renewal or time limit, and a pricing table you can expand to compare and switch plans. Payment runs through Stripe.
The plans
The pricing table has three plan columns, labeled Starter, Professional, and Scale. Starter is the free 14-day trial, Professional is the paid monthly plan, and Scale is the top tier whose price reads “Enterprise / Custom” with a Contact Sales button (a mailto to the sales contact) rather than a self-service checkout.
| Feature | Starter | Professional | Scale |
|---|---|---|---|
| Price | Free for 14 days | Paid, monthly | Custom (contact sales) |
| Users | 1 user | Up to 5 users | Up to 10 users |
| Devices | Up to 5 | Up to 25 | Up to 50 |
| Device Endpoints | 1 | 2 | Not listed on the plan card (contact sales) |
| Dashboards & Widgets | Unlimited | Unlimited | Unlimited |
| Data retention | 14 days | 90 days | 12 months |
NEXT_PUBLIC_PLAN_MAX_DATA_SOURCES and
Dashboards/Widgets against NEXT_PUBLIC_PLAN_MAX_DASHBOARDS_WIDGETS. For the Scale
plan the live table also renders Max Users and Devices as “Unlimited” even though the
customer-facing plan card states “up to 10 users” and “up to 50 devices”. The underlying plan
model tracks a few limits the cards do not show, including widgets, monthly tokens, and monthly
payloads. Treat the table as the customer-facing summary, not a contractual cap.
Account status and the grace period
An account moves through a small set of states that the Billing screen reflects with badges and banners.
| State | What it means |
|---|---|
| Trial |
On the free Starter trial (trial). A days-left countdown is shown under “Time
Limit”, turning red in the last 5 days.
|
| Active | A paid plan in good standing (active), with a renewal date. |
| Grace period |
Subscription has lapsed (grace_period). The account enters view-only access
for a limited number of days before suspension, with an orange “Grace Period Active”
banner that counts down the days left. The Plan Summary badge reads “<plan> – Grace
Period”.
|
| Expired / Blocked |
The subscription has fully lapsed (the account-plan status is expired, with a
blocked restriction). Access is blocked, the badge and a red banner both read
“Account Blocked”, and the message directs the user to contact support to reactivate.
|
Changing the payment method and canceling are gated behind account:update:billing;
viewing the plan only needs account:read:billing.
How Permission Gating Shows Up
Permissions are not just enforced on the server. The UI hides what you cannot use, at three layers, so users are not shown dead ends.
- Whole pages are wrapped in a route guard. Lacking the route’s permission shows an Access Denied screen instead of the page.
- Individual actions (buttons, menu items, whole sections) are wrapped so they simply do not render for users who lack the permission. A delete option you cannot use is hidden, not greyed out.
- Navigation is filtered before it renders. Sidebar items appear only if you can access them, and (as noted) the main sidebar checks account-scope slugs while the application sidebar checks app-scope slugs.
USER_ROLE_MANAGE permission. That predates the current redesign. The live model is
the Owner / Admin / Custom system described above, with the two-scope (account: /
app:) slug catalog. Trust the product, not that legacy guide.
Good to Know
- Owner is all-powerful and immutable. One per account, every check passes, and it cannot be edited or reassigned in the UI. Plan who holds it.
- account:manage:applications is a master key. It grants full access to every application, bypassing per-app roles. Treat it like a super-permission.
- Scopes do not bleed. An account-wide Devices permission and an in-application Devices permission are separate grants. Assign both if a user needs both contexts.
- Roles are optional at invite time. Invite someone with an organization but no account role, then give them access through a specific application instead.
- Email is the login. Sign-in is by magic link or Google, so every invited user needs a reachable, verified email address.
- Application admins cannot escalate. Managing members inside one application never exposes account-level role changes.
