
An Application is a workspace that scopes a slice of your account. Inside an application you only see the devices, device endpoints, dashboards, alerts, maps, and tags that belong to it. Applications let one account run several monitoring projects side by side, each with its own people and its own navigation, without mixing their data.

Quick Start
If you already know NEQTO.ai, here is the short version.
-
1Open Applications from the main navigation. You will see the list, with the Default Application pinned to the top.
-
2Use the + button (its tooltip reads “Add Application”) to open the three-step wizard: name it, pick a sidebar template, then assign device endpoints and devices.
-
3Click an application row to enter it. A dedicated left sidebar appears and every screen now shows only that application’s data.
-
4Add people under Administrator → User management and give each one an Admin, Operator, or Viewer role for that application only.
What an Application Scopes
Entering an application is more than a filter on one screen. It sets the scope for everything you do until you leave.
When you open an application the URL becomes /applications/<id>/<section>, for example /applications/<id>/devices. That application ID travels with every request as an applicationId parameter, so each list narrows to the application’s own resources.
| Area | What you see inside an application |
|---|---|
| Devices | Only the devices assigned to the application. (The Default Application is the exception, see below.) |
| Device Endpoints | Only the endpoints assigned to the application. (The Default Application is the exception, see below — it shows all of the account’s endpoints.) |
| Dashboards | Dashboards created within the application. A new application starts with a default dashboard when its sidebar includes the Dashboard section (the Default and Smart Environment templates do). |
| Alerts & Alert History | Alerts and notification groups defined inside the application. |
| Map | The application’s own map of its located devices. |
| Tags | Tags scoped to the application. |
The Applications List
The list is the home base for organizing and switching between applications. It lives under Applications in the main navigation.
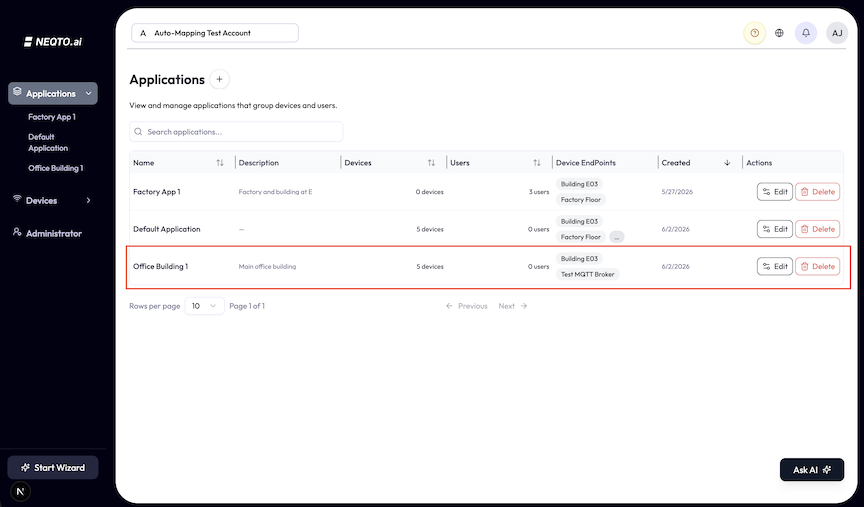
Columns
| Column | Shows |
|---|---|
| Name | The application name. Sortable. |
| Description | Optional description, or a dash when empty. |
| Devices | Count of assigned devices, for example “12 devices”. The Default Application shows All devices instead. |
| Users | Member count. Only visible if you can manage applications. The Default Application shows Manager only. |
| Device EndPoints | Up to two endpoint name badges, then an overflow “…” badge (its tooltip lists the rest). Click a name badge to view that endpoint’s details. Endpoint badges only appear if you have device endpoint view permission; otherwise the cell shows a dash. |
| Created | Creation date. Sortable. |
| Actions | Edit (a gear icon) and Delete (a trash icon), each shown only if you have that permission. |
Searching and ordering
- Search filters by name and description as you type.
- The list order is fixed: the Default Application is always pinned first, then everything else follows by creation date, oldest first.
- The Name, Devices, Users, and Created headers are clickable, but the on-screen order stays default-first then oldest-created-first.
Switching scope
Click any application row to enter it. (You can enter an application only if you are a manager, can manage applications, or are a member of it.) You then land on the application’s first available section. To switch to a different application or return to the account-wide view, use the application sidebar’s header, which links back to this list.
The Default Application
Every account is created with one special application you did not make yourself.

It is named “Default Application” and described as “Contains all devices in the account. Only accessible by managers.” That built-in description is a label, not the current access rule: account managers and users explicitly granted access can also enter it. It is created automatically when the account is set up, along with its own default dashboard.
| Behavior | Detail |
|---|---|
| Contains all devices | It is not a hand-picked list. Every device in the account is in scope, including new ones as they arrive. The list shows All devices rather than a count. |
| Access | The list labels it Manager only because default-app membership is not managed like regular app rows in this table. In the current access rules, account managers and users explicitly granted access can enter it. |
| Assignments are fixed | You cannot add or remove device endpoints or devices on it. The Edit dialog shows those controls as read-only with the note “These assignments cannot be edited for the default application.” |
| Name, description, sidebar are editable | You can still rename it, change its description, and choose which sidebar sections it shows. |
Creating an Application
Click the + button (tooltip: “Add Application”) next to the page title to open a three-step wizard. You need the application-create permission to see the button.
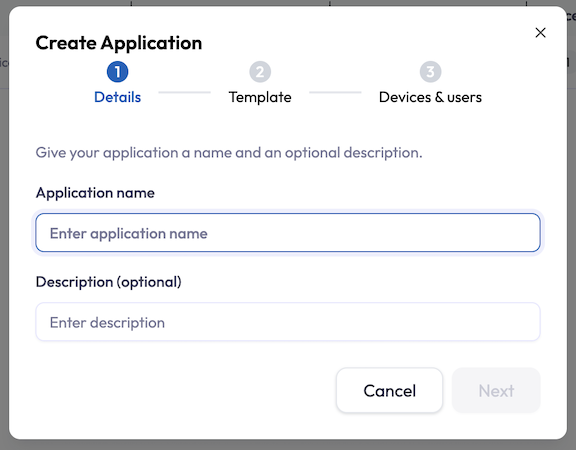
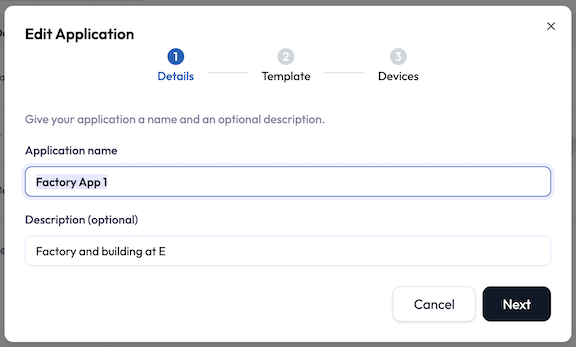
Step 1 — Details
-
1Enter an Application name (required). Names must be unique within the account; a duplicate name is rejected.
-
2Optionally add a Description.
Step 2 — Template
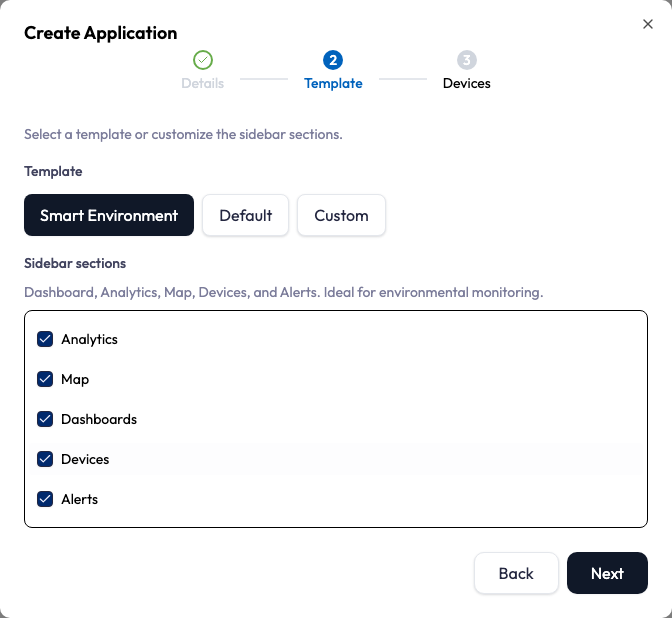
The wizard opens with Smart Environment pre-selected and listed first, with all of its sidebar sections (Dashboard, Analytics, Map, Devices, and Alerts) enabled, so a new application includes them unless you pick another template. The template is a shortcut that pre-checks a set of sidebar sections. You can override any checkbox; doing so switches the template to Custom.
| Template | Sidebar sections | Best for |
|---|---|---|
| Smart Environment (default) | Dashboard, Analytics, Map, Devices, Alerts | Environmental monitoring. |
| Default | Dashboard, Devices, Alerts | Monitoring and device management. |
| Custom | Devices only (then check what you want) | Building your own layout. |
Step 3 — Devices

-
1Assign device endpoints. Each endpoint you select brings in all of its devices automatically. Those devices show as a “Devices from <endpoint>” badge rather than as individual chips.
-
2Assign devices. Add individual devices from other endpoints on top. The picker hides devices already pulled in by a selected endpoint, so you never double-count. A running total shows how many devices the application will contain.
-
3Click Create. The application appears in the list and you become a member.
Inside an Application
Entering an application swaps the navigation for a dedicated left sidebar built from the sections you chose.
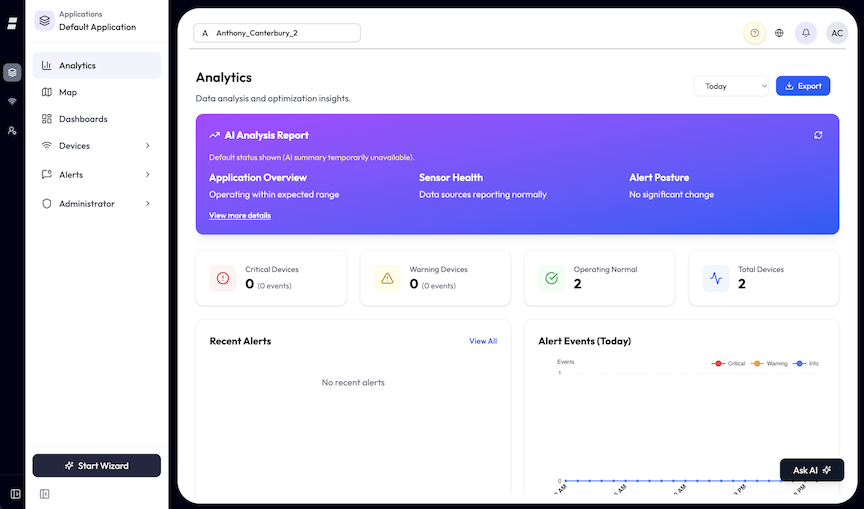
- The sidebar header shows the label “Applications” and the application name, and links back to the Applications list, which is how you switch scope.
- Analytics, Map, and Dashboards each open directly to that view.
- Devices expands into View Devices, Device Endpoints, and Tag Management (each shown only if you have access).
- Alerts expands into View Alerts, Alert History, and Notification Groups.
- Administrator appears for users who can access application user management, and leads to per-application User management.
- The rail can be collapsed to an icon-only strip; your choice is remembered.
Editing, Reorganizing, and Deleting
Edit
Click Edit (the gear icon) in the Actions column to change an application. The Edit button appears only if you hold the application-edit permission. The wizard reopens prefilled and titled Edit Application. You can change the name, description, sidebar sections, and the assigned endpoints and devices. Assignment changes are applied as add and remove operations when you save.
Reassigning devices and endpoints
- Re-open Edit and adjust the endpoint or device selections, then save.
- Adding an endpoint adds all of its current and future devices to the application.
- Removing an endpoint or device only changes this application’s scope; it does not delete the device or stop its data.
Delete
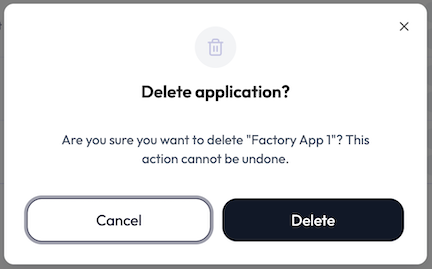
Click Delete (the trash icon) and confirm. Deletion is a soft-delete: the application and the resources scoped to it are flagged as deleted, not erased. It cascades to the application’s dashboards (and their widgets), maps, alerts, notification groups, and tags. It does not delete the underlying devices or device endpoints, which live at the account level and may belong to other applications.
Roles and Permissions
Applications have their own access model that sits alongside your account (organization) role.
The selectable roles are loaded from your account’s application-role configuration and sorted by name. The standard defaults are below, but your account may offer others.
| Application role | Can do |
|---|---|
| Admin (Manager) | Invite and remove members, change application roles, and full access to every feature in the application. |
| Operator | Full access to the application’s features except member and role management. |
| Viewer | Read-only. Cannot change settings or member access. |
- Application roles are separate from organization roles. A person can be a plain account user yet an Admin inside one application.
- Account managers see everything. Users with the account-level manage-applications permission get full access to every application, including the default one, without an explicit per-app role.
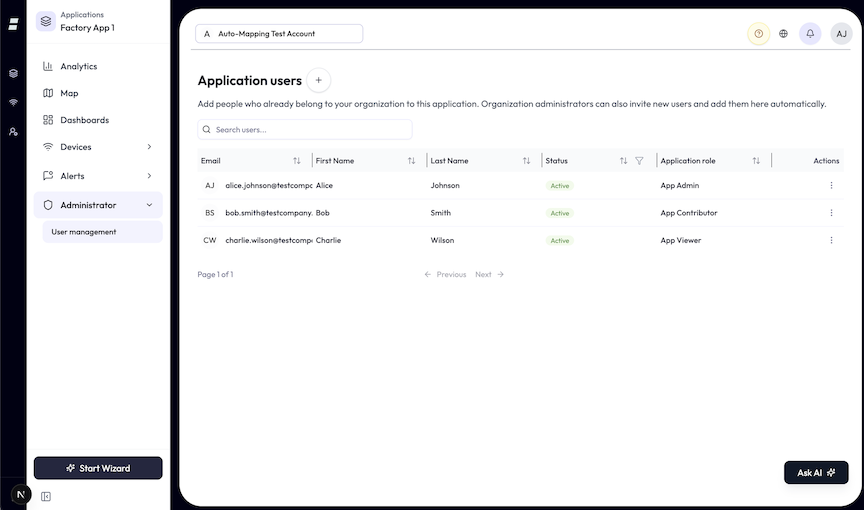
- You add members from Administrator → User management inside the application, choosing from people who already belong to your organization. Org admins can also invite brand-new users there.
Limits and Good to Know
- Scope follows the URL. The path
/applications/<id>/<section>carries the application ID into every request, so the data you see is always tied to the application in the address bar. - Membership pulls in endpoint devices. Assign an endpoint and you get all its devices, current and future. Assign devices individually only to reach across endpoints.
- One device, many applications. The same device can be in several applications at once; its data appears in each.
- Hidden sidebar sections are blocked. A section you did not enable is not just hidden, its URL is unreachable and redirects to an available section.
- The Default Application is all-seeing. Its device and endpoint lists are fixed to everything in the account, and account managers plus users explicitly granted access reach it. Its endpoint and device assignments cannot be edited, but the app does not block deleting it, so treat it as permanent by convention. Use it for account-wide views.
- Names are unique per account. Reusing a name is rejected at creation.
