

Integrations connect NEQTO.ai to your external services. Unlike Device Endpoints, where your devices connect in to the platform, an integration is an outbound connection: you supply the URL and credentials of an external API or broker, and NEQTO.ai authenticates to it. An integration can pull data in on a schedule, or push data out, over secure (TLS) connections only: HTTPS, WSS, or MQTTS.

Where to Find Integrations
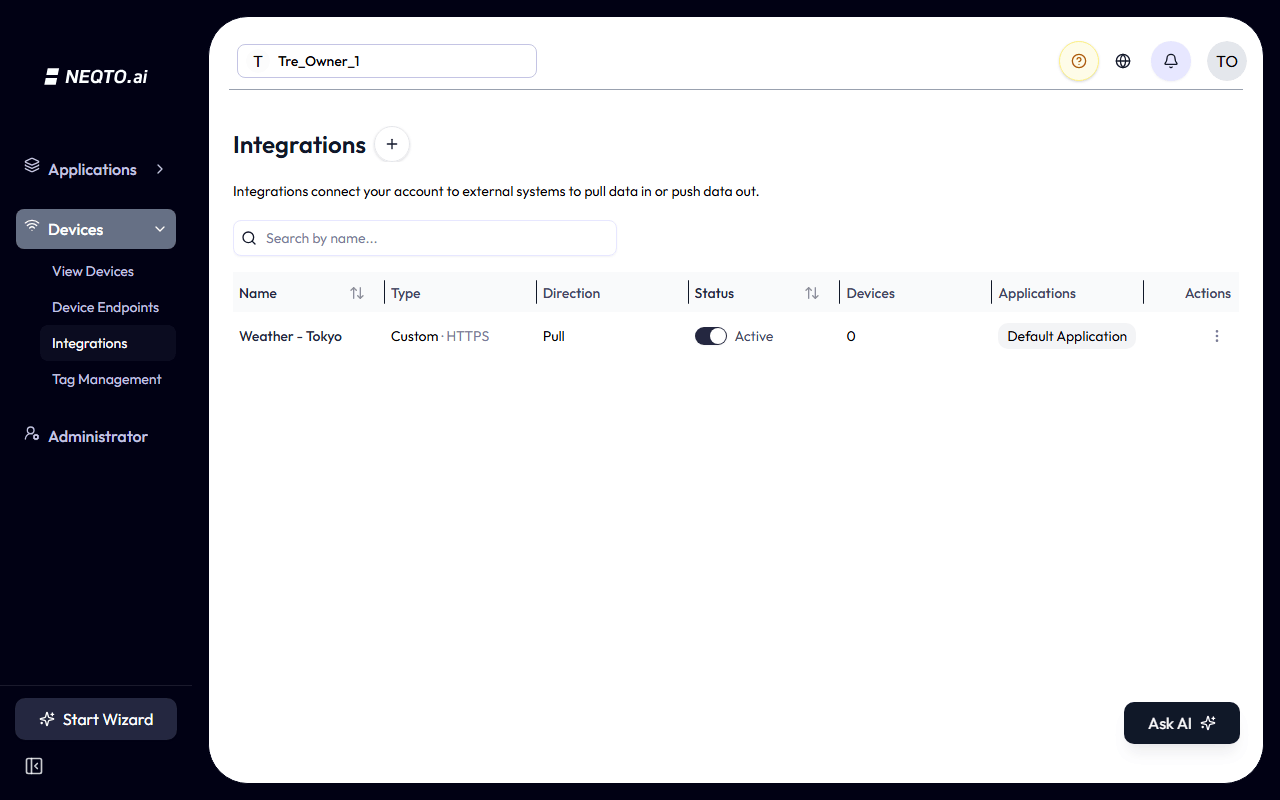
Integrations are managed at the account level and appear in the Application sidebar for permitted users. The default application sees every integration in the account; other applications opt in to the integrations they need.
Creating an Integration
-
1Open Integrations and select the + (Add Integration) button. On the Type screen, choose Custom to connect to any service with your own URL and credentials.
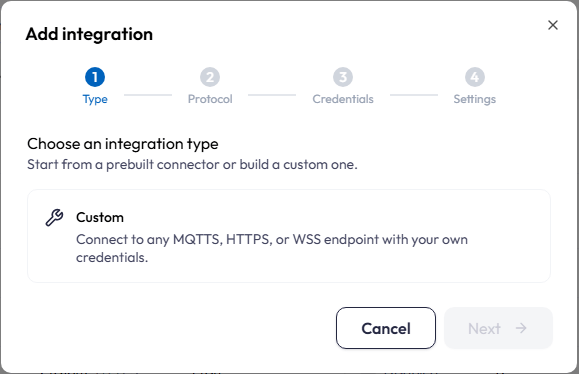
Step 1, Type: choose the integration type. -
2On the Protocol screen, choose the TLS transport: HTTPS, WSS, or MQTTS.
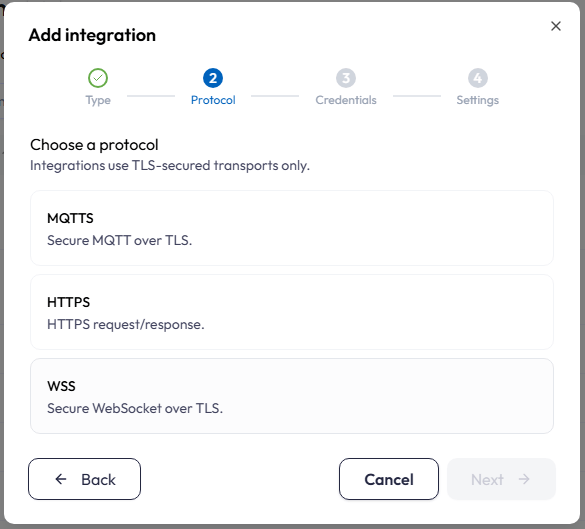
Step 2, Protocol: pick how NEQTO.ai connects. -
3On the Credentials screen, set the direction (Pull, Push, or Pull & Push), enter the pull and/or push URL, optionally add custom headers, then pick an authentication method and enter its credentials. See the table below for what each method needs.
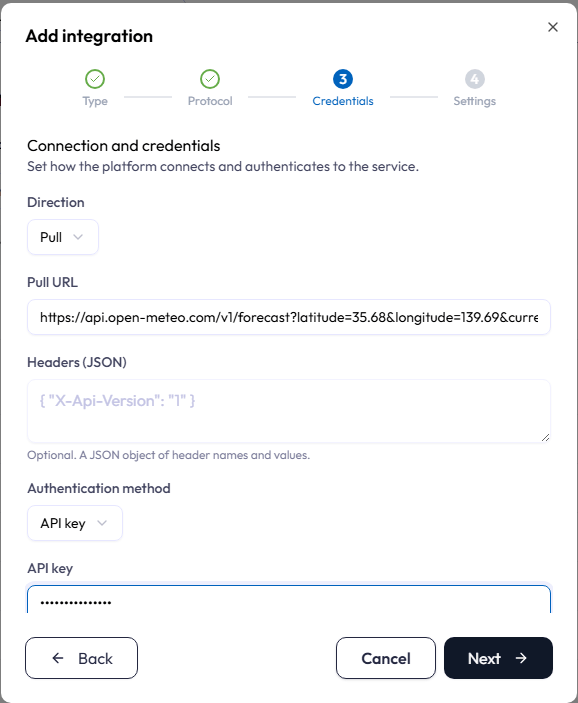
Step 3, Credentials: direction, endpoints, and authentication. Credentials are encrypted and masked whenever the integration is viewed later. -
4On the Settings screen, give the integration a name and an optional description, then finish. The new integration is created as a draft.
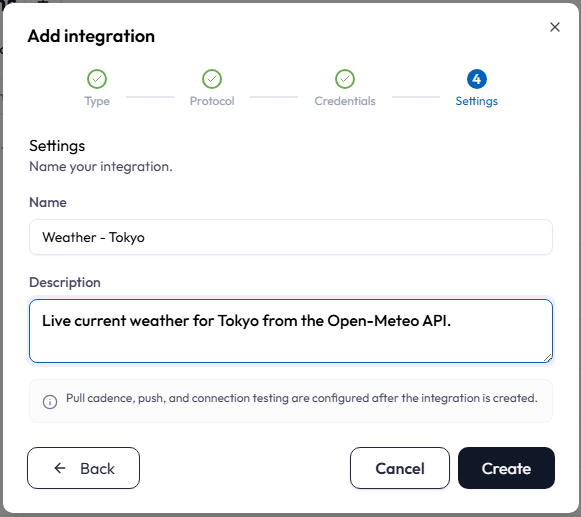
Step 4, Settings: name and describe the integration.
Authentication Methods
| Method | What you enter | How it is sent |
|---|---|---|
| API Key | Your API key. | An X-API-Key header on every request. |
| Bearer Token | Your token. | An Authorization: Bearer header on every request. |
| Basic | Username and password. | An Authorization: Basic header on every request. |
| OAuth2 Client Credentials | Client ID, client secret, and the provider’s token URL. | NEQTO.ai obtains an access token from the provider automatically and refreshes it as it expires. No sign-in is required. |
| OAuth2 Authorization Code | Client ID, client secret, token URL, and the provider’s authorization URL. | After creating the integration, choose Connect on its row and sign in at your provider once. NEQTO.ai then manages and refreshes the tokens automatically. |
| Mutual TLS |
In the wizard, a Certificate URL that NEQTO.ai fetches the service’s CA
certificate from. After creating the integration, add your client certificate and
private key (PEM) through the row’s Edit credentials action, in the
Credentials (JSON) field, as clientCertPem and
clientKeyPem (optionally caPem, which overrides the fetched
CA). The integration cannot connect until these are set.
|
The client certificate authenticates the TLS connection itself. |
caPem through the row’s
Edit credentials action (Credentials (JSON) field).
Integrations can only reach publicly resolvable hosts; private and internal network addresses
are blocked for security.
Pulling Data
A pull integration fetches data from your service on a recurring schedule (your plan defines the interval). The service must respond with a single JSON object (up to 1 MB).
From pulled data to a device
-
1Pull a sample from the integration. The AI reads the sample and proposes data fields.
-
2Review the proposed fields, adjust them if needed, and confirm.
-
3NEQTO.ai creates a device from the confirmed fields. Devices created this way are labeled Integration in Devices & Data, and every subsequent scheduled pull feeds their readings automatically.
Pushing Data
A push integration delivers data to your service. For HTTPS, each push is a
POST request with a JSON body and Content-Type: application/json,
carrying your configured authentication. For MQTTS, the payload is published to the topic in
the push settings (or the topic given by the URL path). Publish topics must be concrete:
wildcards such as # and + are not valid.
Optionally, auto-push sends a message you define on a schedule (your plan defines the minimum interval).
Integration Status
A new integration starts as a draft. When enabled it becomes pending activation, and it activates automatically on its first successful pull or push. This confirms the connection genuinely works before the integration is treated as live.
| Situation | What happens |
|---|---|
| A pull attempt fails | The integration stays enabled and simply retries at the next interval. Pull failures never disable an integration. |
| A push is rejected by the service (for example, wrong credentials or a 4xx response) | The integration is deactivated and the reason is shown on its row, so you can fix the credentials or endpoint and re-enable it. |
| A temporary failure (rate limiting, a 5xx response, or a network error) | The push is retried at the next interval; the integration is not deactivated. |
Worked Example: Pull Live Weather
Open-Meteo is a public weather API that needs no credentials, which makes it a quick way to see the whole pull flow end to end.
-
1Create an integration: type Custom, protocol HTTPS, direction Pull, any authentication method (the service ignores it), and this pull URL:
https://api.open-meteo.com/v1/forecast?latitude=35.68&longitude=139.69¤t=temperature_2m,relative_humidity_2m,wind_speed_10m -
2Run a manual pull. The response contains current temperature, humidity, and wind speed for the configured coordinates.
-
3Pull a sample and confirm the proposed fields to create a weather device, then watch its readings update on every scheduled pull.
Troubleshooting
| Message | Meaning |
|---|---|
| Failed to pull data from the external service | The service could not be reached, timed out, or returned an error status. Check the URL and that the service is up, then pull again. |
| The external service did not return a JSON object | The response was not a single JSON object (for example, plain text, HTML, or a bare array). Point the URL at an endpoint that returns a JSON object. |
| The external service rejected the integration credentials | The service answered with an authentication error (401 or 403). Update the credentials in the integration’s settings. |
| OAuth connection required. Please connect this integration again. | The stored OAuth session can no longer be refreshed (for example, access was revoked at the provider). Choose Connect on the integration’s row and sign in again. |
| The external service rejected the push request | The service answered a push with an error status other than an authentication error. Check the push URL and the payload format the service expects. |
| The pull interval is shorter than your plan allows / The auto-push interval is shorter than your plan allows | Increase the interval, or upgrade your plan for faster cadences. |
| The MQTT push topic must be a concrete topic without # or + wildcards | Replace the wildcard with the exact topic the payload should be published to. |
| Failed to fetch a PEM certificate from certificateUrl |
The Certificate URL could not be fetched or did not return a PEM certificate. Check the
URL, or paste the CA directly as caPem via Edit credentials.
|
Limits and Security
| Item | Limit |
|---|---|
| Connection security | TLS only: HTTPS, WSS, and MQTTS. Plain HTTP, WS, and MQTT are not supported. |
| Reachable hosts | Public hosts only. Private and internal network addresses are blocked. |
| Pull response size | Up to 1 MB per pull, and the response must be a single JSON object. |
| Pull and auto-push intervals | Minimum intervals depend on your plan. |
| Credentials | Stored encrypted and masked whenever the integration is viewed after saving. |