

Applications
An Application gives a project or team its own view of selected Devices and Device Endpoints within your Account. You build Dashboards, review Analytics and Reports, and manage Alerts, Systems, Tags, and user access within that Application.
Assignments control which Devices belong to an Application. Assign an Endpoint to include its current and future Devices, or select individual Devices. Roles control what each user can see and do with those resources.
Quick Start
Create an Application, assign its Devices, and then give your team access.
-
1
Open Applications from the main navigation and select +.
-
2
Enter an Application name and an optional Description.
-
3
Select the Device Endpoints or individual Devices to include, then select Create. You can add assignments later.
-
4
Open the Application from the list. If you have permission, use Administrator > User management inside it to add users and assign their Application roles.
What an Application Scopes
When you open an application, its assignments and settings determine what you can see and manage.
| Area | What is in the application |
|---|---|
| Devices and device endpoints | The assigned endpoints and devices. The Default Application is the exception: it includes all account devices and endpoints. |
| Dashboards | Dashboards and Widgets created in this Application. A default Dashboard is created with a new Application. |
| Alerts | The application’s alerts, notification groups, and alert history. |
| Analytics and Reports | Use Analytics to review Device readings and Alert activity for a selected period. Use Reports to create one-time or scheduled CSV or PDF reports of Device summaries and email the results. Available actions and schedules depend on your permissions and plan. |
| Systems and tags | Systems and Tags created for this Application. Systems can organize Devices in a hierarchy and place them on an image such as a floor plan. |
The Applications List
Open Applications from the main navigation to find, enter, and manage the applications you can access.
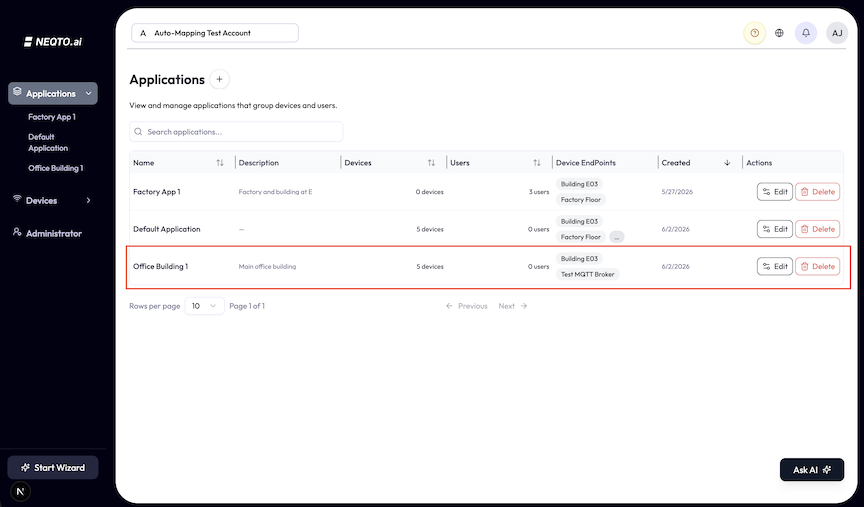
Columns
| Column | Shows |
|---|---|
| Name | The application name. |
| Description | The optional application description. |
| Devices | The number of assigned devices. The Default Application shows All devices. |
| Users | The number of application members. This column appears only if you can edit or delete applications. The Default Application shows Manager only; see the access note below. |
| Device EndPoints | Up to two assigned endpoint names. If there are more, point to the overflow badge to see them. Select an endpoint name to open its details. This information appears only if you can view device endpoints. |
| Created | The date the application was created. |
| Actions | Edit and Delete, when you have the corresponding permissions. |
Searching and ordering
- Search filters application names and descriptions as you type.
- The Default Application remains first. Other applications initially appear newest first.
- Select the Name, Devices, Users, or Created header to change the order.
Switching scope
Select an Application row to enter it. Account owners, account administrators, users who can manage Applications, and users assigned an Application role can enter it. The section you can use depends on your permissions. When available, select the Application sidebar header to return to the list and choose another Application.
The Default Application
Every account starts with a Default Application for account-wide monitoring.
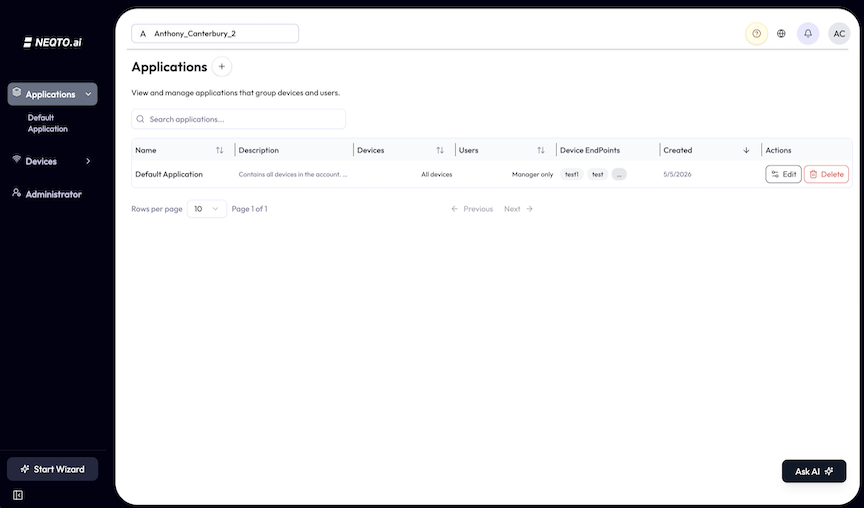
The Default Application is created with the account and includes its own default dashboard. Its initial description says it is only accessible by managers, but access is determined by the current permission rules described below.
| Behavior | Detail |
|---|---|
| Account-wide scope | All account devices and device endpoints are included, including devices added later. |
| Access | Account owners, account administrators, users who can manage applications, and users assigned a role for the Default Application can enter it. The Manager only table label does not list every permitted user. |
| Fixed assignments | You cannot add or remove its device endpoints or devices. |
| Editable settings | You can change its name and description. Its Endpoint and Device assignments remain fixed. |
Creating an Application
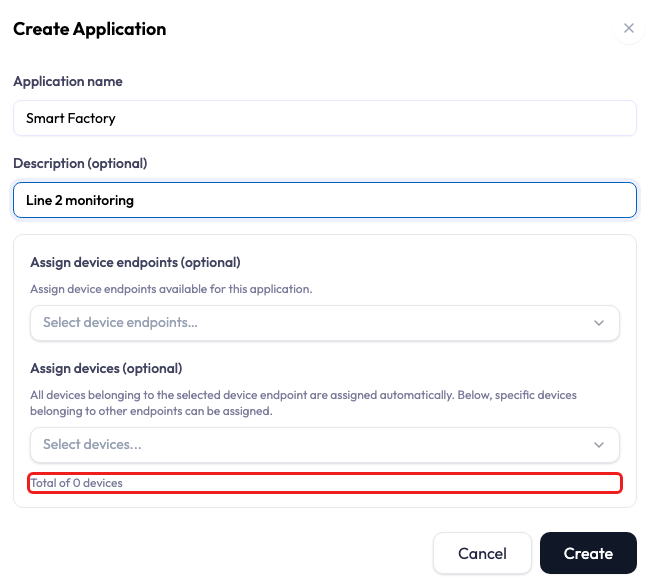
If you have Application-create permission, select + in the Applications list. The dialog contains the details and assignments on one screen.
Enter the Application details
-
1
Enter an Application name that identifies the project, site, or team. Names must be unique within your Account and can contain up to 100 characters.
-
2
Enter an optional Description, up to 500 characters. Explain what the Application monitors so teammates can identify it in the list.
Understand the Application navigation
The Application sidebar provides Dashboard, Analytics, Devices, Alerts, and Reports. Each user sees the sections their permissions allow. Creating an Application does not grant other users access; add members and assign roles after creation.
Assign Endpoints and Devices
-
1
Use Assign device endpoints to include every Device on selected Endpoints, including Devices added to those Endpoints later.
-
2
Use Assign devices to include individual Devices from other Endpoints. Devices already included through a selected Endpoint are omitted from this picker.
-
3
Check the selected resources and Device total, then select Create. The new Application appears in the list.
The assignment controls show resources you have permission to view. You can create the Application first and assign resources later. Add members from its Administrator > User management page.
Inside an Application
The Application sidebar shows the sections your permissions allow. Use it to work with the resources assigned to this Application.
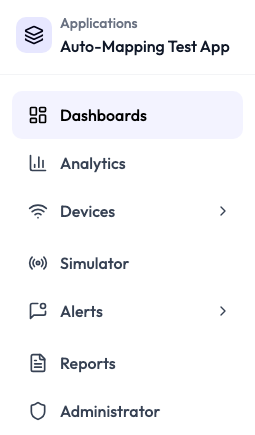
- Dashboard opens the Application’s Dashboards and Widgets.
- Analytics reviews Device readings and Alert activity for a selected period.
- Devices can include Device lists, Device Endpoints, Integrations, Systems, and Tags.
- Alerts can include Threshold Alerts, Alert History, Notification Groups, and Actions.
- Reports lets you create one-time or scheduled CSV or PDF reports and download completed reports.
- Administrator appears when you can access Application user management.
- Collapse the sidebar when you need more room. The browser remembers your choice.
Editing, Reorganizing, and Deleting
Edit and Delete are in the Actions column of the Applications list. Open Edit to update details or change assignments.
Edit
If you have Application-edit permission, select Edit in the row’s Actions column. The dialog opens with the existing name, description, and assignments. Change the permitted fields and select Save. The Default Application allows changes to its name and description, but its assignments stay fixed.
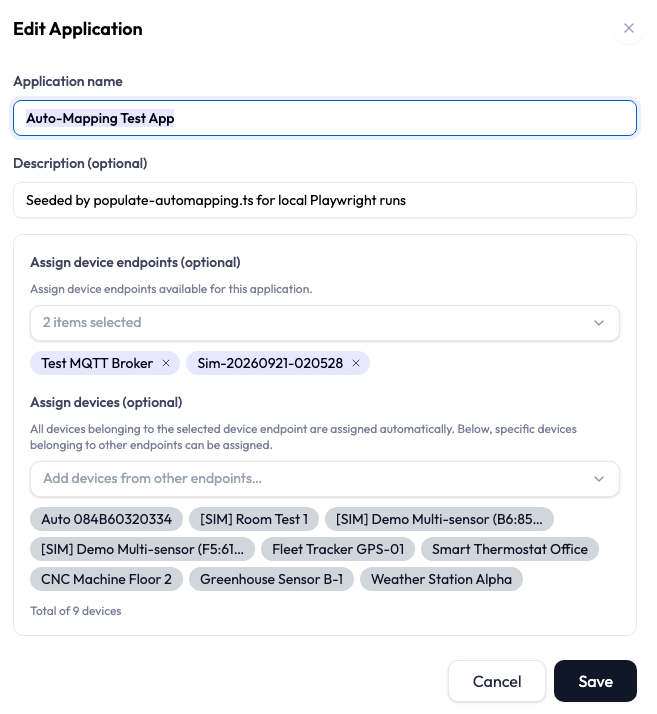
Reassigning devices and endpoints
- Removing an endpoint removes that assignment from the application. Assign any device that must remain individually or through another selected endpoint before saving.
- Removing an endpoint or device from an application does not delete it from the account or stop its data ingestion.
Delete
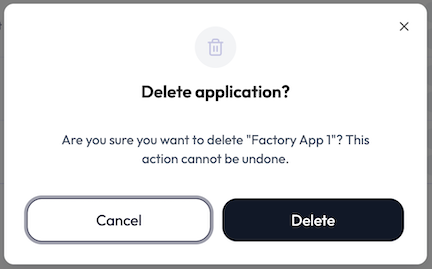
If you have application-delete permission, select Delete and confirm. This removes the application and its dashboards, widgets, Systems, alerts, notification groups, and tags. It does not delete the underlying devices or device endpoints from the account.
Roles and Permissions
An application role controls a user’s access within one application. It is separate from the user’s account role.
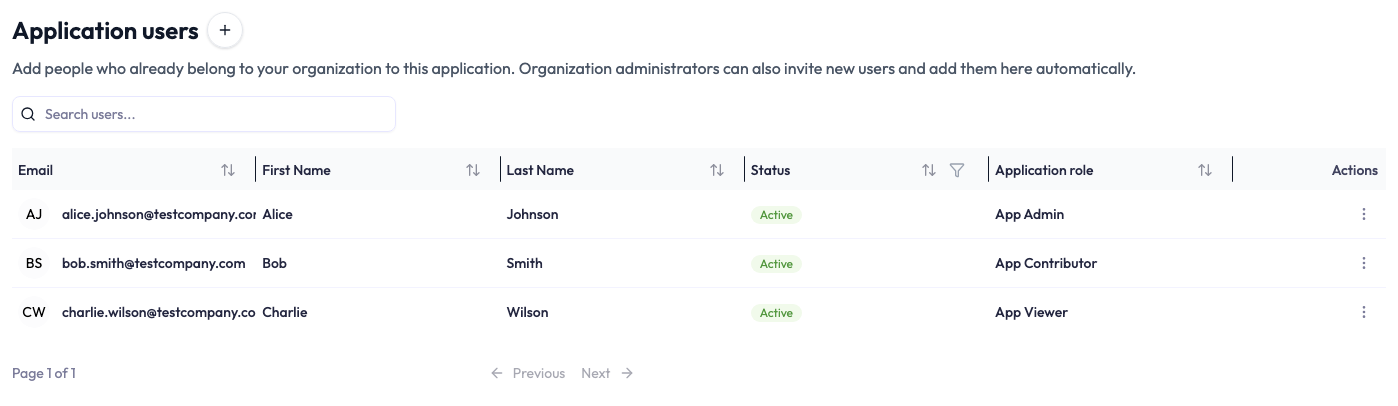
Available roles come from the account’s application-role configuration. Common labels and access patterns are shown below, but your roles may differ.
| Common application role | Typical access |
|---|---|
| Admin / Manager | Full application access, including member and role management. |
| Operator | Application access without member and role management. |
| Viewer | Read-only application access. |
- A user can have a different application role in each application.
- Account owners, account administrators, and users with the account-level manage-applications permission can access every application without a separate application role.
- From Administrator > User management, permitted users can add an existing account user and assign a role. Users who can create account users can also invite someone new.
Limits and Good to Know
These limits apply to Application details, assignments, and access.
| Item | Limit or behavior |
|---|---|
| Name | Required, unique within the Account, and up to 100 characters. |
| Description | Optional, up to 500 characters. |
| Assignments | Assign an Endpoint for all its current and future Devices, or assign individual Devices. A Device can belong to more than one Application. |
| Default Application | Includes all Account Devices and Endpoints. Its assignments cannot be changed. |
| Access | Users need the relevant permissions for each action. Creating or assigning resources to an Application does not grant another user access. |