
Endpoints & Devices
Endpoints & Devices is where data from your hardware enters NEQTO.ai. An Endpoint holds the connection settings and credentials your hardware uses. A Device is one piece of equipment sending data. An Attribute is one measurement from that device, such as temperature, humidity, or battery. Stored device data can then be used in dashboards, alerts, and analytics.
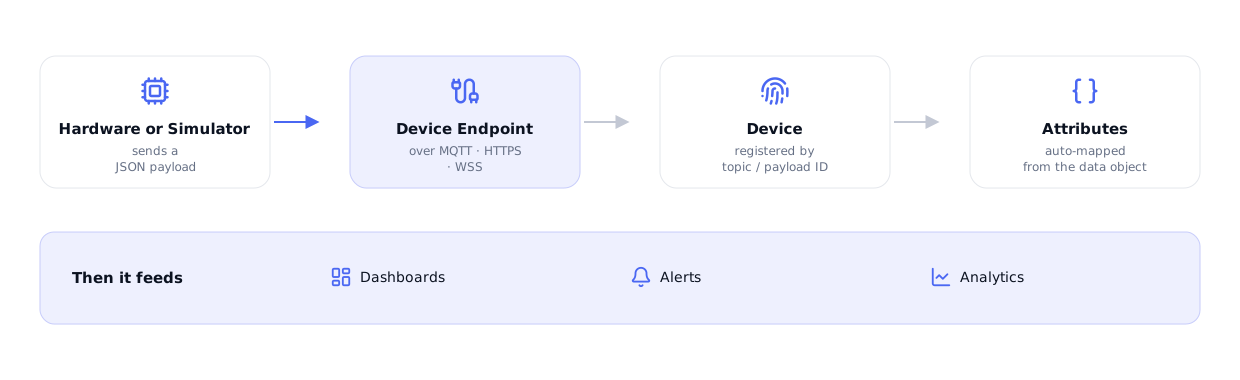
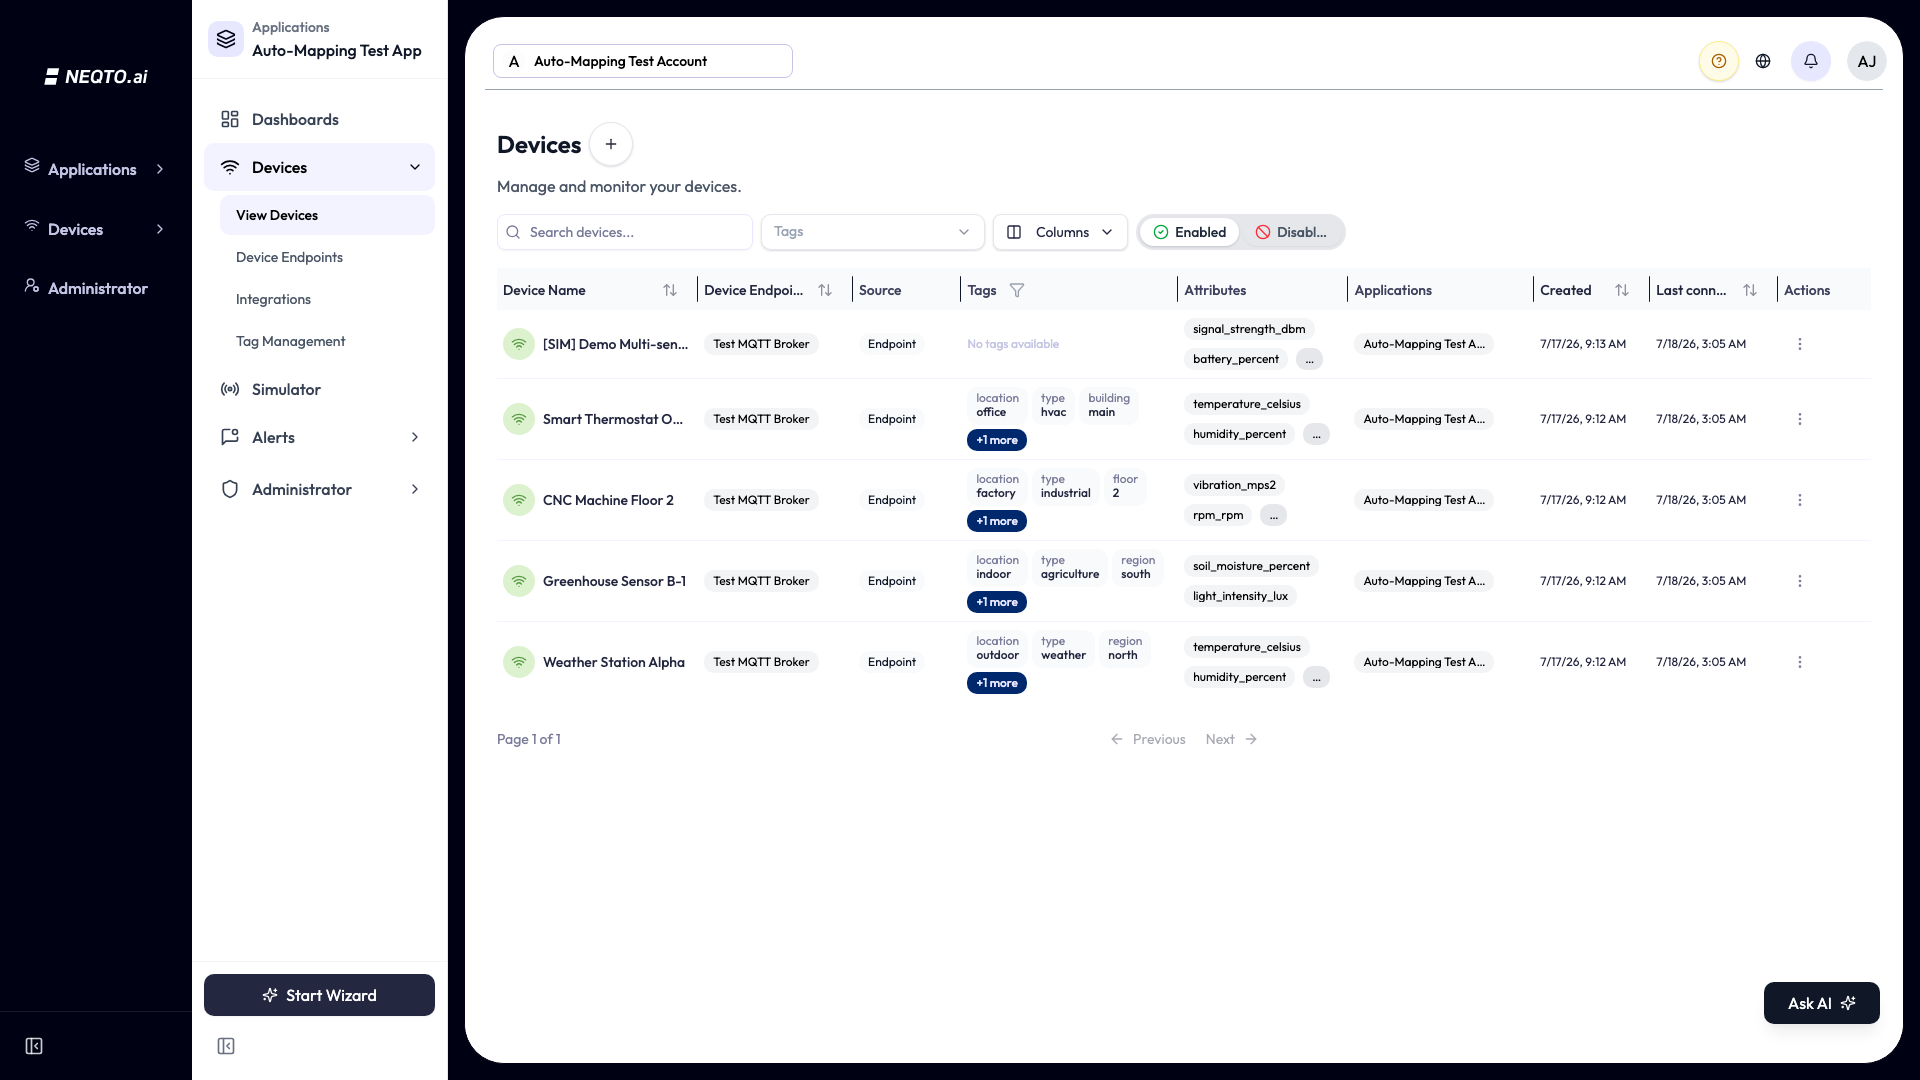
Data reaches NEQTO.ai in two ways. Most devices publish to a Device Endpoint, as shown above. A device can also be created from an Integration, which pulls in data from an external cloud service instead of receiving it from the device. Either way it becomes a Device with auto-mapped Attributes. Every device is labelled by its Source (Endpoint or Integration) so you can tell the two apart; see the Source column on the Devices list below.
Quick start
Use these steps to connect a device and confirm its first reading.
-
1Open an application and go to Device Endpoints. Click Add Device Endpoint and pick a connectivity type: MQTT, HTTPS, or WSS.
-
2Copy the credentials shown on the final step (Stream ID, host/URL, port, username, password, and the CA certificate). Use Download details to save them all, or copy each value with its own copy button.
-
3Open How to connect a device and use the recommended
neqtoai-stdexample or another supported JSON shape. No hardware yet? Create a Demo endpoint and use the built-in Simulator instead. -
4After NEQTO.ai processes the first valid message, the Device appears and mappable readings become Attributes. Open the device’s Device Data tab to confirm the stored values before using them in a dashboard or alert.
Device endpoints
An Endpoint holds one protocol and authentication configuration. Devices that publish through it are linked to it and appear in its details.
Connectivity types
You choose the type when you create the endpoint, and it cannot be changed afterward. The same goes for its authentication type.
| Type | Use it for | You receive |
|---|---|---|
| MQTT | Most IoT devices and gateways. Persistent, low-overhead connection. | Stream ID, broker URL, port, topic, username, password, and a CA certificate. |
| HTTPS | Devices, scripts, or services that push data with an HTTP request. | Stream ID, an ingestion URL, port, method (POST), a CA certificate, and (with Basic Authentication) a username and password. Max payload 1 MB per request. |
| WebSocket Secure (WSS) | Apps and gateways that keep a live WebSocket open and stream frames. | Stream ID, a secure WebSocket URL, port, a CA certificate, and (with Basic Authentication) a username and password. |
Each type also has an Authentication Type. For MQTT the choices are “MQTT with TLS (Recommended)” (username and password over an encrypted TLS connection, with a CA certificate) or “MQTT with no TLS” (username and password, unencrypted). For HTTPS and WSS the choices are “Basic Authentication” (username and password) or “None”. The older HTTP and WS variants have been retired.
Ways to add an endpoint
Add Device Endpoint first asks how you want to set the endpoint up. Every choice in the wizard, here and on the form that follows, has a ? that opens a short explanation of when it applies.
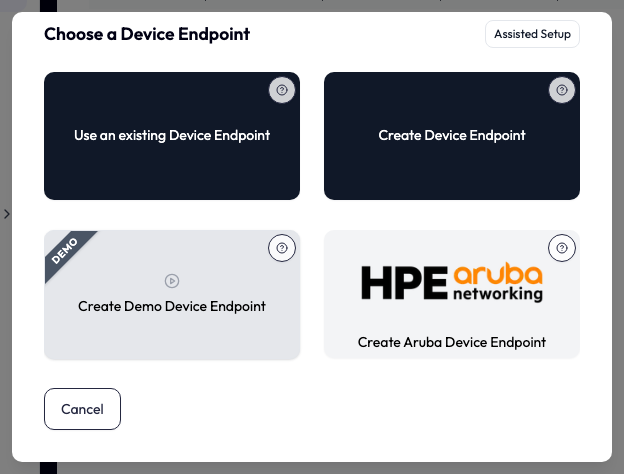
| Choice | When it applies |
|---|---|
| Use an existing Device Endpoint | The equipment speaks the same protocol as something already connected, so it reuses that endpoint’s credentials. Shown only when you already have an endpoint. |
| Create Device Endpoint | Equipment that is not sending data to the platform yet. |
| Create Demo Device Endpoint | Your hardware is not ready. A built-in Simulator feeds the endpoint instead, and nothing you build on it is wasted — real equipment can be connected later. |
| Create Aruba Device Endpoint | Your equipment is managed in Aruba Central. Signing in binds the endpoint to one Aruba group, and the devices in it report without per-device setup. |
Create an endpoint
Choosing Create Device Endpoint opens the form below.
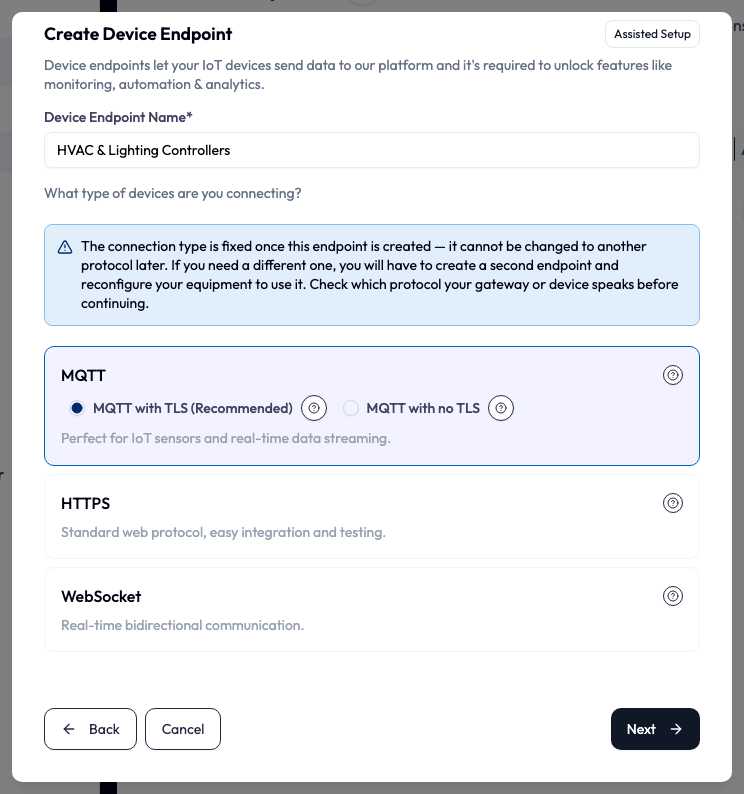
-
1Enter a Device Endpoint Name (required, up to 100 characters). The name must be unique within the account. You can also add a description of up to 500 characters.
-
2Pick the connectivity type (MQTT, HTTPS, or WebSocket) and, where there is more than one option, its authentication type. The connectivity type is fixed once created. To change it, you create a new endpoint.
-
3If you have permission to manage applications, you can assign the endpoint to applications so the right teams can see it.
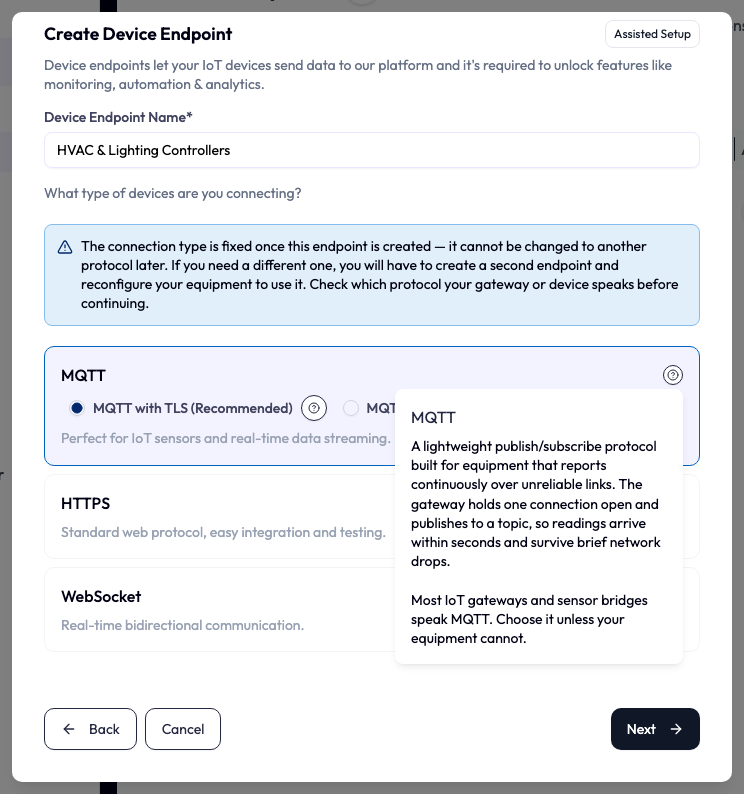
Endpoint access is permission-based. Viewing, creating, editing, and deleting endpoints are separate permissions at the account or application level, so an action may be hidden even when you can open the list.
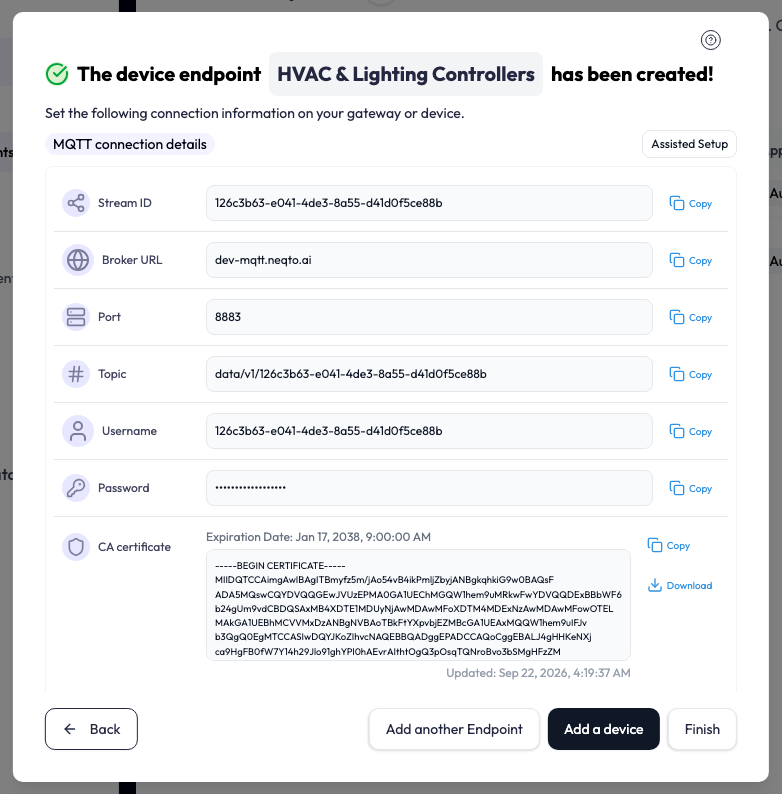
Assisted Setup
Every step of the endpoint wizard carries an Assisted Setup button that asks the assistant about the step you are on. The question is written and sent for you, and the answer arrives in the assistant panel beside the wizard. The button appears if you have permission to use the assistant. See Ask AI for what the assistant can do elsewhere in NEQTO.ai.
Sending data: payload guidance
NEQTO.ai accepts flexible JSON payloads and provides neqtoai-std as the
recommended, most predictable envelope. The endpoint wizard’s
How to connect a device helper shows this example tailored to your endpoint’s
protocol, with supported alternatives, a field reference, and troubleshooting tips.
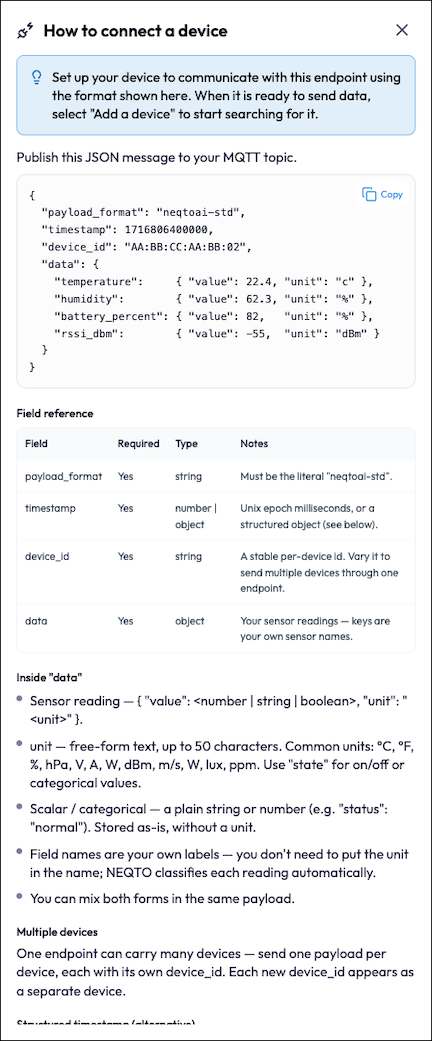
payload_format selects the standard format directly; without it, NEQTO.ai detects
the payload shape. If no timestamp field is present, NEQTO.ai uses the time the worker received
the message. A timestamp that parses outside the accepted range is skipped, and malformed
timestamps may also be rejected depending on how the device was identified. Omit the field if
you want to use receive time. Timestamps and time zones
covers the accepted forms, the range, and why to send UTC. Device identity can come from a
supported MQTT topic, a top-level or stable nested payload field, or the endpoint’s only linked
active device. The
data wrapper is optional: readings may be top-level or nested under an object
wrapper.
MQTT topic options
For an MQTT endpoint, the topic shown in the endpoint details is the recommended NEQTO.ai topic. You can publish to that topic as before, or use one of the supported vendor-native topic shapes below. Use the same endpoint username and password; you do not need to change the endpoint configuration.
Names in braces are placeholders: replace them with your values. For example,
losant/{deviceId}/state could be losant/freezer-17/state. The trailing
{...} shown for Azure means that an optional vendor suffix is accepted; do not
publish the braces literally.
| Topic style | Accepted topic pattern | Device identity and telemetry rules |
|---|---|---|
| NEQTO.ai default | data/v1/{endpointId} or data/v1/{endpointId}/{...} |
Optional suffix levels are accepted but do not identify the device. Use a stable payload identifier, or, when exactly one active device is linked, the automatic fallback. |
| Losant | losant/{deviceId}/state |
deviceId identifies the device. Only the state channel is
ingested.
|
| Azure IoT device | devices/{deviceId}/messages/events/{...} |
deviceId identifies the device. Azure property-bag suffixes are accepted.
|
| Azure IoT module | devices/{deviceId}/modules/{moduleId}/messages/events/{...} |
deviceId identifies the device; moduleId is also extracted.
|
| Tasmota | tele/{deviceId}/SENSOR or tele/{deviceId}/STATE |
deviceId identifies the device. Other Tasmota channels are not ingested.
|
| ChirpStack | application/{applicationId}/device/{devEui}/event/up |
devEui identifies the device. Only up events are ingested.
|
| The Things Stack | v3/{applicationId}/devices/{deviceId}/up |
deviceId identifies the device. |
| ThingsBoard | v1/devices/me/telemetry |
The topic has no device identifier. Use a stable payload identifier for multiple devices; a single linked device can use the automatic fallback. |
| Generic hierarchy | sites/{siteId}/devices/{deviceId}/telemetry |
deviceId identifies the device; siteId is also extracted.
|
When a supported topic contains a device identifier, that value becomes the device’s External ID
and takes precedence over device_id in the payload. Without a topic identifier,
NEQTO.ai can use a stable top-level or nested payload identifier, or the endpoint’s only linked
active device. Literal channel segments such as state, SENSOR, and
up are case-sensitive.
MQTT topics may be at most 512 characters. A device identifier captured from a supported topic may be at most 128 characters. Control characters are rejected in topics and topic-derived identifiers; printable vendor punctuation and Unicode are accepted.
Third-party names identify compatible topic formats only and do not imply affiliation with or endorsement by those third parties.
Recommended payload example
This neqtoai-std JSON is the recommended starting point. Equivalent supported JSON
shapes are accepted. Reading keys are your own sensor names and may be top-level or nested under
any object wrapper; you do not need to encode units into the names.
{
  "payload_format": "neqtoai-std",
  "timestamp": 1716806400000,
  "device_id": "AA:BB:CC:AA:BB:02",
  "data": {
    "temperature":     { "value": 22.4, "unit": "c" },
    "humidity":        { "value": 62.3, "unit": "%" },
    "battery_percent": { "value": 82,   "unit": "%" },
    "rssi_dbm":        { "value": -55,  "unit": "dBm" }
  }
}
Envelope fields
| Field | Status | Type | Notes |
|---|---|---|---|
payload_format |
Recommended | string |
A routing hint. "neqtoai-std" selects the standard format directly. When
absent, the payload shape is detected automatically.
|
timestamp |
Recommended | number, string, or object |
Unix epoch seconds or milliseconds, or ISO 8601 in UTC. When absent, worker receive time
is used. Out-of-range timestamps are skipped; malformed timestamps can also be rejected.
The structured object below is supported with neqtoai-std. See
Timestamps and time zones.
|
device_id |
Recommended | string or number | A stable per-device id. This becomes the device’s External ID in the UI. On a supported MQTT topic containing a device identifier, the topic value takes precedence. When absent, NEQTO.ai can inspect a stable nested payload identifier. Automatic fallback is used only when the endpoint has one active device. |
data |
Recommended | object or key/value array | Your sensor readings. The wrapper is optional: readings may be top-level or nested under any object wrapper. Recognized identifiers, timestamps, and metadata are excluded. |
At the top level, envelope field names match case-insensitively after underscores and hyphens
are removed. Common device-ID aliases include device, mac,
serial, sn, dev_eui, imei, and
external_id. Timestamp aliases include ts, time,
datetime, reported_at, and epoch. Wrapper names are not
special; nested objects and arrays are inspected for readings and stable identifiers.
device_id, device, uuid, mac_address,
serial_number, dev_eui, imei, bdAddr, and
hwId are recognized as identity metadata rather than readings. Generic nested
fields such as id, sender, and destination are not
assumed to identify a device. At the top level, sn, ts,
time, index and sequence are always reserved as metadata;
nested fields with those short names may be treated as sensor readings.
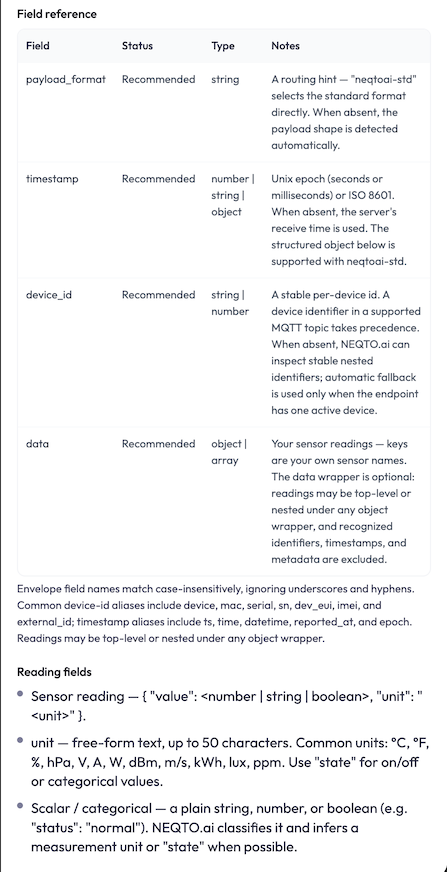
Reading fields
-
Sensor reading:
{ "value": <number | string | boolean>, "unit": "<unit>" }. -
Unit: free-form text, up to 50 characters. Common units:
°C,°F,%,hPa,V,A,W,dBm,m/s,kWh,lux,ppm. Use"state"for on/off or categorical values. -
Scalar / categorical: a plain string, number, or boolean, for example
"status": "normal". NEQTO.ai attempts to classify it and infer a measurement unit or"state". If it cannot find a valid mapping, the message reports that no readings could be extracted. - Naming: field names are your own labels. You do not need to put the unit in the name; NEQTO.ai classifies each reading automatically.
- Mixed: you can mix the reading and scalar forms in the same payload.
Multiple devices through one endpoint
One endpoint can carry many devices. Give each message a stable, unique device identifier in a
supported MQTT topic or payload (for example, device_id, serial, or a
strong nested identifier). Without an identifier, automatic fallback only applies when exactly
one active device is linked to the endpoint.
A top-level JSON array can carry a batch of device objects. NEQTO.ai processes each array item as a separate reading, so each item should contain or inherit an unambiguous device identity and valid measurement fields.
Structured timestamp (neqtoai-std only)
With payload_format set to "neqtoai-std", you can use this object
instead of an epoch timestamp. The offset uses the ±HHMM convention. Use valid
calendar and offset values; unsupported values may be rejected or resolve to a different date
than intended.
"timestamp": {
  "year": "2026", "month": "05", "day": "26",
  "hour": "14", "minute": "30", "second": "00",
  "offset": "+0900"
}
Timestamps and time zones
The timestamp field is the time a reading was measured. NEQTO.ai stores the reading
at that time, and charts plot it there. Send it in UTC. Unix epoch time is the safest choice
because it carries no time zone at all. An ISO 8601 string that ends in Z works as
well.
| What you send | Example | How NEQTO.ai reads it |
|---|---|---|
| Unix epoch seconds | 1716806400 |
Recommended. A number under ten billion is read as seconds. |
| Unix epoch milliseconds | 1716806400000 |
Recommended. A larger number is read as milliseconds. Both examples are 27 May 2024, 10:40 UTC. |
| ISO 8601 in UTC | "2024-05-27T10:40:00Z" |
Read exactly as written. |
| ISO 8601 with an offset | "2024-05-27T19:40:00+09:00" |
Converted to UTC with the offset you give. The structured object above works the same way. |
| ISO 8601 with no offset | "2024-05-27T10:40:00" |
Read as UTC, whatever time zone the device meant. See the warning below. |
| No timestamp | Field left out | The time NEQTO.ai received the message. |
Epoch values also work as numeric strings, such as "1716806400". Microsecond and
nanosecond values are not supported, and NEQTO.ai skips readings that use them.
If the device has no reliable clock, leave the field out. NEQTO.ai then uses the time it received the message, which is accurate to within network delay. Readings that a device holds while offline and sends later all get the time they arrive, not the time they were measured.
Timestamps must fall between 1 January 1970 UTC and 24 hours ahead of NEQTO.ai’s clock. Out-of-range readings are skipped and reported in real-time ingestion feedback. Other valid readings in the message are still stored.
-
In New York, a timestamp without an offset is 4 or 5 hours early. Daylight saving time also
creates one-hour gaps or overlaps in local timestamps; a fixed
-05:00offset is wrong during daylight saving time. - In Tokyo, omitting the offset places readings 9 hours in the future. They fall within the 24-hour limit, so NEQTO.ai accepts them without warning.
Set the device clock to UTC, or send Unix epoch time. If you send local time, use the UTC offset that applied when the reading was measured.
How to deliver it
| Protocol | How to send |
|---|---|
| MQTT | Publish the JSON message to your MQTT topic. |
| HTTPS | Send the JSON as an HTTP POST to your endpoint URL. |
| WSS | Send the JSON over your WebSocket connection as a text frame. |
Troubleshooting
| Symptom | Likely cause |
|---|---|
| Connection or TLS handshake fails | Wrong host or port, or connecting without TLS. Check the endpoint details on the credentials summary. |
| Authentication is rejected | The username or password does not match, or the endpoint was deleted or its credentials were changed. |
| Connected, but no device appears | Publishing to the wrong or unsupported topic or URL, using a non-telemetry channel, or the payload could not be parsed. On the default MQTT topic, the endpoint ID must match. |
| Device appears, but readings are missing | No mappable sensor fields were found, the readings were empty or malformed, or the payload contained only identifiers, timestamps, and metadata. |
neqtoai-std is the
recommended starting point, while other supported JSON shapes are accepted.
Managing endpoints
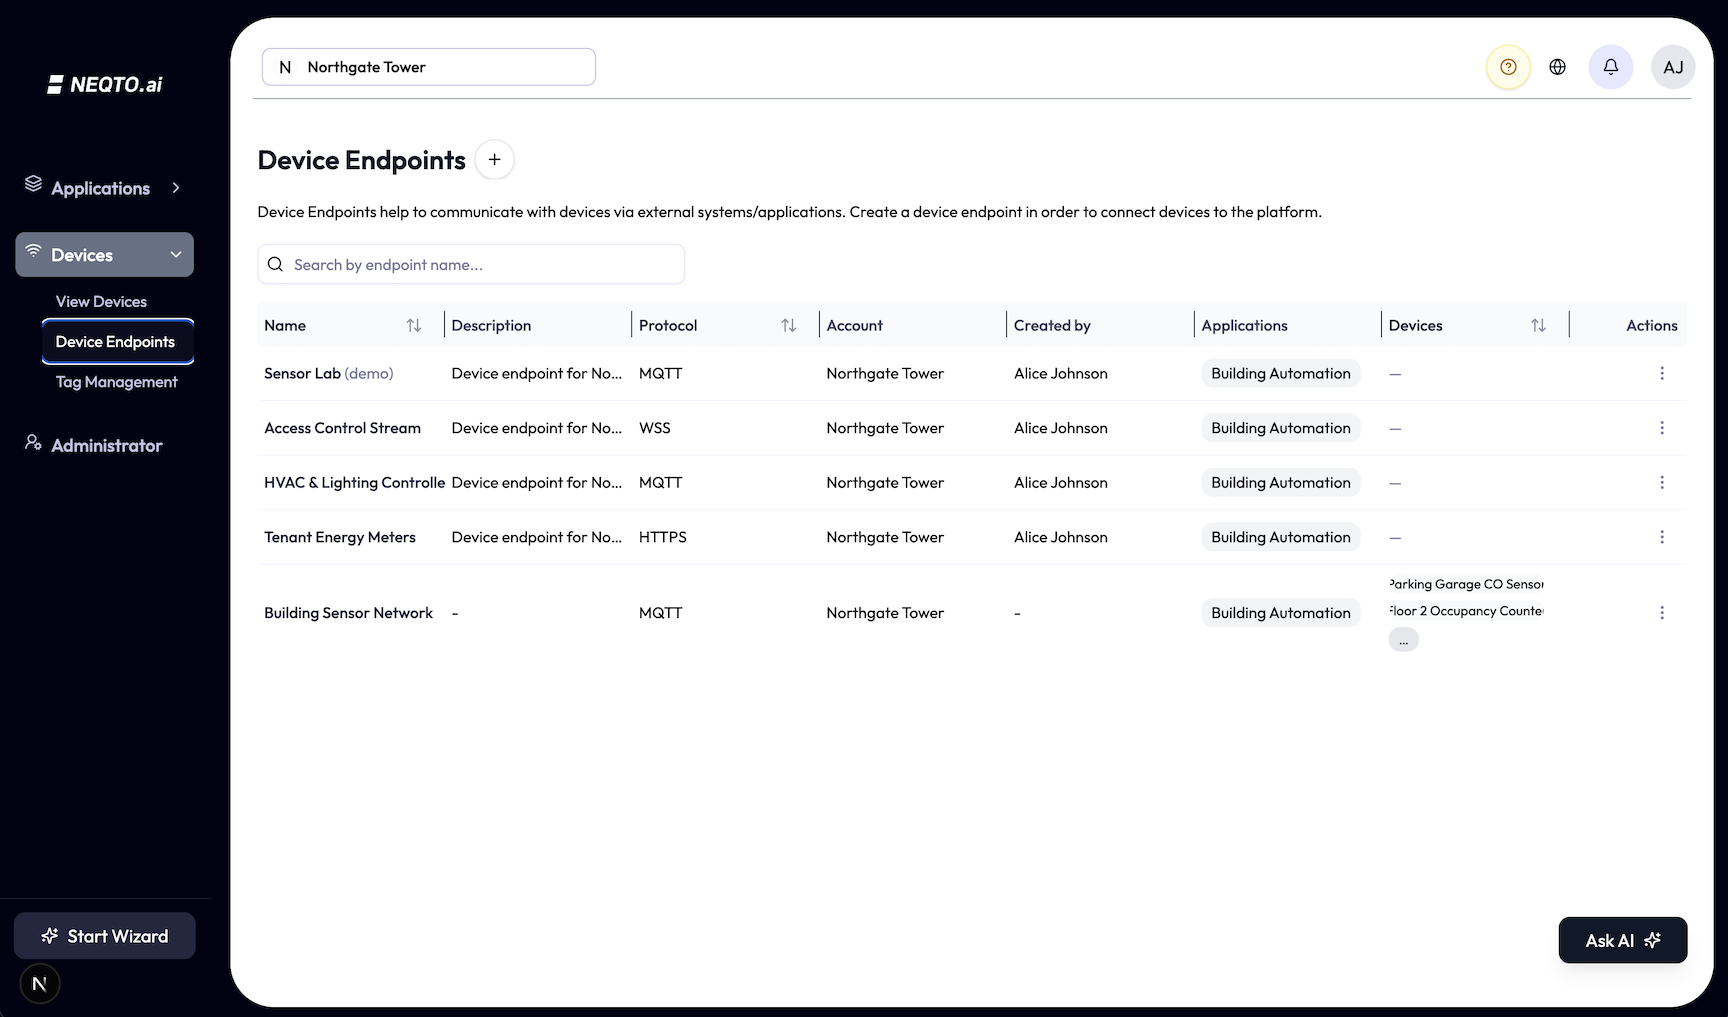
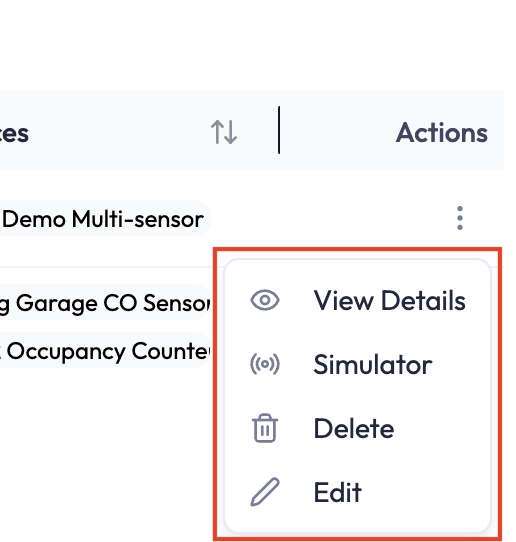
Each row in the Device Endpoints table has an actions menu. Click the ⋮ (three-dot) icon in the Actions column on the right of the row to open it. This menu contains the actions your permissions allow, including Edit and, for demo endpoints, Simulator.
- Search the list by endpoint name.
- View Details re-opens the credentials summary and lists every device currently publishing to the endpoint.
- Simulator opens the built-in Simulator for demo endpoints inside an Application. It appears for Account owners, users with full access to every Application in the Account, and members with both View simulator and Run simulator operations in that Application. See Built-in Simulator for its controls.
- Edit changes only the name and description. Connection settings stay fixed.
- Delete disables the endpoint and its credentials, stops its demo simulator if applicable, and removes the endpoint’s device and application links. It does not delete the Device records. A device linked through another source can remain usable, but a device that relied on this endpoint stops receiving through it. Deleted endpoints cannot be restored in the UI; create a new endpoint and update the hardware with its new credentials.
Real-time ingestion feedback
While an endpoint’s details or one of its linked device pages is open, notifications in the top-right show how new messages move through ingestion. They let you confirm a new connection or see why a message failed without refreshing the page.
The stages
A payload that ingests cleanly reports these stages as it moves through processing:
| Notification | What has happened |
|---|---|
| Message received. Deciphering the format. | The message arrived, and NEQTO.ai matched it to this endpoint. |
| Deciphering the message format. | NEQTO.ai is reading the payload and normalizing it. |
| Device recognized. Extracting readings. | NEQTO.ai matched the message to a device and parsed its readings. |
| Reading stored successfully. | The readings are saved. They now feed dashboards, alerts and analytics. |
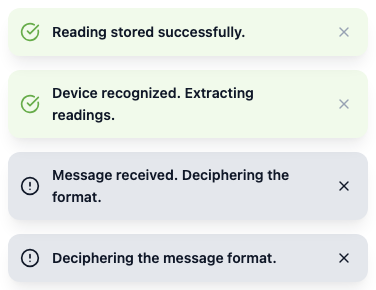
Each stage announces itself once per visit. A device publishing every few seconds would otherwise fill the screen, so later messages do not repeat successful stages. Reopen the endpoint or device page to see a fresh set.
Message received. Deciphering the format. is specific to MQTT. Over HTTPS and WSS, feedback starts at Deciphering the message format, which means the same thing.
When a message is rejected
A rejected message produces a full-size error notification. Repeated failures of the same kind for the same device are deduplicated, so a recurring problem does not raise a new notification for every message. A second device failing the same way gets its own.
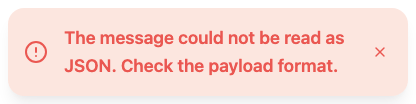
| Message | What to do |
|---|---|
| No device id found. Add a device_id field to the payload, or include the id in the topic. | Nothing in the message identified a device, and the endpoint has no single device to fall back on. Add a stable identifier, as described under Sending Data. |
| The message could not be read as JSON. Check the payload format. | The payload is not valid JSON, or the MQTT topic it arrived on is not one this endpoint accepts. Check both against Sending data. |
| The message was received but no readings could be extracted from it. Check the payload fields. | The device was recognized, but no valid reading mapping was found. The payload may contain only identifiers, timestamps, and metadata, or its reading fields may be empty, malformed, or unclassifiable. Add or correct the measurement fields and resend. |
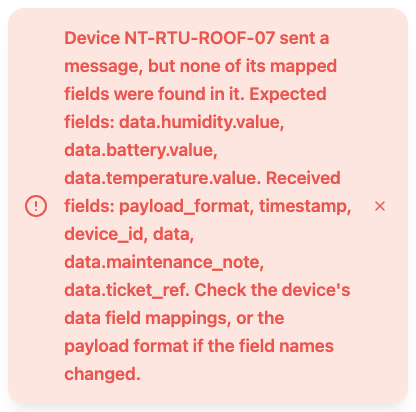
| Device … sent a message, but none of its mapped fields were found in it. — followed by Expected fields and Received fields lists | The same failure as the row above, on a message NEQTO.ai could attribute to a device — usually a firmware or payload change that renamed the reading fields. The expected and received field lists tell you which names moved. They are left out only when there is nothing to compare, such as a device with no mapped fields yet. |
| A reading from device … was skipped because its timestamp is outside the accepted range (or … is more than N minutes in the future, … is too far in the past, … is not a valid date) | The device’s clock is wrong, or its timestamp is in a format NEQTO.ai read differently than you intended. The future case means the timestamp is more than 24 hours ahead, usually from a clock set to the wrong date or a microsecond epoch value. The past case means a date before 1970. The message names the device. Fix the clock, or leave the timestamp out and let arrival time be used. See Timestamps and time zones. |
| This message shape failed N times and is paused for H hours. Fix the payload and it will retry. | NEQTO.ai sets aside a payload shape that keeps failing identification, so one misconfigured device cannot occupy the pipeline. Correct the payload. The pause lifts on its own, and a corrected shape counts as a new one. |
| Data ingestion is paused because your plan is not active. | Nothing is being stored for the account. An expired plan or a lapsed grace period stops ingestion. Contact support to reactivate the account. |
| Device limit reached for your plan; this device was not created. | A new device tried to register and could not. Remove devices you no longer need, or move to a plan with a higher device limit on the Billing tab; see Administration. If your account has no Billing tab, contact support to raise the limit. |
| The system is briefly overloaded and dropped a message. It will catch up shortly. | A burst filled the intake queue and this message was dropped. It is not stored or retried; later messages can still be processed. If this happens repeatedly, reduce or stagger the devices’ publish rate. |
| A reading was received but could not be saved due to a temporary storage error. It was not stored. | The write failed, and this reading is not retried automatically. A later message may succeed. Contact support if the error continues. |
Devices
A Device represents one piece of equipment. NEQTO.ai can create it from the first identified payload, or you can create it manually to register hardware before it begins sending data.
The list view
- Connectivity shows next to each device name: green Wi-Fi when connected, red when not.
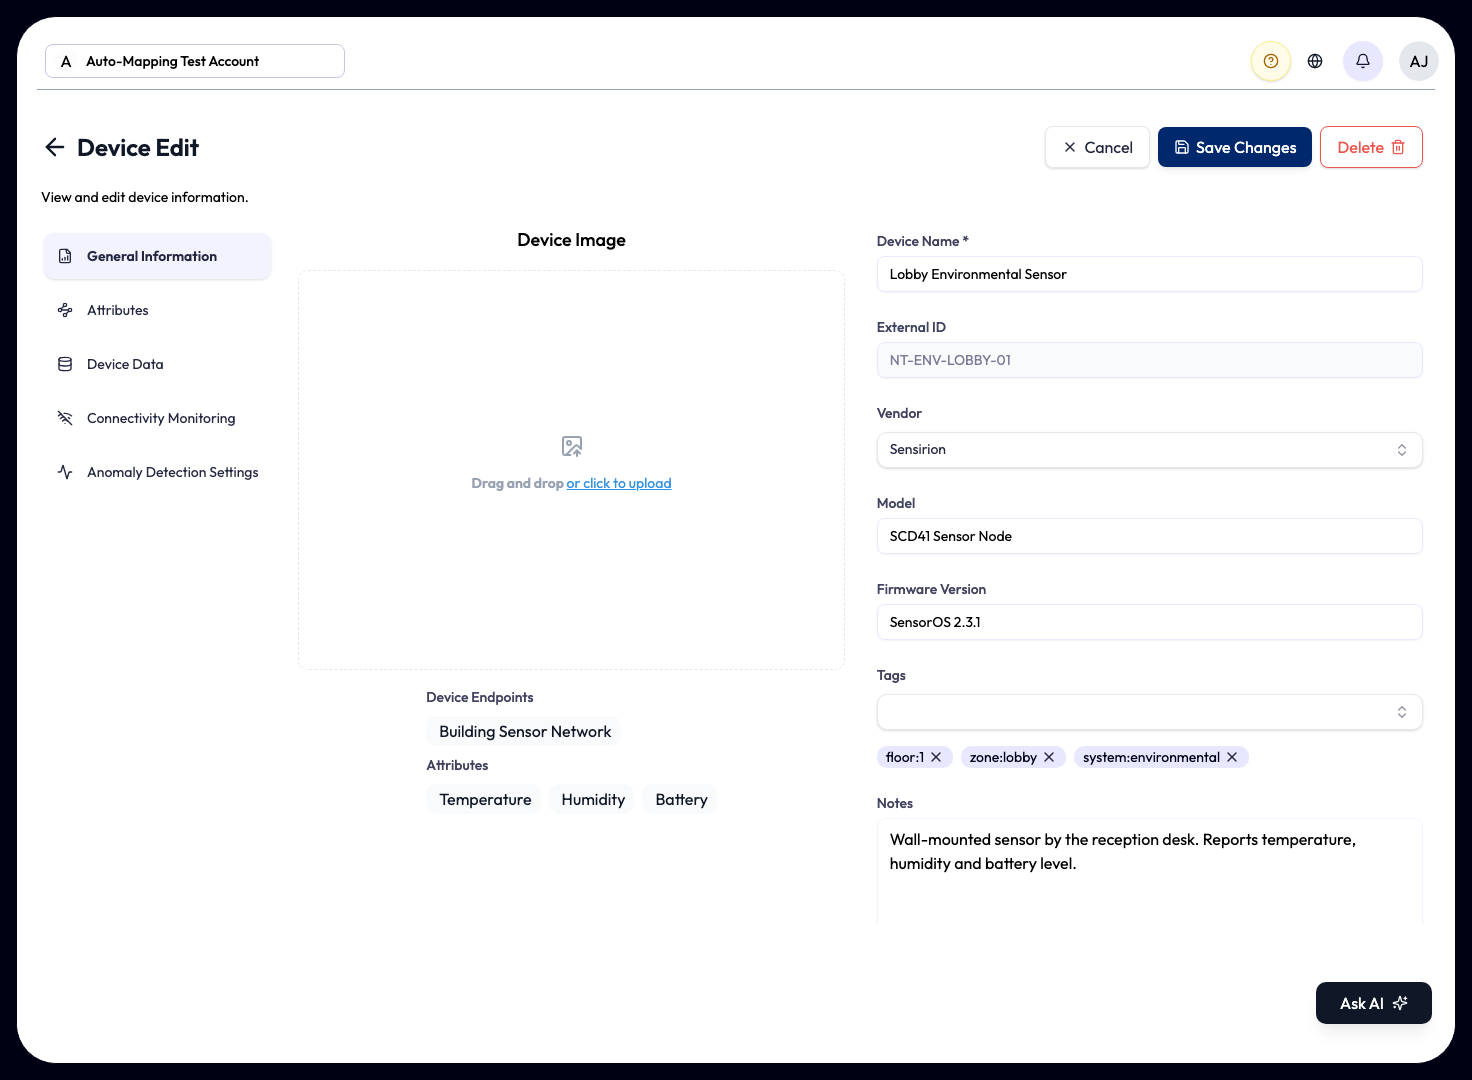
- Open alerts show as a small red count between the connectivity icon and the name, in an application’s Devices list when you can view alerts. It counts the device’s alert events that are still New, In Progress or Pending in that application, reads 99+ above 99, and is absent when nothing is open. Click it to open Alert History in a new tab, filtered to that device and to those three statuses. The account-level list has no count, because Alert History belongs to an application.
- Source shows how each device entered NEQTO.ai: an Endpoint badge for devices that publish to a Device Endpoint, or an Integration badge (with the integration’s name beside it) for devices pulled in from an external service through an Integration. This column is shown by default.
- Search by name, and filter by tag from either the toolbar Tags filter or the Tags column header.
- Switch between Enabled and Disabled devices with the toggle. Disabled devices are ones you have soft-deleted.
- Sort by most columns, including Last connected to surface quiet devices.
- Choose your columns with the Columns control. Several (External ID, Vendor, Model, Account, Notes, Profiles, and Systems in application scope) are hidden by default, and your choice is remembered per application.
- Profiles shows how each device’s data is parsed: EnOcean (with its EEP), BLE, or STD. This column is hidden by default.
- Dashboards opens Related dashboards for that device, listing every dashboard with a widget showing it and how many widgets on each. Check it before you change or remove a device. The same view is on the row’s actions menu. Device list and alert list widgets do not count as showing a device; the Dashboards page covers the rest.
Add a device manually
Select Create a Device above the Devices list if you have create permission. In the form, External ID, Device Name, Vendor, Model, and at least one Tag are required. You can also enter firmware, firmware version, gateway, notes, and an image, or use Scan QR Code to fill available details. Device names are limited to 100 characters, and External IDs to 255.
When the account already holds as many devices as its plan allows, the device is not created and Device Limit Reached says You have reached the maximum number of devices allowed. Remove devices you no longer need, or move to a plan with a higher device limit on the Billing tab; see Administration.
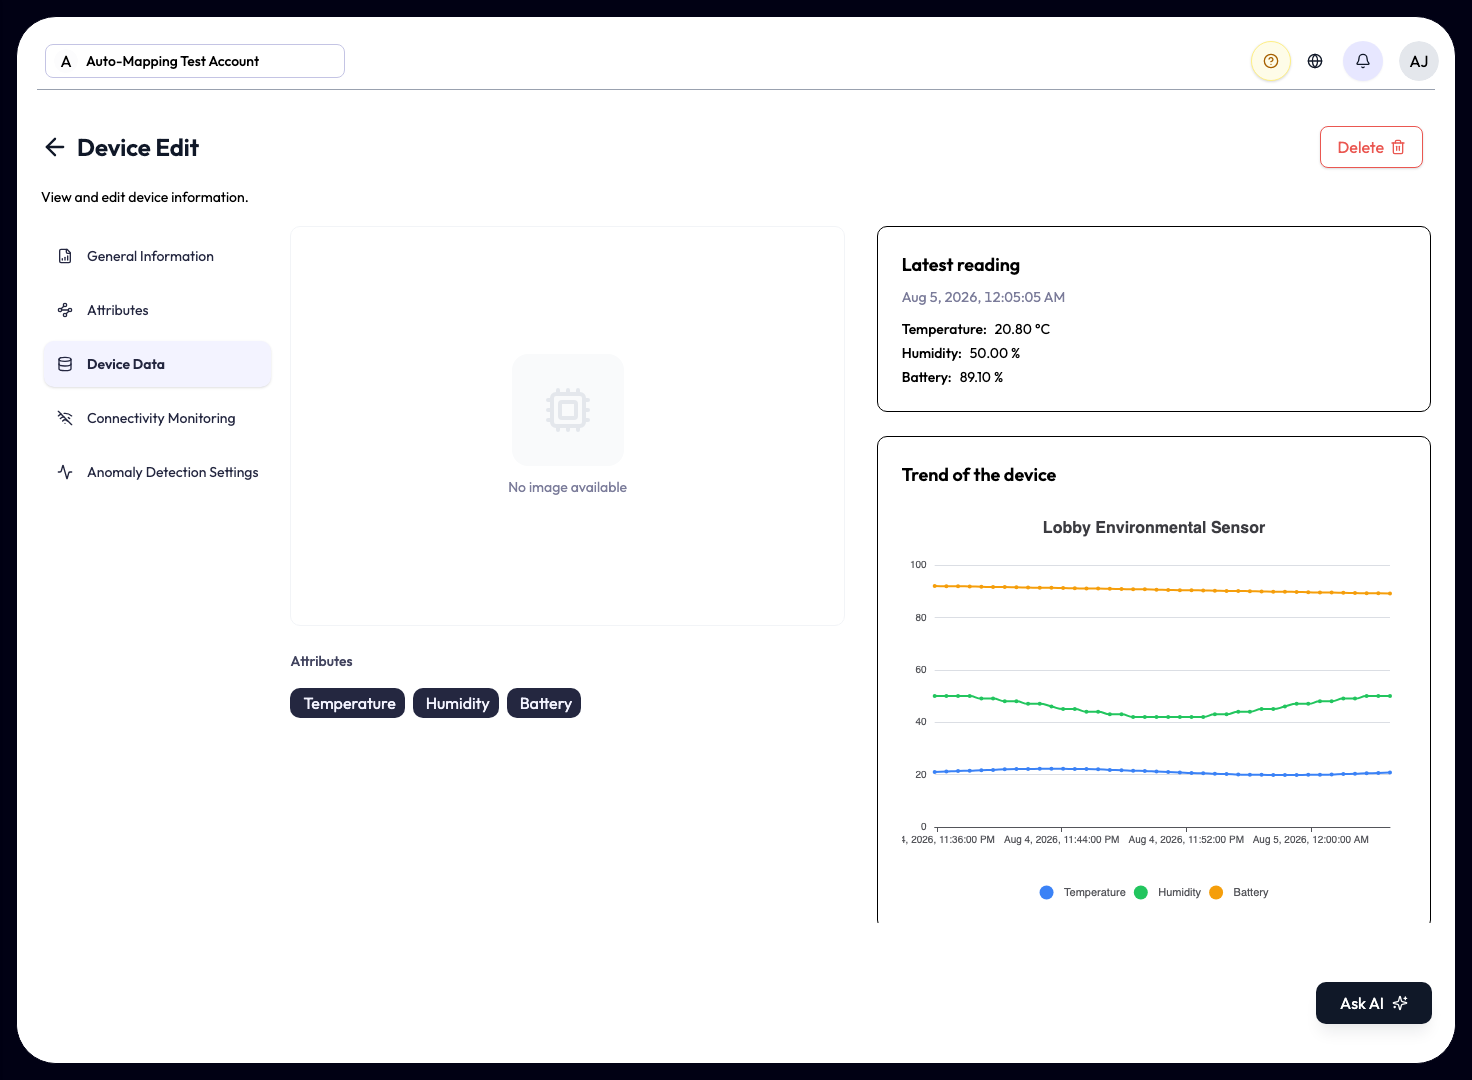
Device Edit page
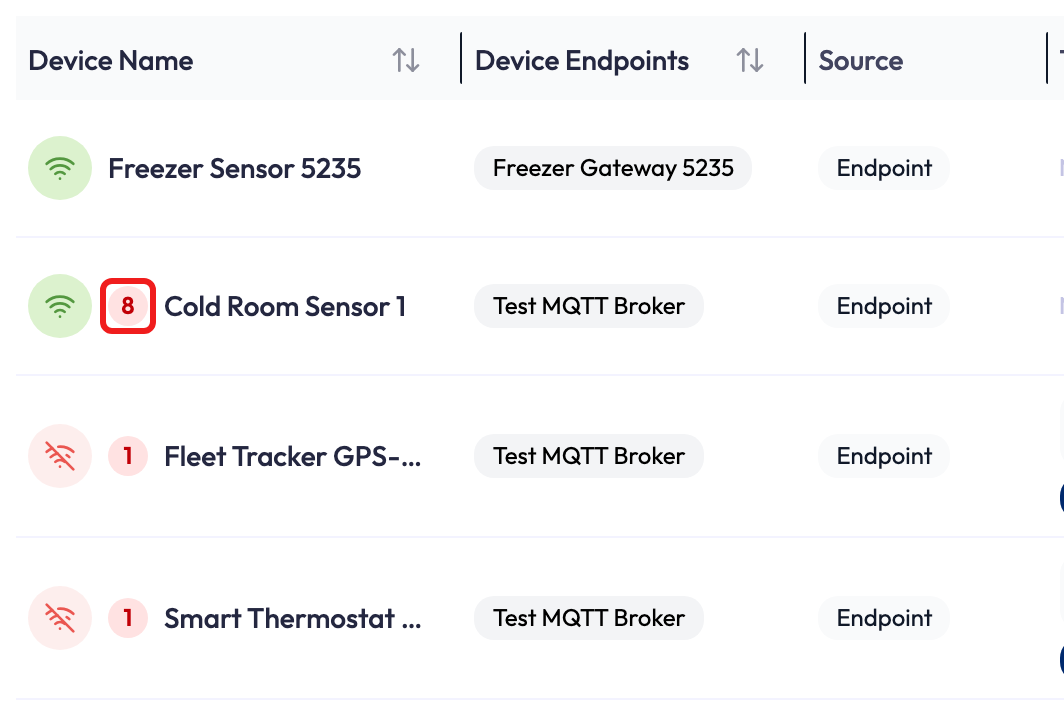
Click a device row, or choose View Details or Edit from its actions menu, to open Device Edit. You can review the device on this page and, with edit permission, change its settings. It has these tabs:
| Tab | What’s there |
|---|---|
| General Information | Editable metadata: device name, vendor, model, firmware, tags, notes, and image. External ID is read-only. EnOcean devices also show an editable EEP selector (you pick the code from a dropdown). |
| Attributes | The auto-detected measurements for this device. See below. |
| Device Data | The live and recent payload values arriving from the device. |
| Connectivity Monitoring | Shown only inside an application: the device’s offline-timeout and connectivity-alert settings. See the Alerts page. |
| Anomaly Detection Settings | Per-sensor anomaly detection for this device, from the account-level Devices list or inside an application. Warm-up progress and the sigma setting appear in both. The anomaly alert switches appear only inside an application, because alerts belong to one. See the Alerts page. |
How connectivity status is decided
The same tab lets you turn connectivity alerts on or off and choose in-app, email, SMS, and payload-push behavior. SMS requires a phone number on the recipient’s profile and SMS opt-in. These controls are read-only without device edit permission.
Connectivity changes update the Devices list and the device page while those screens are open; you do not need to refresh them.
Searching for a device
The device pickers on alerts and widgets search as you type. An empty result and a search that could not run are two different things, and they say so. Search failed. Please Retry. means the lookup never completed, which is not evidence that the device is missing. Retry it before you conclude anything about the device.
Organizing devices
-
Tags are key:value labels (for example
floor:3orsite:warehouse-A) you can filter the whole list by. See the Tags section for managing them. - Vendor and Model are device metadata you can show as columns and sort by; use Tags when you want to filter or group devices.
- Add to application from a device’s actions menu (on the main Devices list) to control which teams see it.
Disabling, restoring, and deleting
Disable is reversible; Permanently Delete is not. Disabling an active device moves it to the Disabled list and keeps its External ID reserved. Switch the list toggle to Disabled to find it. From there, choose Enable to restore it, or Permanently Delete to remove it and release its External ID. Permanent deletion is available only after the device is disabled.
Disabling leaves the device’s alerts alone. Permanent deletion does not:
- Threshold alerts lose every trigger and unlock condition that named the device, and the device leaves their device lists. The alerts themselves stay. One that still has conditions on other devices keeps running on those. One left with no trigger condition shows a Device unassigned badge on the Threshold Alerts list until someone assigns an active device. Any approved payload push whose trigger conditions change needs approval again, even if the alert still has conditions on other devices. Its Action reads Config changed, and it cannot send payloads until you approve and enable it again.
- Connectivity and anomaly alerts covering the device are deleted.
- Alert History stops showing the device’s events once it is disabled, and they do not come back after permanent deletion.
- The device also leaves its applications, Systems, tags and widget series. The widgets themselves stay.
To replace a faulty device, update its alert conditions and restore any affected payload pushes before permanently deleting it:
-
1Register the new device and add it to every application that uses the old one.
-
2Open Threshold Alerts in each of those applications, open each alert that uses the old device, switch its trigger and unlock conditions to the new device, then save it.
-
3Open Actions in each application. Reapprove affected pushes that were previously approved, and re-enable those that were previously enabled.
-
4Return to the Disabled list and permanently delete the old device.
Changing a condition’s device removes any calculation on it, so add those again for the new device. The Alerts page covers the badge.
Enabling a device rechecks whether the same device name is now in use on one of its linked endpoints, and the account’s device limit if its plan has one. If either check fails, the device remains disabled until you resolve the conflict.
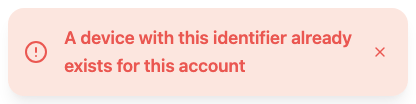
When an External ID is already in use
A device’s External ID is unique across your account, so creating a second device on an identifier that is already taken is refused. You meet this most often when creating a device from an integration’s sample, or through the API.
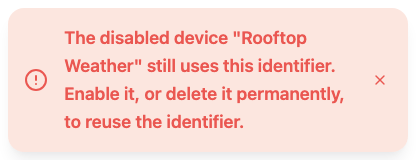
A disabled device can cause a less obvious collision. Disabling keeps the External ID reserved, but disabled devices are hidden from the default list. The error names the disabled device and gives both options: enable that device, or permanently delete it to release the identifier.
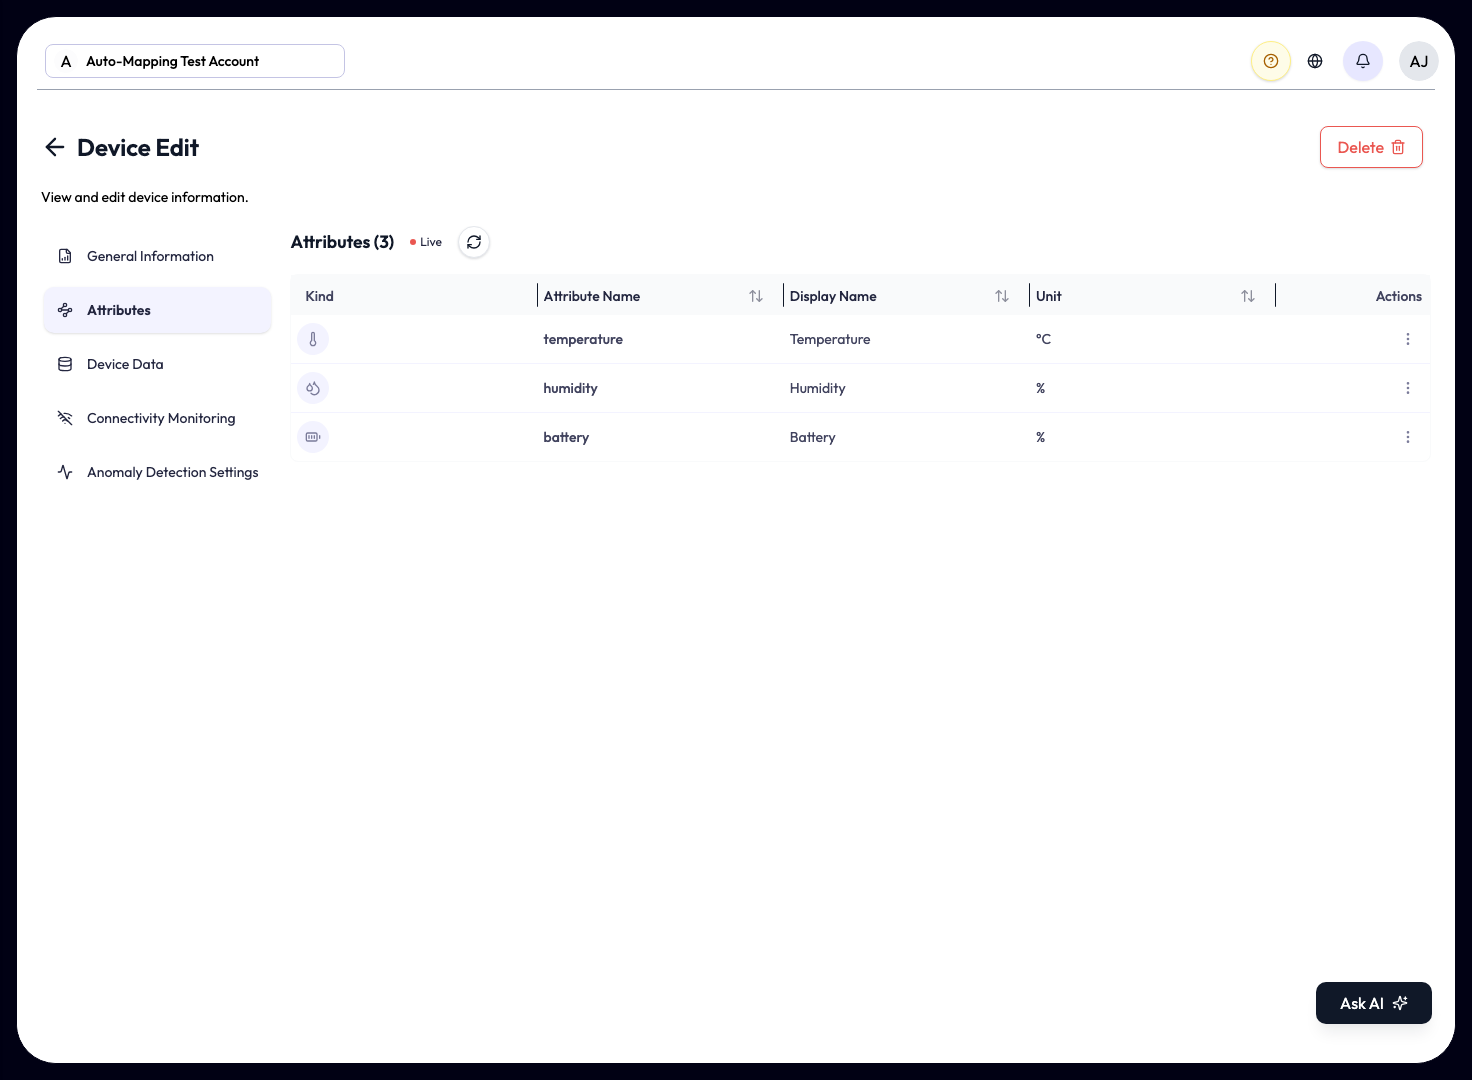
Attributes
An Attribute is one mapped measurement from a device, such as temperature, humidity, battery, or occupancy. Attributes supply the named values used by widgets, alerts, and analytics.
data wrapper is not required. You do not create or
delete Attributes manually; they follow valid mappings from the data. A new payload structure
may require classification before its fields can be mapped. Later messages with the same mapped
structure reuse those mappings.
What you can edit
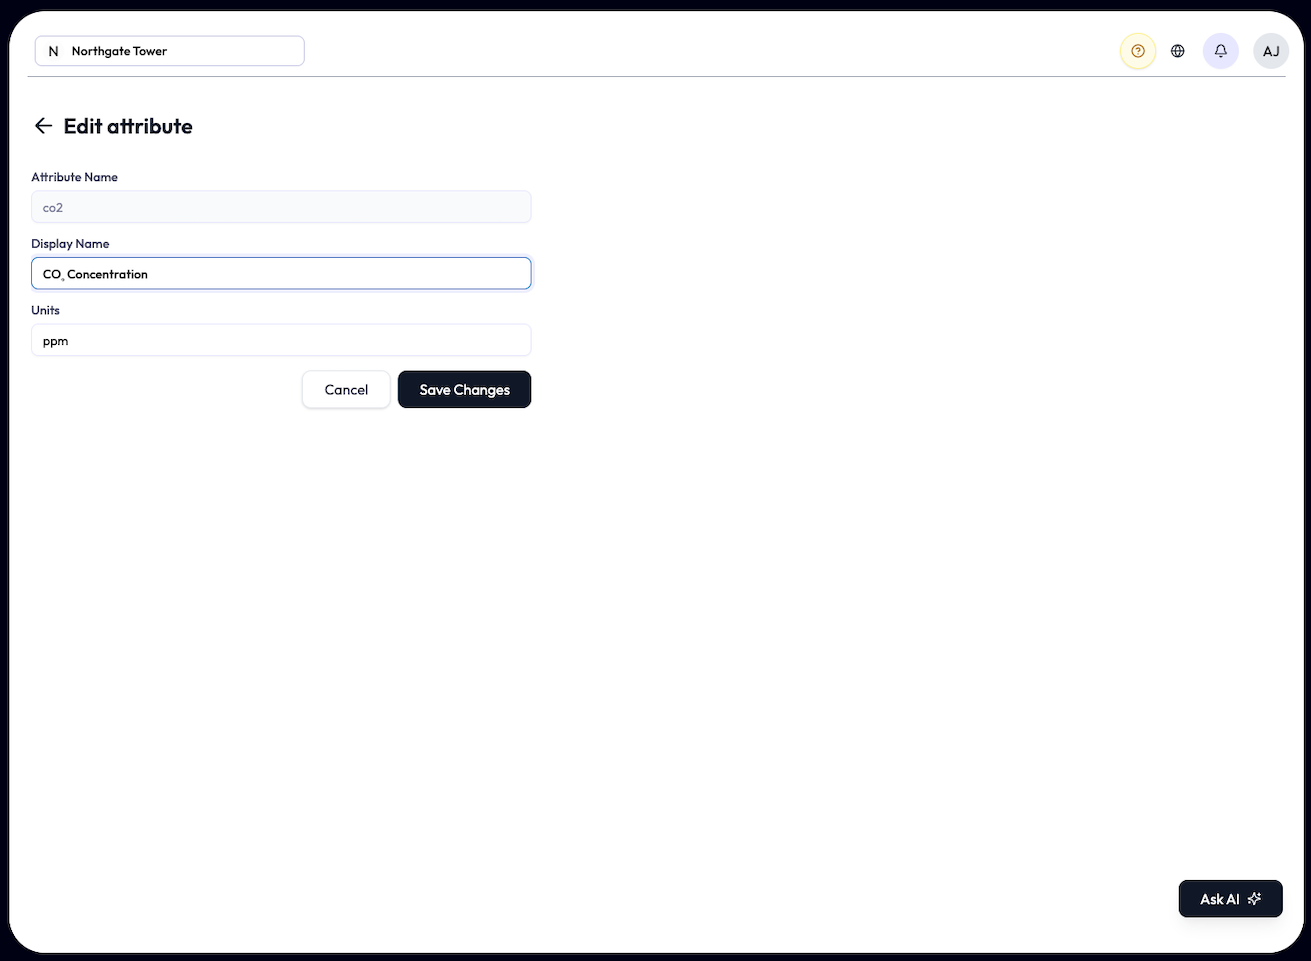
This screen does not change the detected JSON path or raw Attribute Name. To change how an Attribute is presented, open its actions menu and choose Edit:
-
Display Name: a friendly label (required, up to 255 characters), for example
rename
t1to “Supply air temp”. -
Units: the unit shown with the value (up to 50 characters), for example
°C,%, orhPa.
The underlying Attribute Name is fixed and shown read-only on the edit form.
Display Name and Units are account-scoped: a change applies everywhere that attribute appears across your account, for every user (the raw unit sent in the payload stays as the fixed mapping key; only the display unit shown in the UI changes). Permission to edit Attributes can be granted at the application level as well as the account level.
Demo endpoints and the simulator
A Demo endpoint lets you generate data without hardware. Its built-in Simulator publishes sample Device readings through the endpoint, so you can check payload mapping and build dashboards and alerts before connecting equipment.
Open the Simulator from a demo endpoint’s Simulator row action, or from Simulator in the application sidebar. Built-in Simulator covers adding simulated Devices, creating them with AI, and every Simulator control.
Limits and operational details
These limits affect endpoint configuration, ingestion, and connectivity monitoring. Your plan also sets a monthly payload allowance.
| Limit | Value |
|---|---|
| HTTPS payload size | 1 MB per request |
| HTTPS request rate |
Limited by client IP and endpoint. The service default is 100 requests per 15 minutes,
but deployments can override it. Read the RateLimit-* response headers for
the active window and remaining requests.
|
| MQTT topic length | 512 characters maximum |
| MQTT topic-derived device identifier | 128 characters maximum; control characters are not accepted |
| Connectivity timeout | 10 min minimum |
| Endpoint name and description | 100 characters for the name; 500 characters for the description |
-
Keep device identity stable. Use a supported topic identifier or payload
field such as
device_id. If the chosen identifier changes, NEQTO.ai treats the hardware as a new device. -
neqtoai-stdis recommended, not required. It selects the most predictable path directly; payloads withoutpayload_formatare detected and normalized automatically. - Endpoint type is permanent. Decide MQTT, HTTPS, or WSS up front.
- Quiet devices look offline. Match each device’s connectivity timeout to how often it actually reports.
- Keep payload structures consistent. Reusing the same field paths and value forms lets later messages reuse existing Attribute mappings. A changed structure may require new fields to be classified.
- MQTT ingestion monitors for stalled broker delivery. If the worker remains connected but stops receiving messages, it restarts its broker session automatically. This requires no device configuration change. Delivery of messages sent during the interruption still depends on the device’s MQTT QoS and session settings.