
Systems
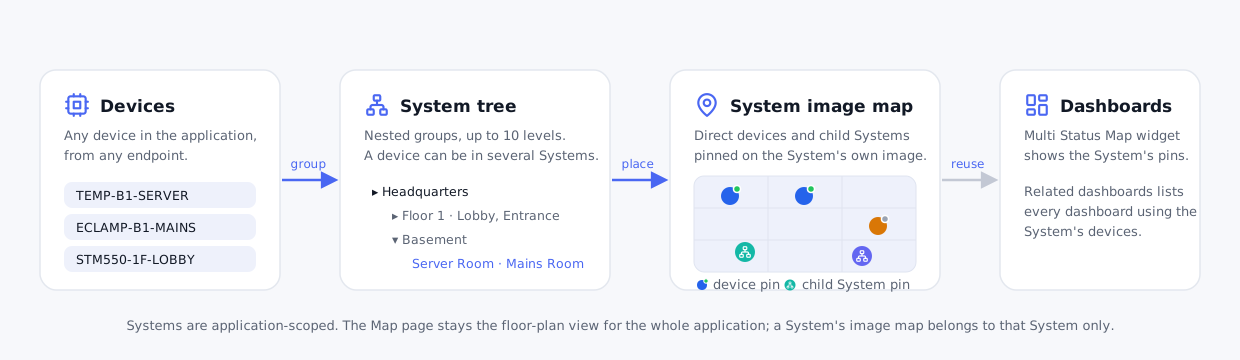
A System is a named, hierarchical group of devices. A System can represent a site, building, machine, robot, or fleet. It has its own image canvas for placing its members. Systems can nest. For example, a headquarters can contain floors, and a floor can contain rooms. Each level shows its direct device count.
A System tree and its images can form a digital twin of the physical equipment. The hierarchy records how equipment is arranged on site, and each System’s image shows where its devices are located. The same view combines that layout with live device data.
What a System is
These four related features serve different purposes.
| Concept | What it answers |
|---|---|
| Application | Who can see what. The top-level container for devices, dashboards, alerts and Systems. Systems live inside an application and never span two. |
| Tag |
What kind of thing is this. A flat key/value label on a device (for example
type=temperature). Tags filter; they have no hierarchy and no image.
|
| Map widget | Where is this reading right now. A dashboard widget: Multi Status › Map pins individual device attributes on one uploaded image, and Multi Status › World Map places devices by latitude and longitude. A Map widget belongs to a dashboard and carries its own pins; it can also show a System’s image and placed members instead. See Dashboards. |
| System | What belongs together. A nested group of devices with its own image map for placing its members and its child Systems. A device can belong to several Systems at the same time. |
Where Systems live
Systems are application-scoped. Open an application and pick Systems in the application sidebar, under Devices.
What you can do depends on your role’s Systems permissions:
| Permission | Lets you |
|---|---|
| Systems: read | See the Systems page and each System’s detail page. Without it the page is hidden entirely. |
| Systems: create | Create top-level Systems and child Systems. |
| Systems: update | Rename, edit the description, move, change the image, add or remove devices, and save pin positions. |
| Systems: delete | Delete a System (and, with it, its descendants). |
Listing or changing which devices belong to a System also needs Devices: read, because the membership screens show device details. If you have Systems access but not device access, a System’s image map shows only its child-System pins. Related dashboards also requires Dashboards: read and Widgets: read. Open alert counts appear only with permission to view alerts.
The tree page
The Systems page displays a tree. Each row is a System. Expand a row to see its child Systems and the devices that belong directly to it.
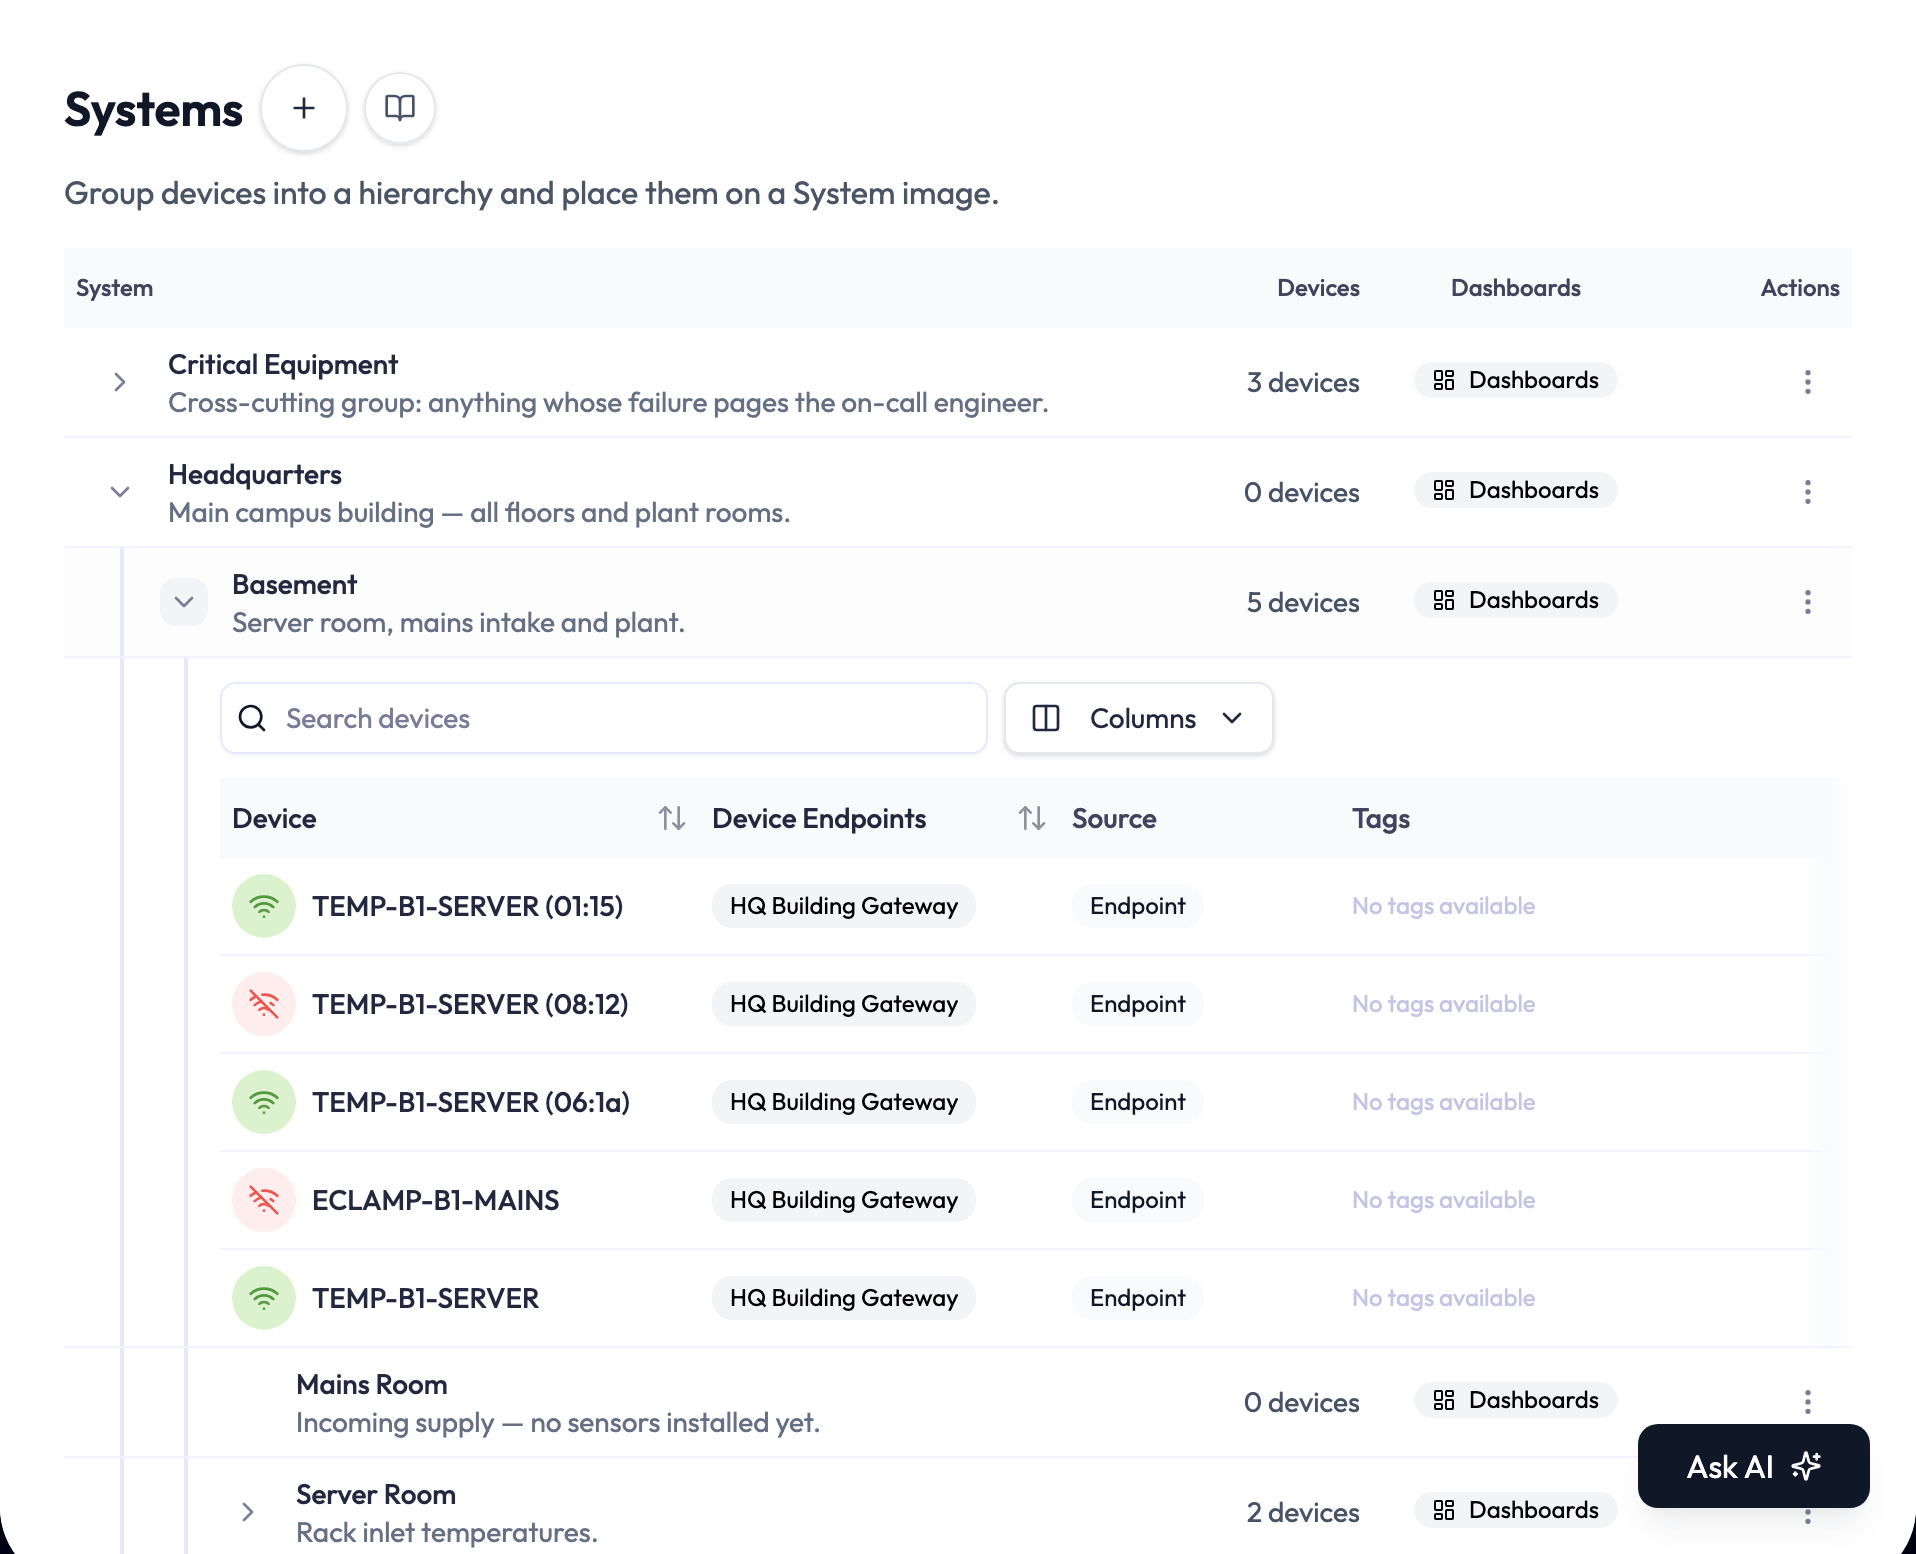
| Column | What’s there |
|---|---|
| System | The name and description. Click the name to open the System’s detail page; click the chevron to expand or collapse the branch. A red count before the name means open alert events; see below. |
| Devices | How many devices belong directly to that System (child Systems count their own). |
| Dashboards | Opens Related dashboards for that System (see below). |
| Actions | The row menu: Add child System, Edit, Move and Delete. |
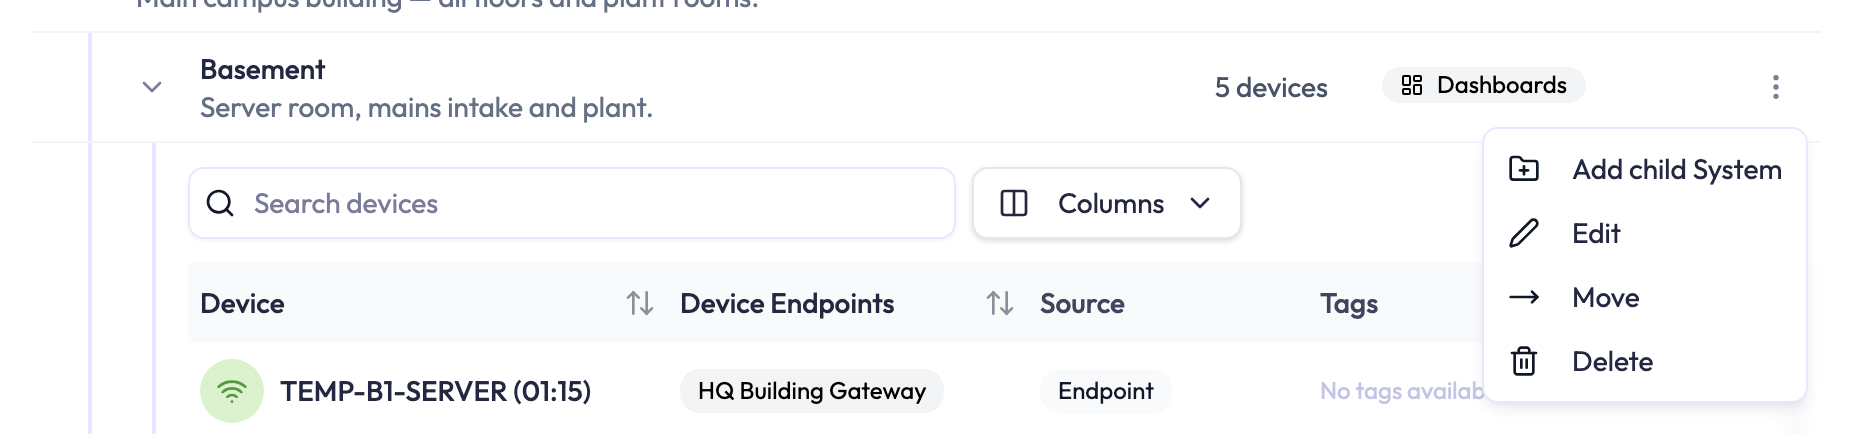
Large branches load in pages. When a System has more children than fit in one request, a Load more row appears at the end of the branch. An expanded System shows its direct devices in a searchable table with the same columns as the device list.
Open alert counts
The red badge counts New, In Progress, and Pending events. It is hidden when the count is zero and shows 99+ above 99. Hover for the exact count.
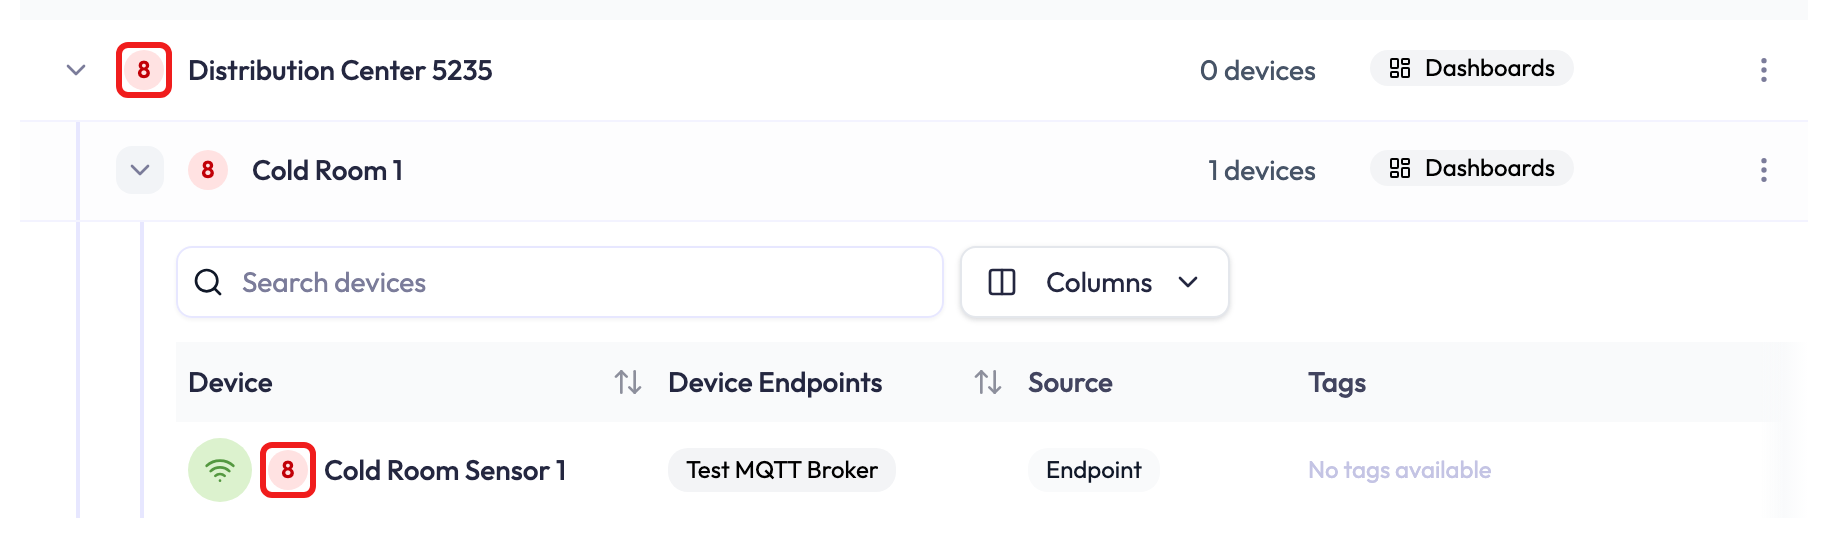
| Count on | What it counts | Clicking it opens |
|---|---|---|
| A System row | Open events involving any device in that System or in any System beneath it. An event that involves several of those devices counts once. | The application’s Alert History in a new tab, filtered to those devices and to the three open statuses. |
| A device row | Open events involving that device in this application. | Alert History in a new tab, filtered to that device and to the three open statuses. |
The System link carries at most 100 devices. For a subtree with more devices than that, Alert History can list fewer events than the count. Alert History itself is covered on Alerts.
Create, edit, move, and delete
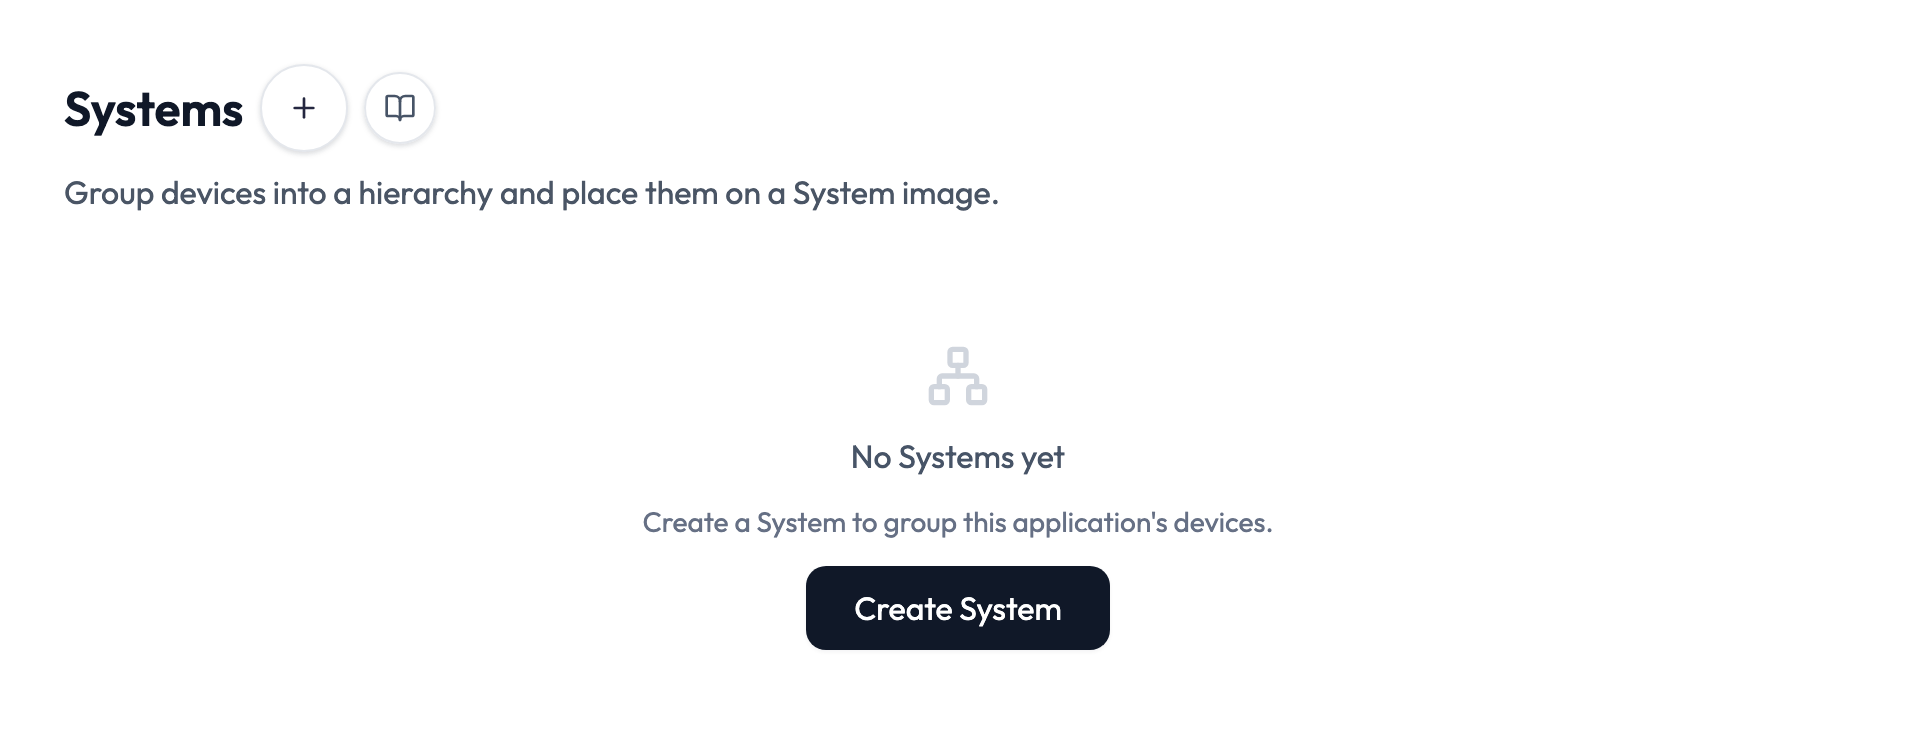
All four start on the tree page, from the + button beside the title or from a row’s action menu. Names, nesting depth, and image-map pins each have a rule worth knowing first.
Create a System
-
1Click the + button next to the page title for a top-level System, or Add child System in a row’s action menu to nest one under it.
-
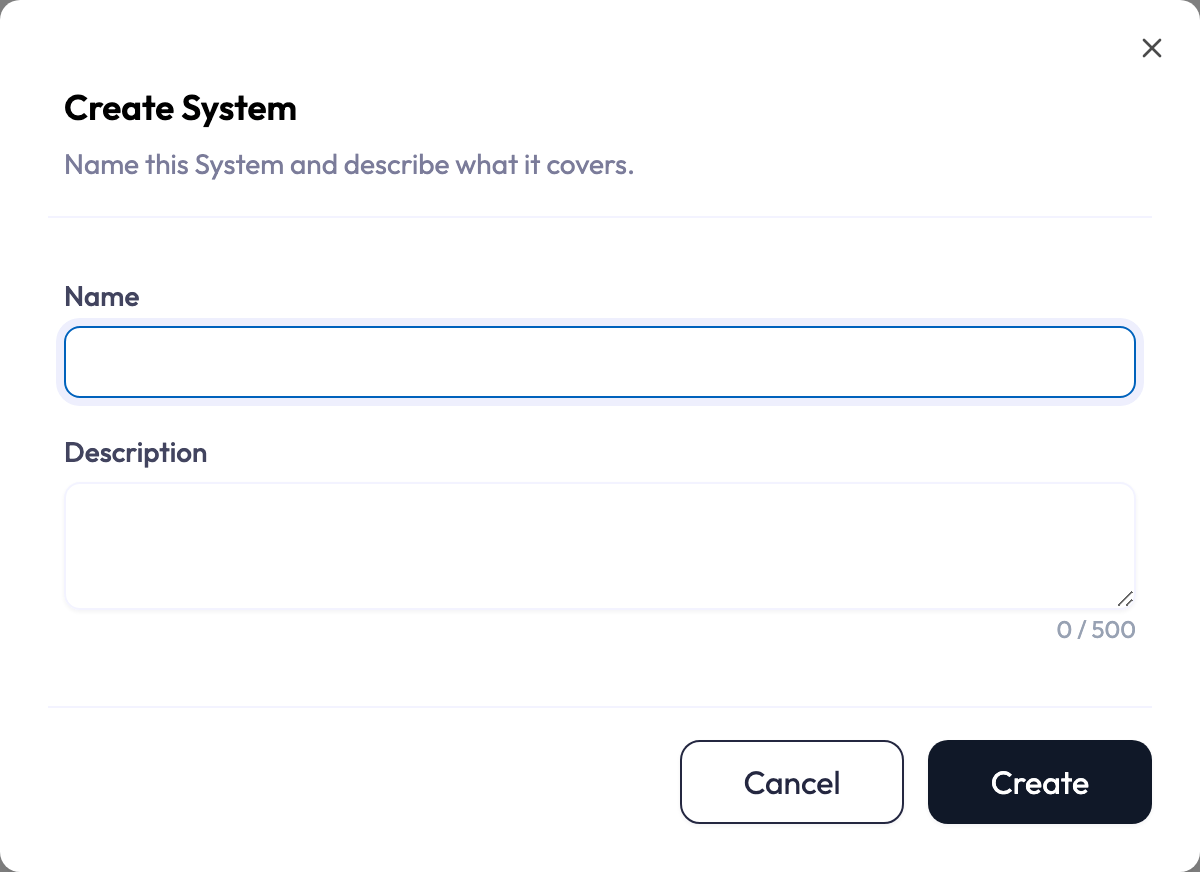
2Enter a required name of up to 100 characters. Names must be unique among sibling Systems. Two children of the same parent cannot share a name, but Systems under different parents can. For example, two floors can each have a System named Server Room.
-
3Add an optional description of up to 500 characters. It appears under the name in the tree and on the detail page.
Edit
Edit changes the name and description. The same sibling-uniqueness rule applies to renames.
Move
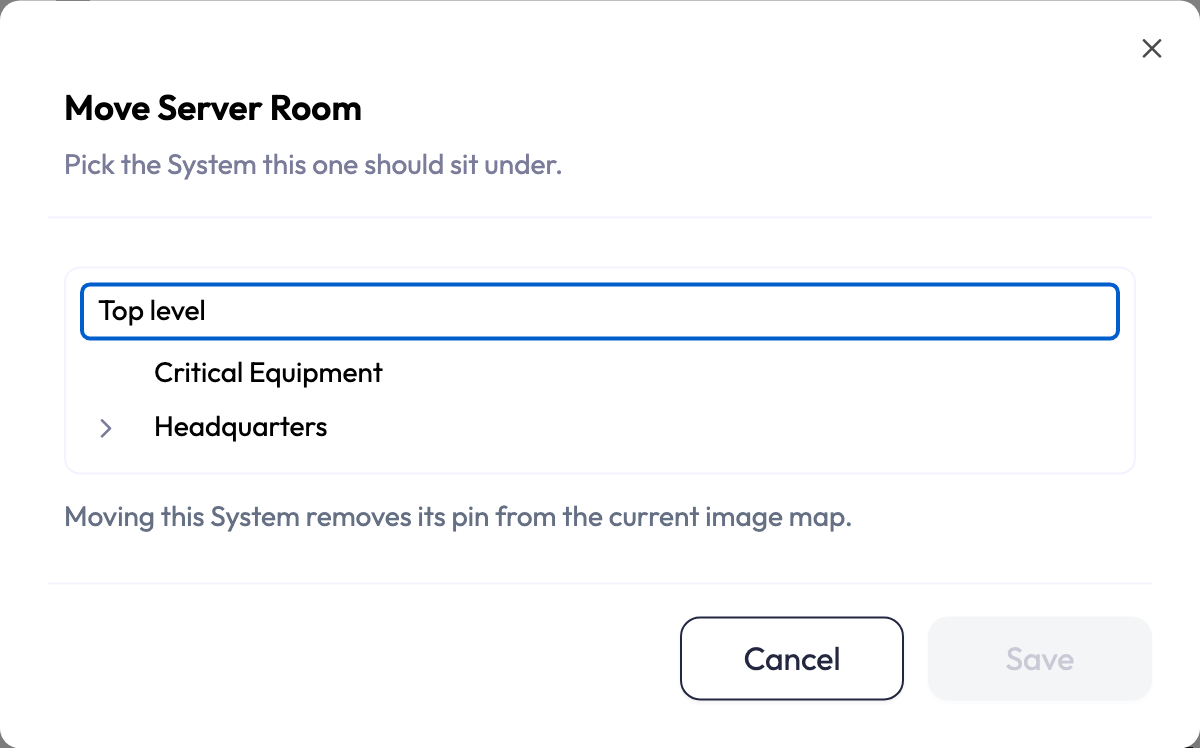
Move changes the parent of a System and its entire subtree. Select a different parent or Top level in the dialog’s tree picker.
- Nesting is capped at 10 levels. NEQTO.ai refuses a move if the moved subtree would end up deeper than that.
- A System cannot be moved under itself or under one of its own descendants.
- Moving a System removes its pin from the old parent’s image map. Place it on the new parent’s map if you want it to appear there.
Delete
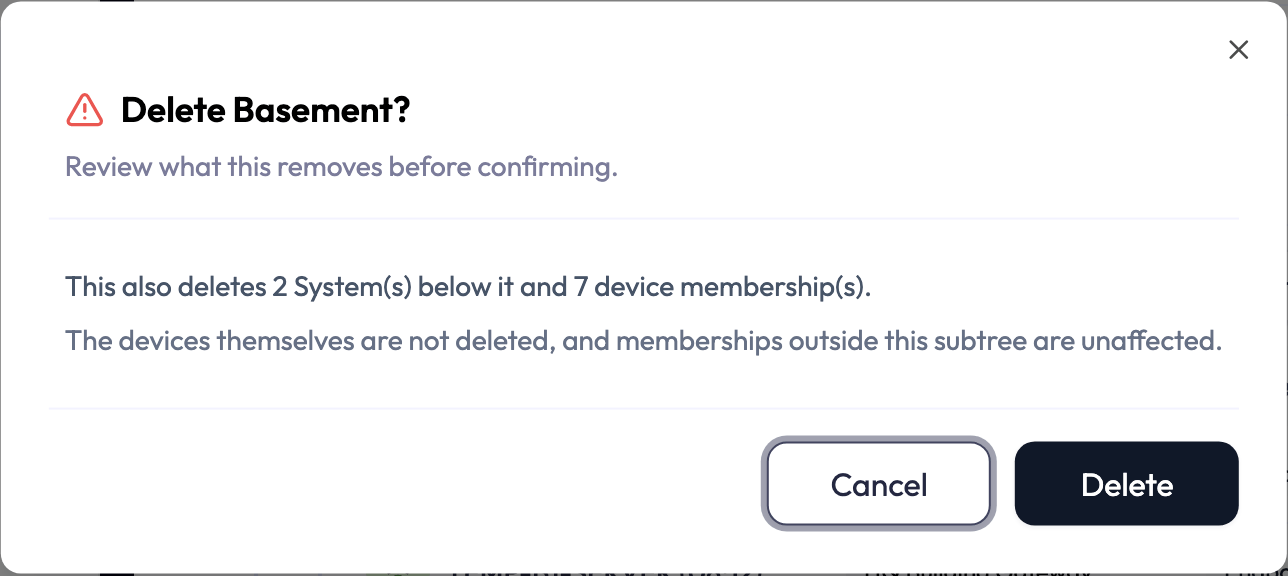
Delete removes the System and every System beneath it. Before anything is deleted, the confirmation shows how many descendant Systems and device memberships it will remove. Deleting a System never deletes its devices. They remain in the application and in any other Systems they belong to.
Devices in a System
System membership is direct. A device belongs only to the Systems where you add it. Parent Systems can show their children’s devices in the tree and through Include child Systems, but that does not add the devices to the parent.
Add devices
-
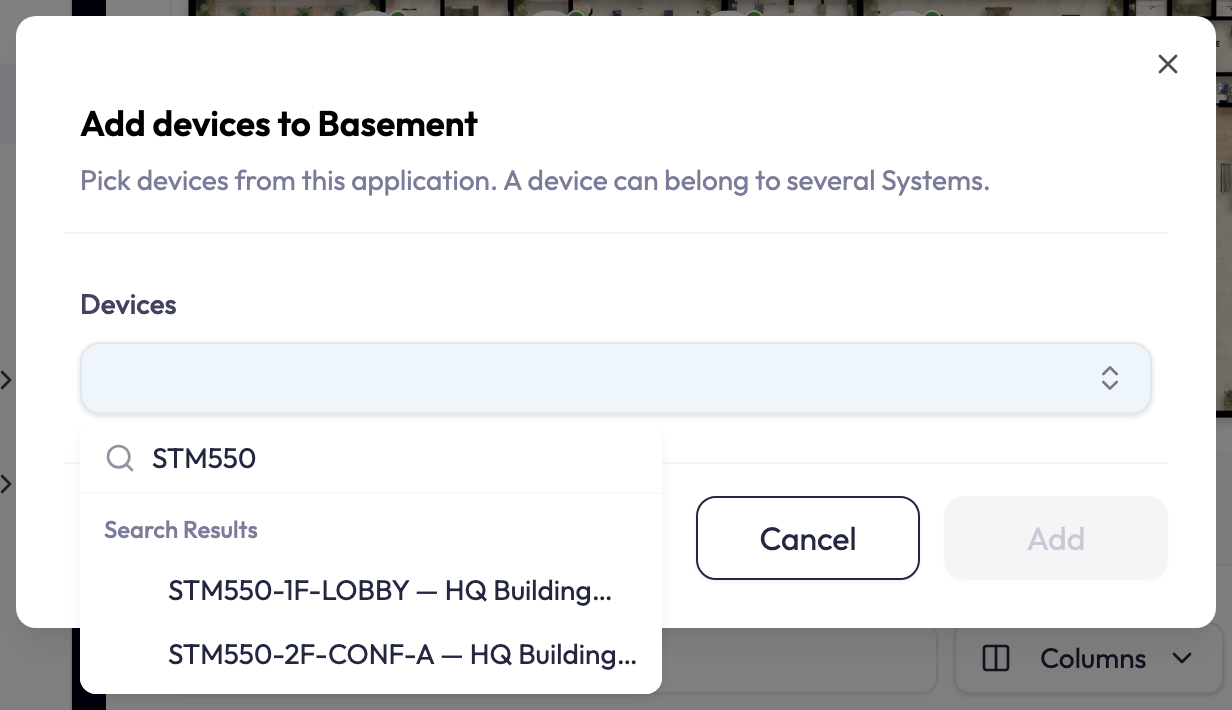
1Open the System’s detail page and click Add devices.
-
2Search for and select devices from the application. You can add only devices in this application. You can add up to 100 devices at once. Repeat this step to add more.
The devices table
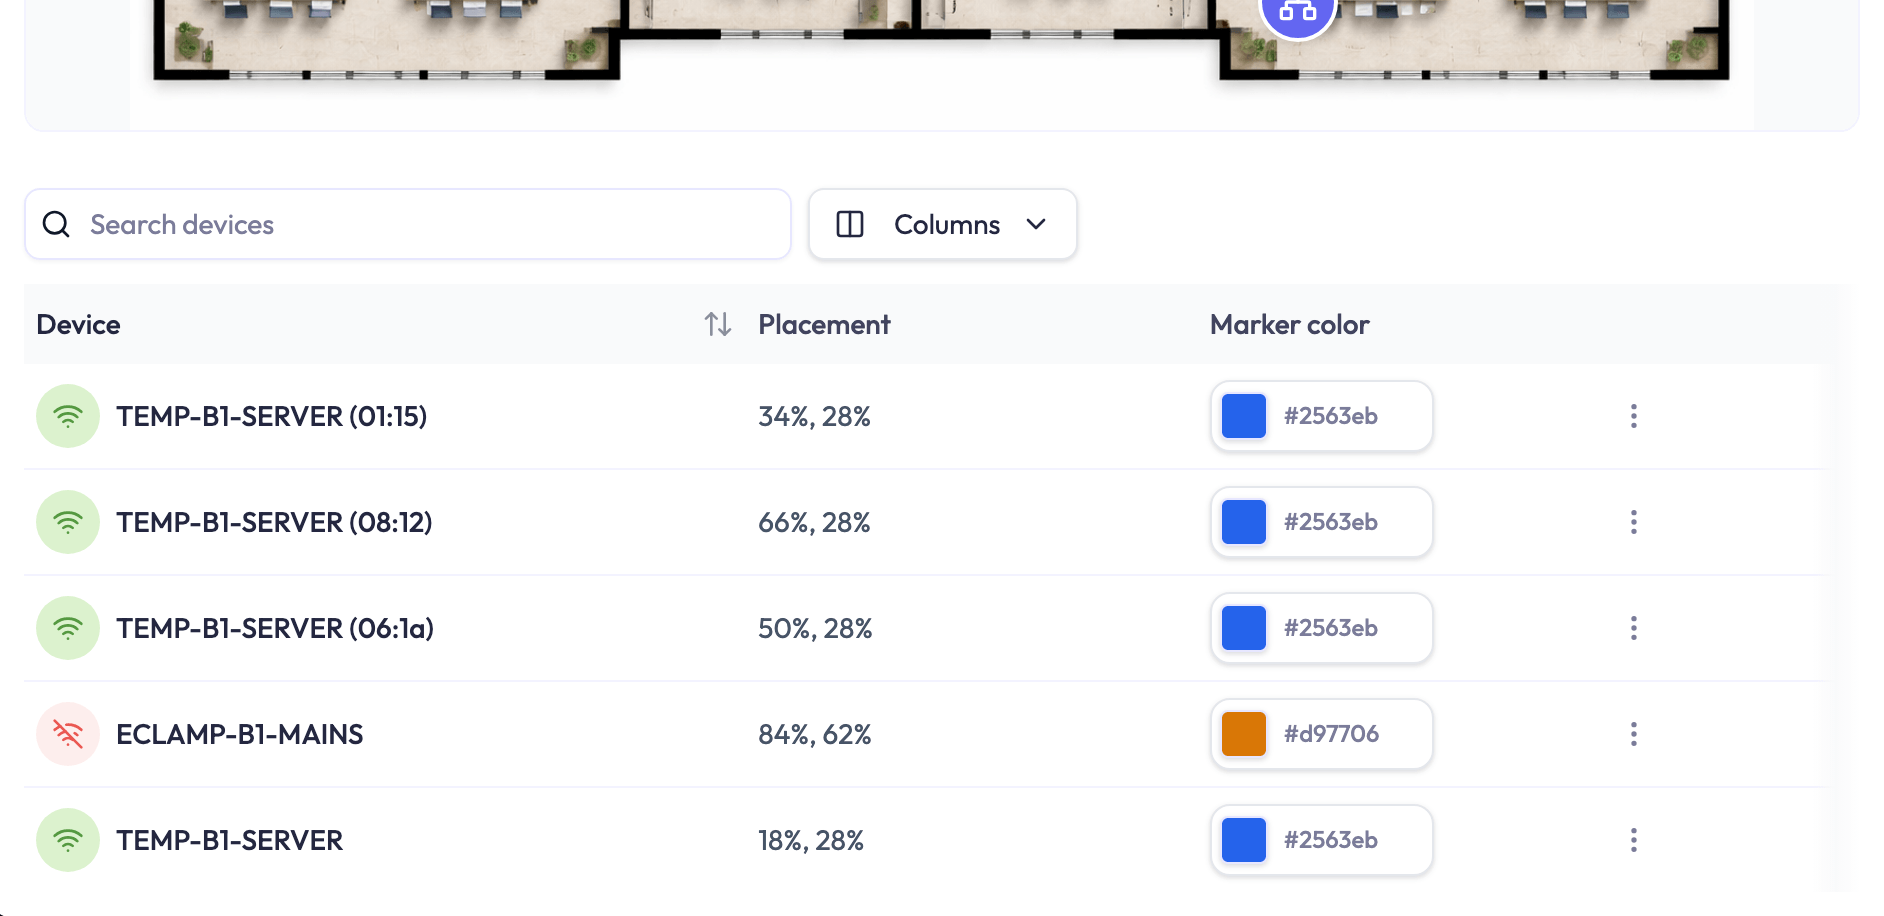
By default, the table shows Device with its connection icon, Device Endpoints, Source, Tags, Dashboards and Marker color. Placement, External ID, Vendor and Model are off by default. Use Columns to show them. These columns have System-specific behavior:
| Column | What’s there |
|---|---|
| Placement | Whether the device has a pin on this System’s image map. The column shows Not placed or the pin position as percentages of the image. |
| Marker color | The pin color for this device in this System. The same device can have a different color in another System. |
| External ID, Vendor, Model | The same device details as on the device list. |
| Actions | The row menu holds Place on image map and Remove from this System. Removing a device leaves it in the application and in its other Systems. |
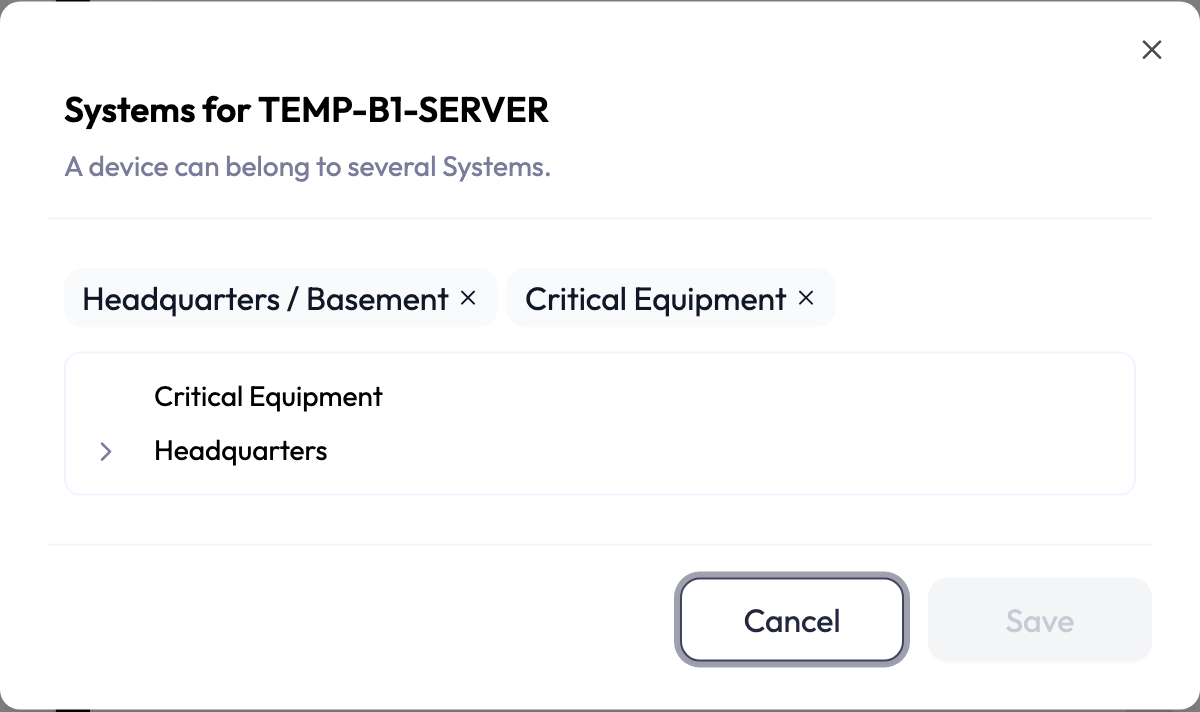
You can also manage membership from a device. The Manage Systems action in the device list’s row menu shows every System the device belongs to and lets you add or remove memberships.
Group devices from an assistant suggestion
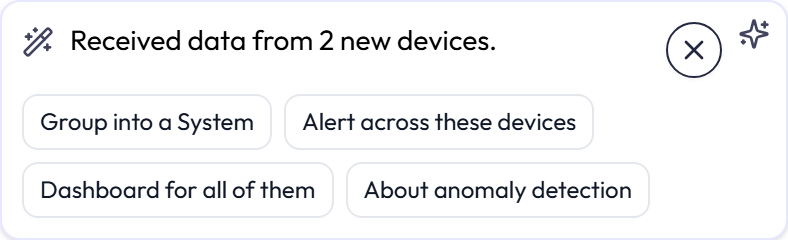
When the assistant notices devices that belong together, for example several devices that started reporting at the same time, it proposes grouping them. The proposal arrives as a suggestion card beside the Ask AI button, with the assistant’s reasoning and two kinds of action: Group into a System for several devices, or Add to a System for one.
-
1Select the action on the card. The Group devices into a System dialog opens with the count of devices in its title. Nothing has been created yet.
-
2Choose one of the application’s top-level Systems, or, if your role can create Systems, choose New System and enter a name.
-
3Click Add to System, or Create and add for a new one. The devices join the System and the card is marked complete. Closing the dialog instead keeps the suggestion for later.
The image map
Every System has an image canvas. Upload a floor plan, site photo, or machine drawing. You can place the System’s direct device members and direct child Systems on it as pins.
The image
- Change image uploads or replaces the picture. Remove image clears it. Pin positions are stored as percentages of the image. The pins remain in place if you replace the picture with one that has the same layout.
- A System with no image shows a neutral default image so you can still place and read pins.
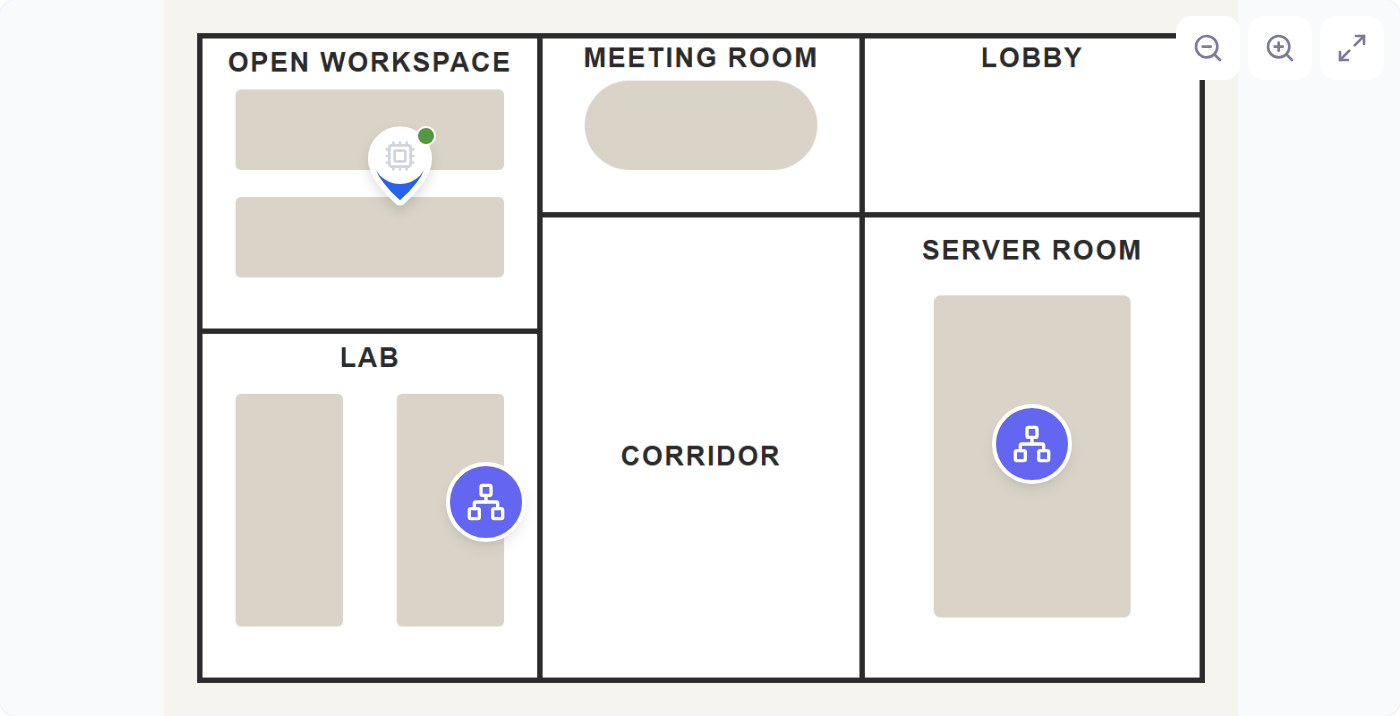
Placing pins
- For a device, select Place on image map from its row menu in the devices table.
- For a child System, select Auto-place from its row. Select Remove from map to remove its pin.
- Drag a pin to move it. Click a pin to select it, then nudge it with the arrow keys. Each press moves it 1%, or 5% while you hold Shift. Press Delete or Backspace to remove the selected pin from the map.
- Zoom from 20% to 200% in 20% steps, and use full screen for large plans.
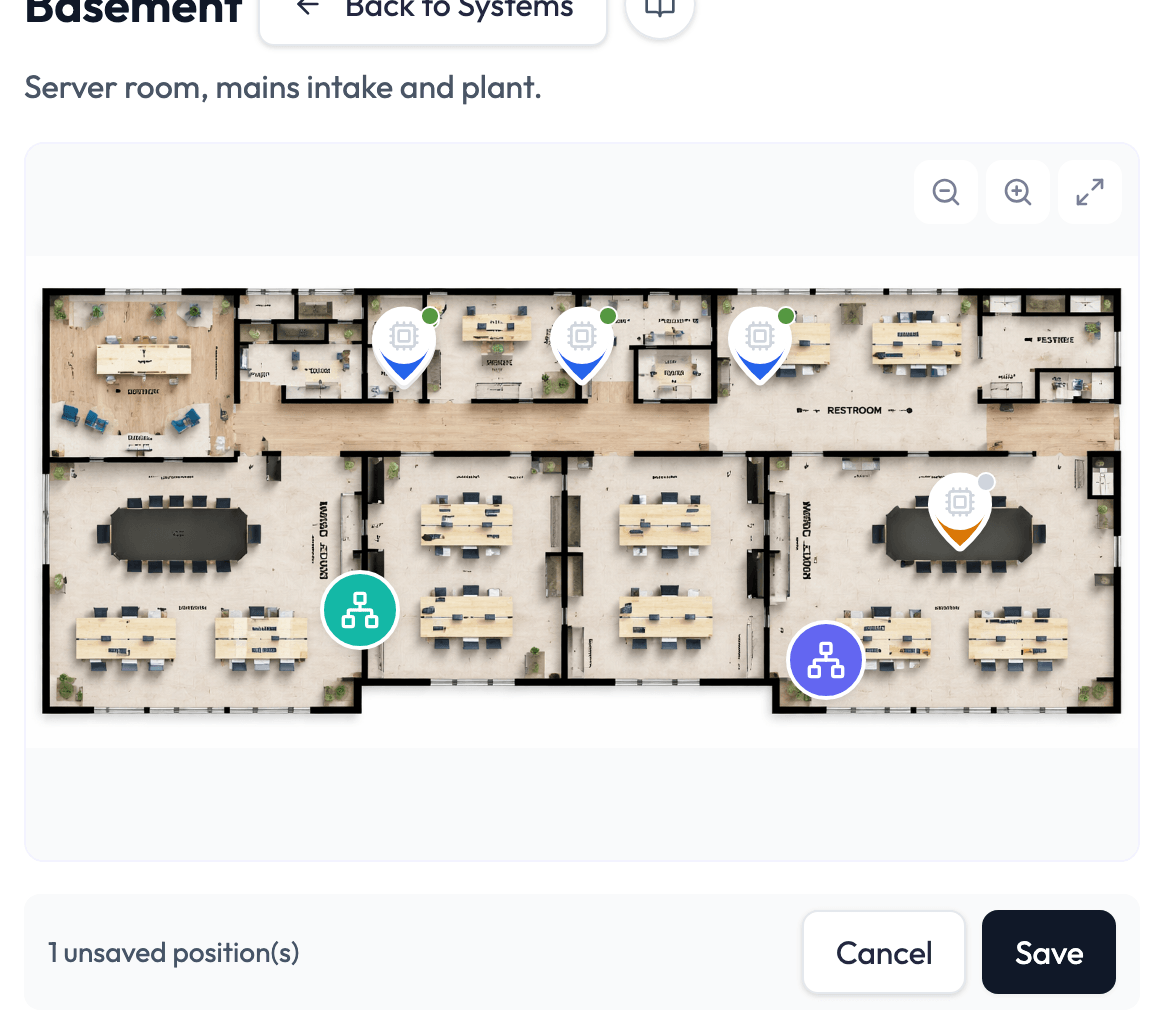
Pin moves are staged. The platform does not store them until you click Save. The bar under the canvas counts the unsaved positions, and Cancel discards them. A single save can include up to 100 position changes. At that limit, the canvas stops accepting moves and asks you to save before continuing.
What a pin shows
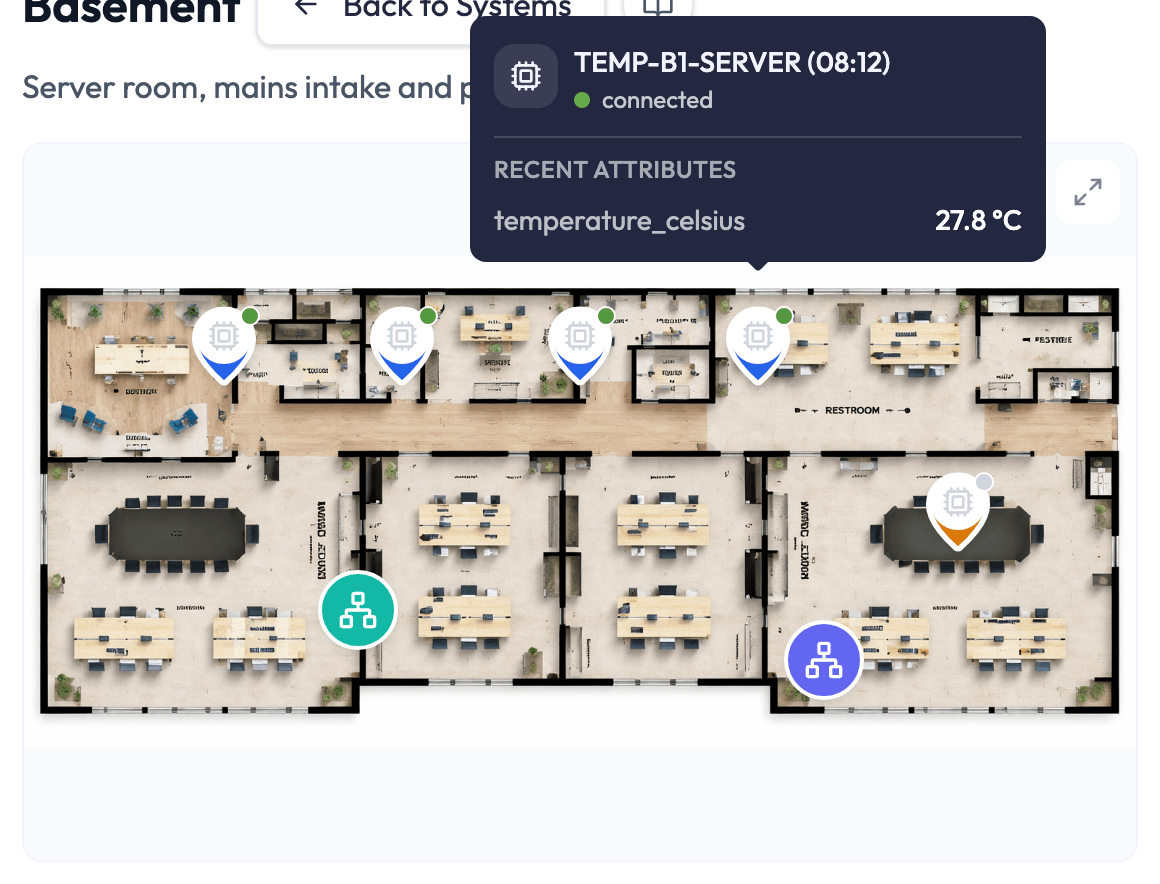
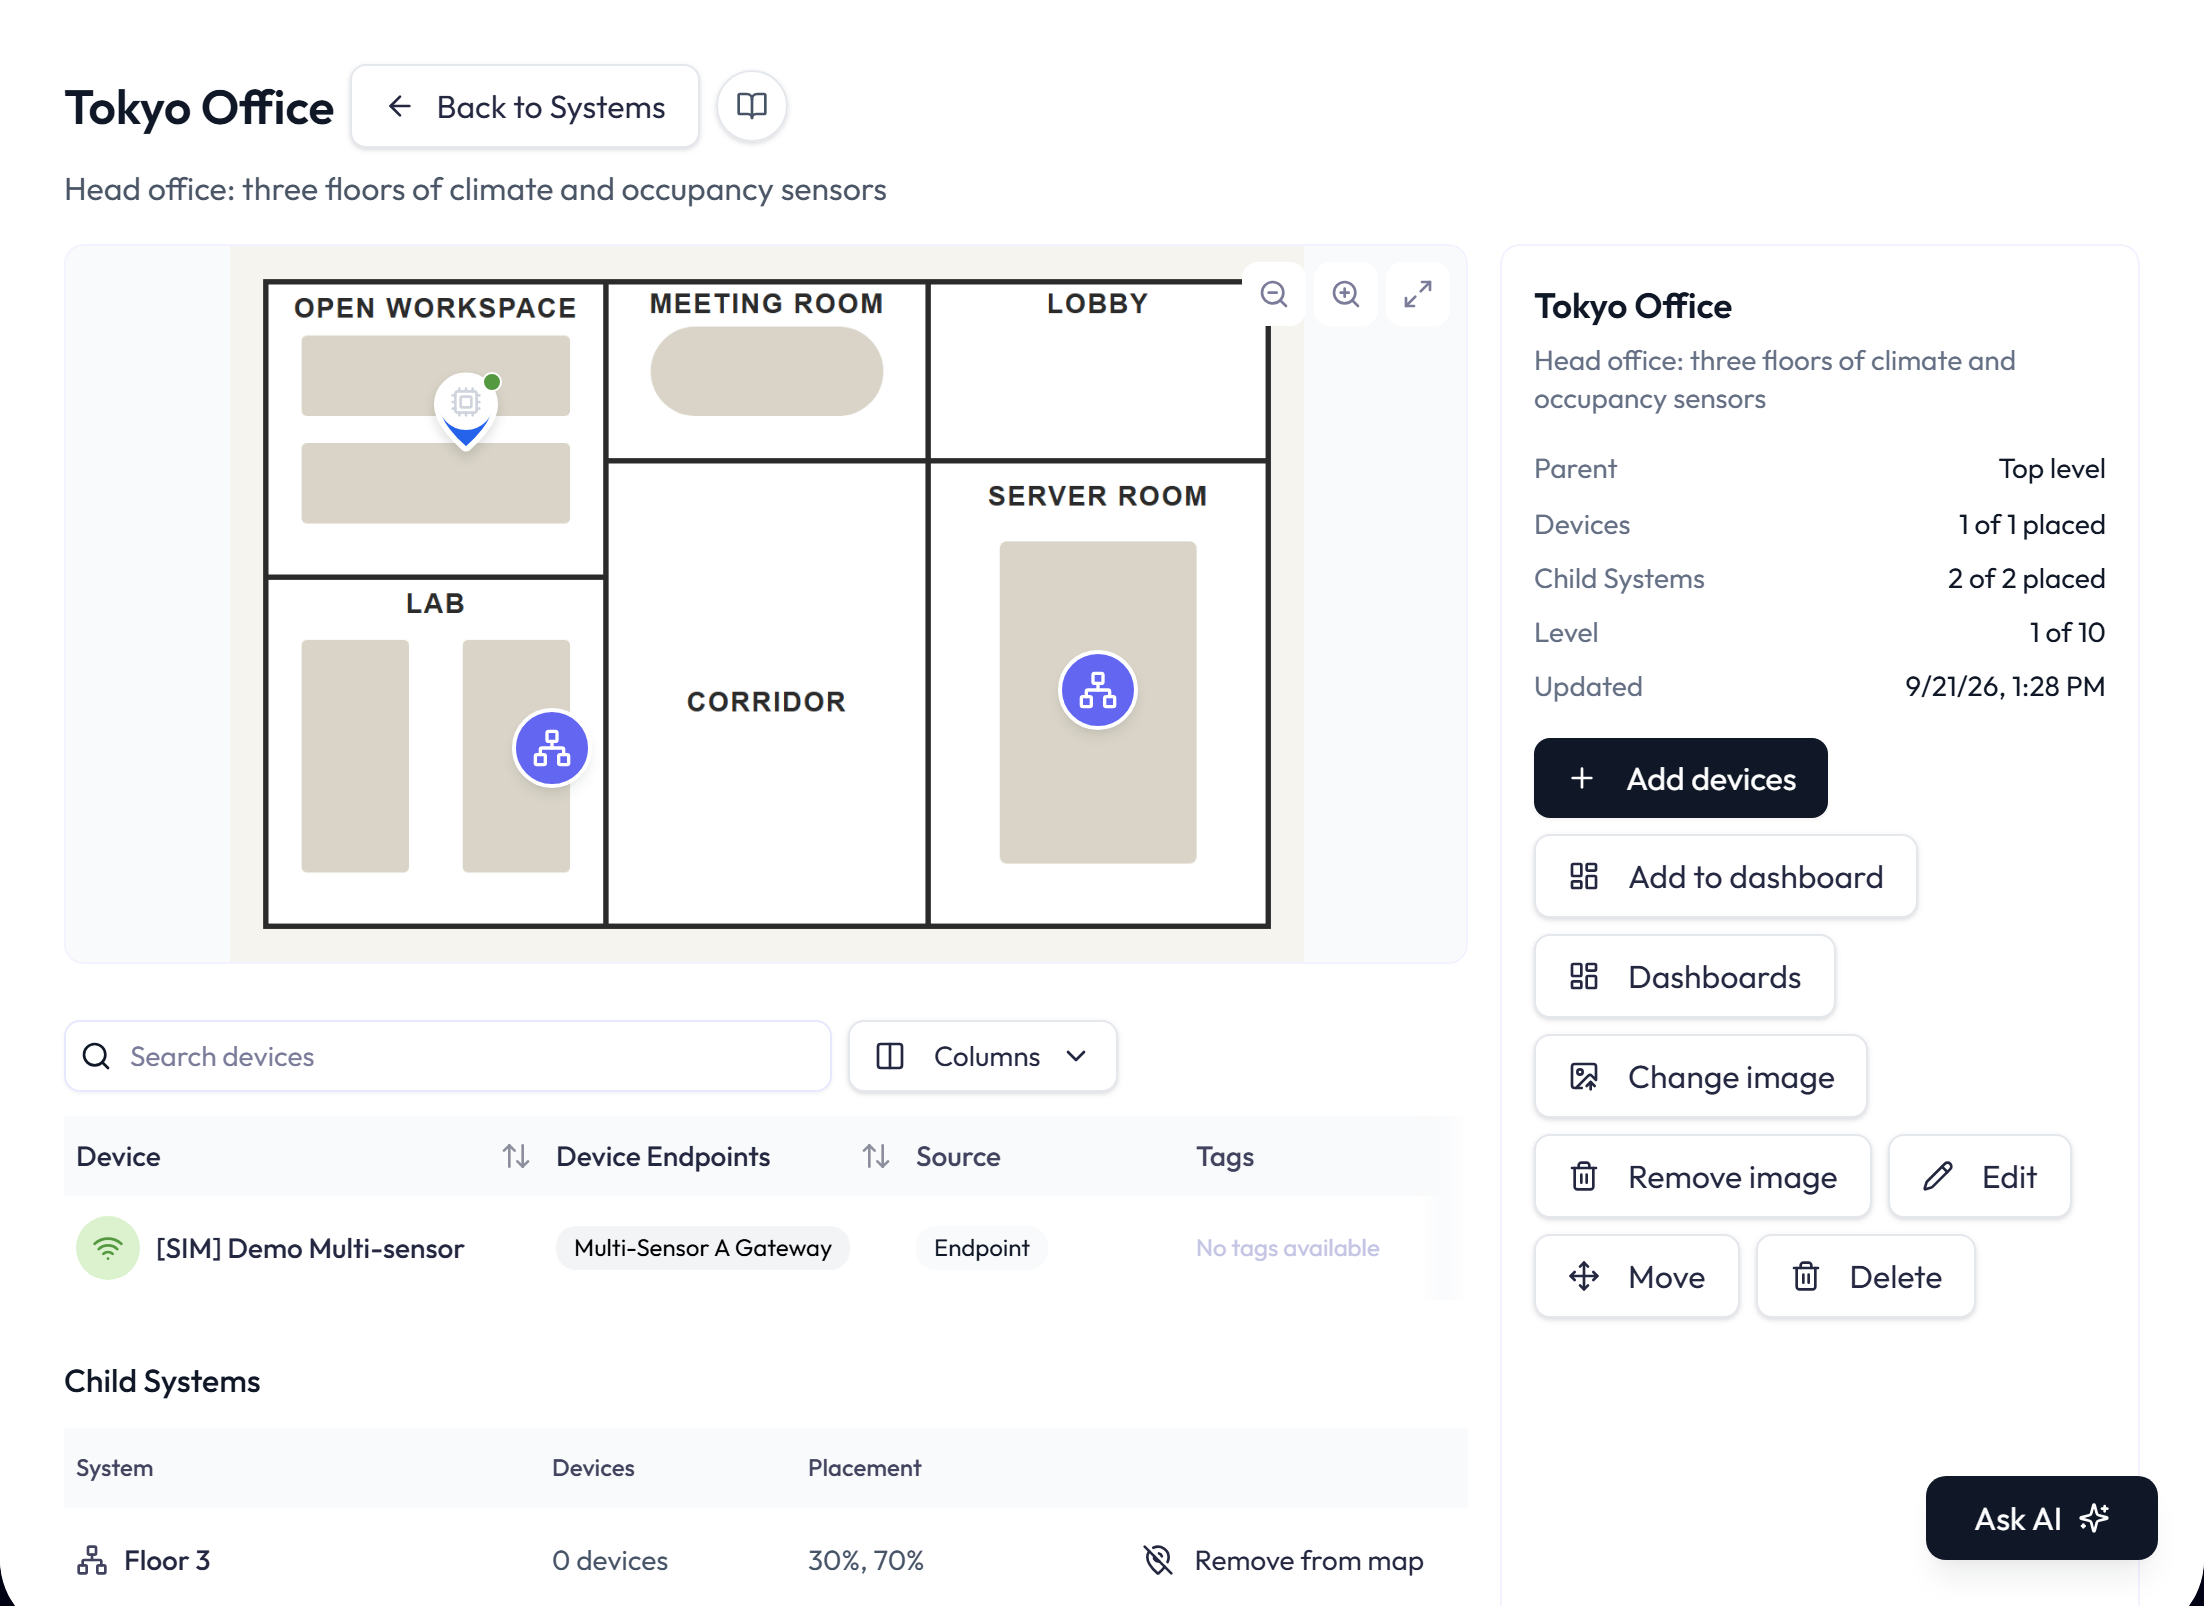
A device pin carries the device’s marker color and a status dot for its connection state. Hover it for a popover with the connection status and up to five recent attribute values from the device’s latest message. A child-System pin is a round marker with the System icon. Click it to open that System’s detail page.
The detail page
Click a System’s name to open its detail page. The image map is on the left, the System’s facts and actions are on the right, and the member devices table is below.
The member devices table and the Child Systems table carry the same open alert counts as the tree page. A child System’s count covers its own subtree.
A breadcrumb above the facts shows the path from the top level to this System. Each ancestor is a link. The facts panel includes these fields:
| Field | Meaning |
|---|---|
| Parent | The System directly above, or Top level. |
| Devices | Placed out of total direct members, for example 5 of 5 placed. |
| Child Systems | Placed out of total direct children. |
| Level | Its depth out of the maximum of 10, such as 2 of 10 for a floor. |
| Updated | When the System’s own record last changed. |
Systems on dashboards
A Multi Status › Map widget can show a System’s image and placed pins instead of pins of its own. You create the widget from the System’s detail page, and you keep editing its image and pins there.
-
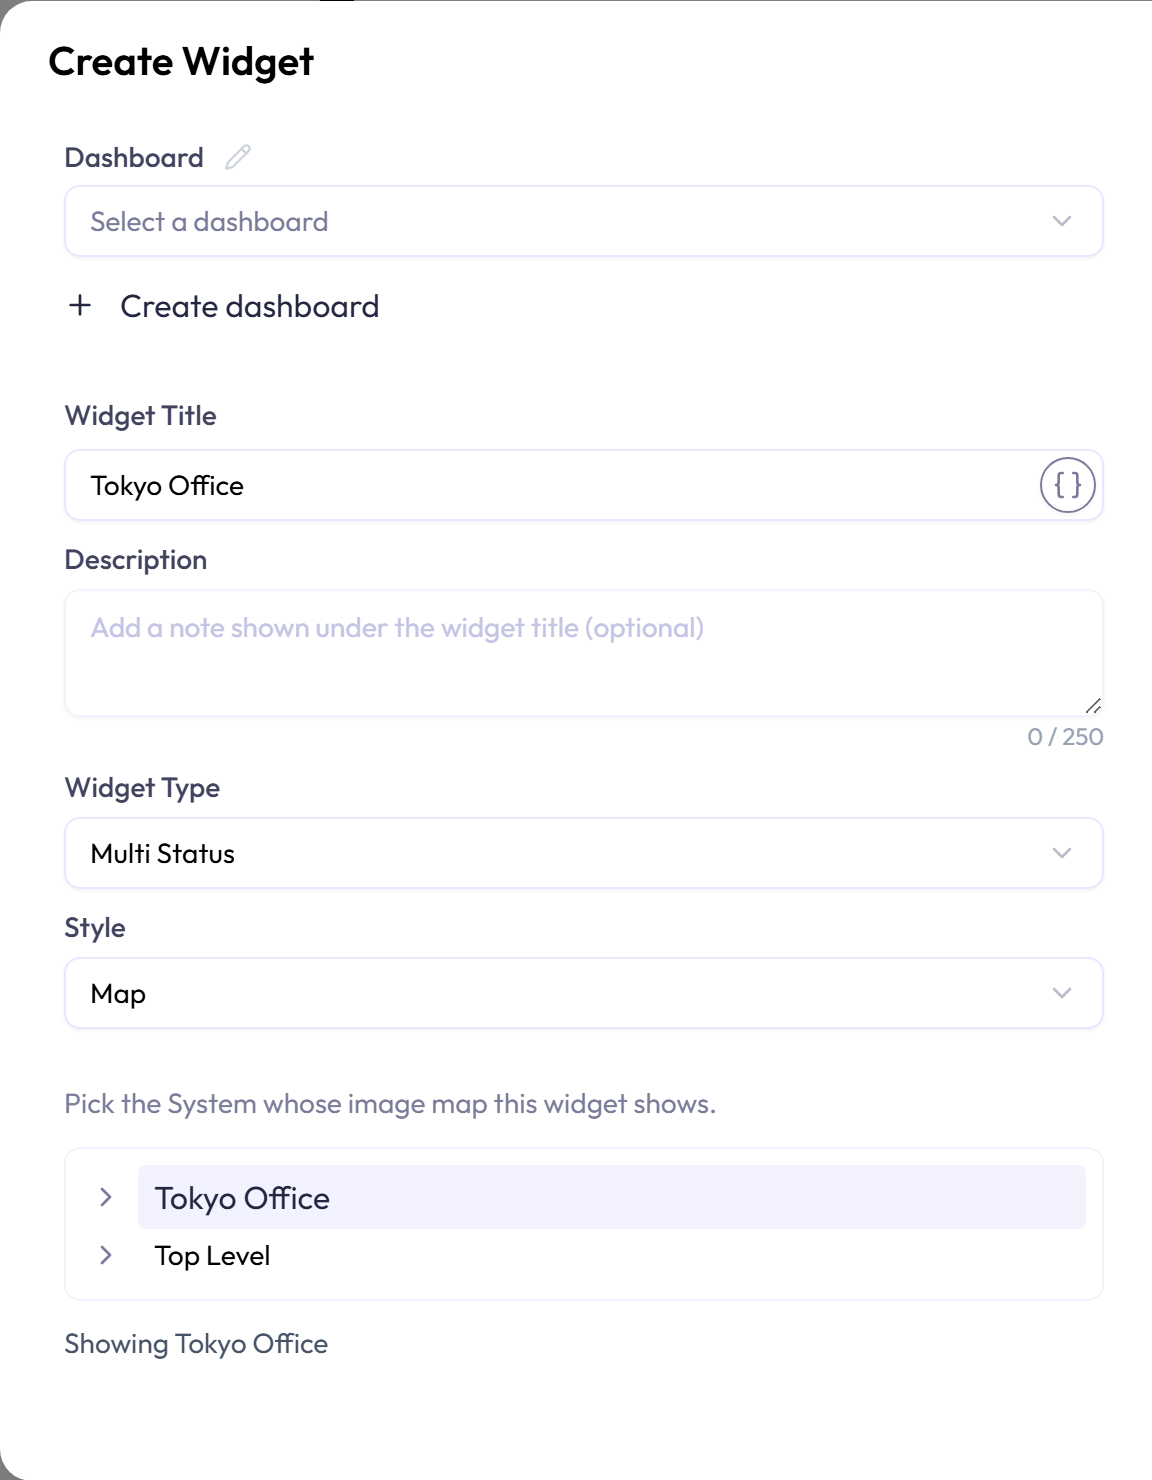
1On the System’s detail page click Add to dashboard. The widget editor opens with the System already picked and the title prefilled with its name.
-
2Choose a Dashboard or create one. Adjust the title and click Save. The widget shows the System’s image, placed direct devices, and placed direct child Systems. These are the same pins shown on the System’s image map, with no additional pin configuration.
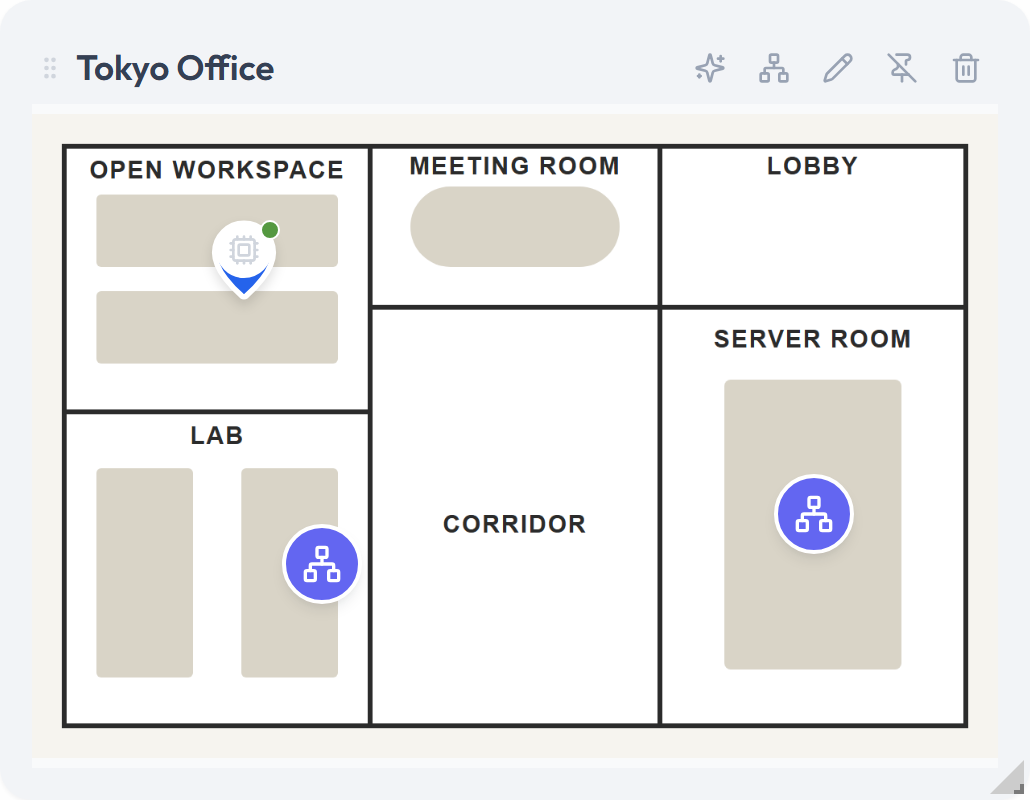
- The widget header has an Open System action. It opens that System’s detail page, which is where the image and the pins are edited. Inside the widget, a child-System pin drills down and Back returns to the parent.
- A System-backed Map widget is created only from Add to dashboard. The widget editor has no control for switching an ordinary Map widget onto a System, or the other way round.
- System maps are only available on application dashboards.
- If the System is later deleted, the widget stays on the dashboard and reads This System no longer exists. Edit or remove this widget.
Related dashboards
Related dashboards lists the dashboards whose widgets use the selected devices. You can open the dialog from a device or a System.
| Opened from | What it lists |
|---|---|
| A device (row menu › Dashboards) | Every dashboard with a widget that shows this device. The row reports Used in 2 widget(s). From the account-level device screen, the list spans your applications. |
| A System (row or detail page › Dashboards) | Every dashboard that shows any of this System’s devices. Each row reports how many of the System’s devices appear in how many widgets, such as 5 of 7 devices – 3 widget(s). Turn on Include child Systems to count devices of descendant Systems too. |
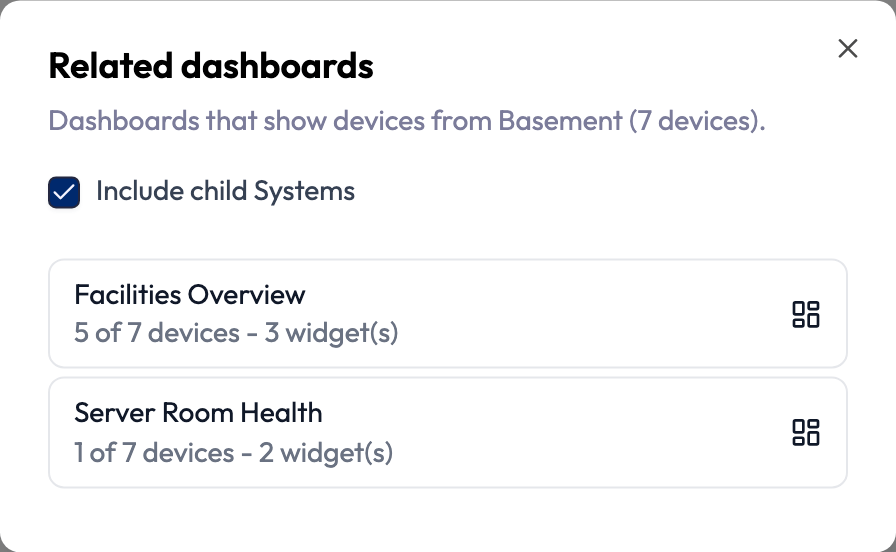
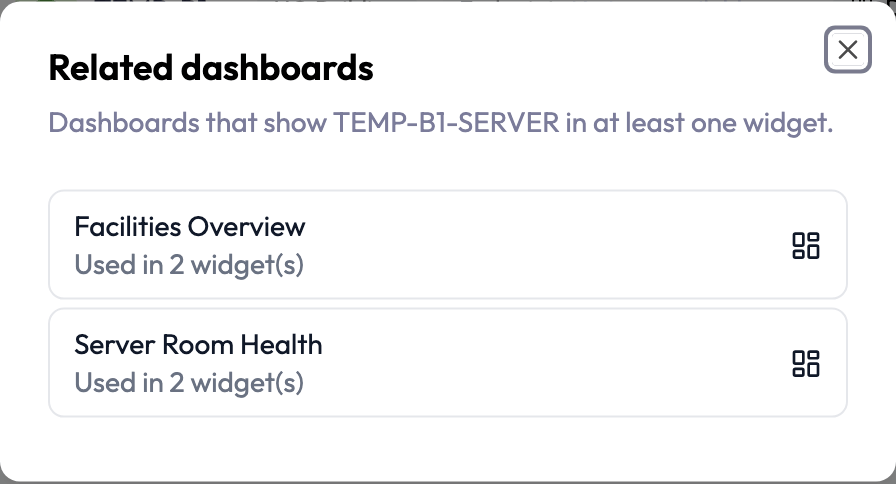
- Click a row to open the dashboard. When more than eight dashboards match, a Filter dashboards box appears above the list.
- Only widgets that read device data count. Device List, Alert List and Data Push widgets do not make a dashboard “related”.
- Related dashboards needs Widgets: read and Dashboards: read in addition to the Systems or Devices permission you used to get there.
Limits and error messages
This table explains the messages you may encounter.
| Message | Why, and what to do |
|---|---|
| A System with this name already exists under the same parent | Sibling names must be unique. Rename, or nest the new System under a different parent. |
| Systems cannot be nested more than 10 levels deep | Creating or moving would push a System deeper than level 10. Flatten the structure or move the subtree higher up. |
| A System cannot be moved under itself or one of its descendants | A move would create a cycle. Pick a parent outside the moved subtree. |
| One or more devices are not available in this application | Only devices assigned to the same application can join its Systems. Assign the device to the application first. |
| At most 100 devices can be added at once | Add devices in batches of 100; membership itself is not capped. |
| The maximum number of positions is staged. Save them before moving more. | 100 pin moves are waiting to be saved. Save (or cancel) them, then keep placing. |
| This image map already holds the maximum number of pins | Each map caps placed pins at 500 devices and 500 child Systems. Remove pins you do not need on the canvas, or split the group into child Systems with their own maps. |